Rustic Fall Wedding Centerpieces That Brought The Table Together
I’m a mom of three wild and wonderful boys, so when it comes to decorating, I look for ideas that feel lived-in, warm, and easy enough for busy hands to help. Rustic fall wedding centerpieces grabbed my heart because they remind me of every cozy autumn spent baking apple pies and piling leaves in the yard with my kids. I wanted to bring that same family warmth and down-to-earth charm to wedding tables, where everyone feels welcome and at home—even if sticky little fingers are nearby!
Here, I’ll share simple centerpiece ideas that actually work for moms. Expect pieces that are realistic, inviting, and easy enough to pull together when you’re juggling snacks, homework, or last-minute RSVPs. Get ready for inspiration you can make your own, with lots of personality and zero stress.
Why Rustic Fall Wedding Centerpieces Steal the Show
You know how some tables just pull you in and make you want to stay a little longer? That’s exactly what rustic fall wedding centerpieces do. The first time I saw rustic fall wedding centerpieces at a family friend’s wedding, I knew I’d want the same feeling at my own table—warm, a little messy in the best way, and totally welcoming for kids and grown-ups. Moms like us, with sticky fingers and full days, need centerpieces that feel real and leave room for fun. Let’s look at what makes these autumn centerpieces the star of every wedding table!
They Feel Like Home
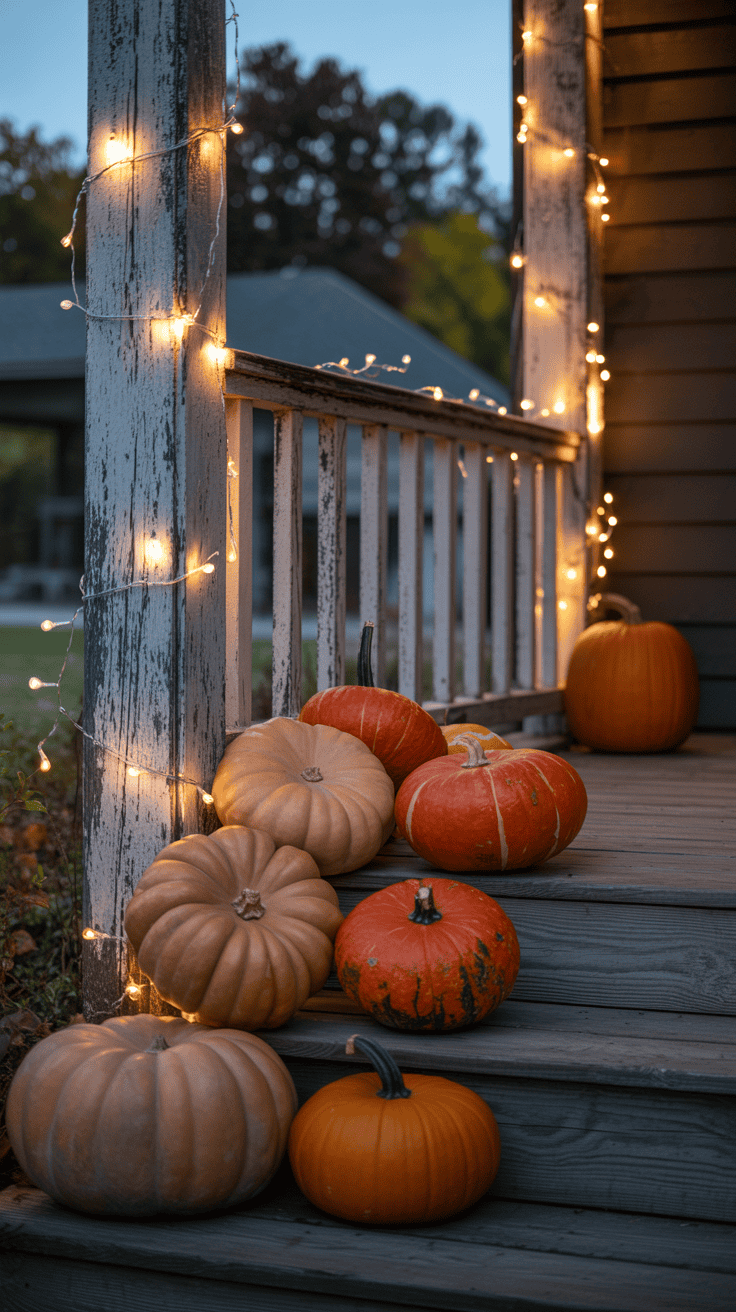
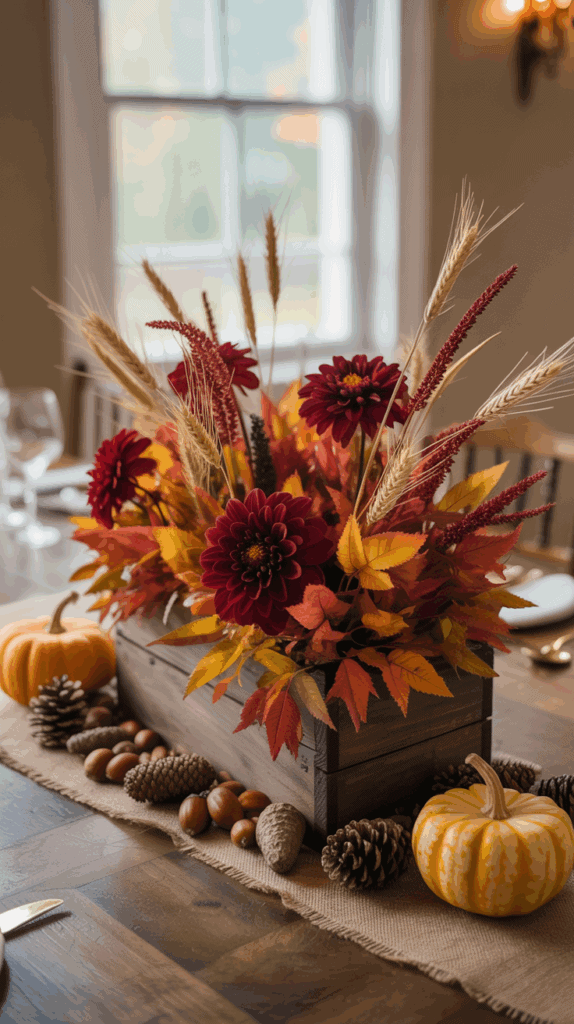
The second I set out a simple wooden crate filled with pumpkins and leaves, the whole room just feels different. Rustic fall wedding centerpieces instantly remind everyone of home. Maybe it’s the cozy colors, the mix of worn wood and bright orange, or just the way the arrangement feels collected rather than forced.
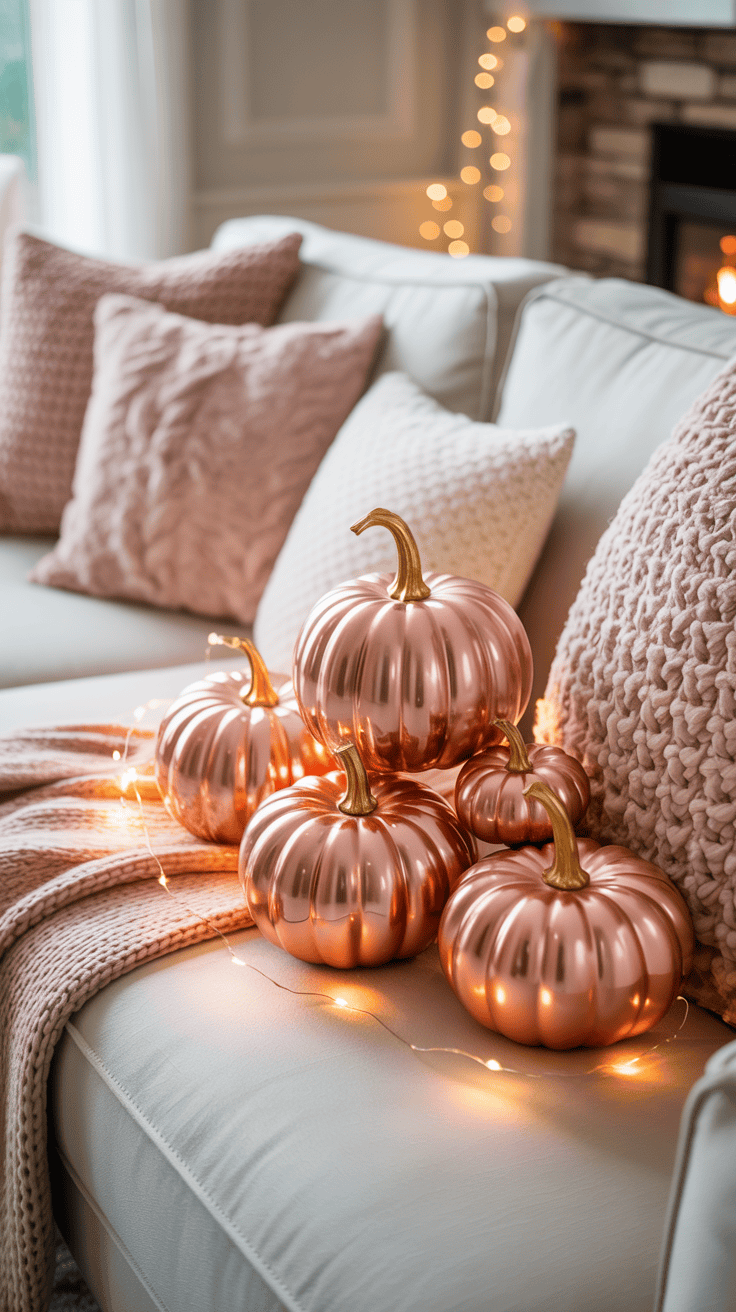
– Neutral shades like creams and browns help everyone relax. – Natural textures (burlap, twine, rough wood) make things low-key. – Real or faux pumpkins, apples, and pears give the vibe of a family harvest table.
There’s nothing stiff or formal about these looks. People feel at ease, which is exactly what you want with kids around!
Perfect for Little Helpers
If you’ve ever tried to set a fancy centerpiece with little ones nearby, you know the struggle. But rustic fall wedding centerpieces invite kids in! I let my boys place pinecones, acorns, or even a handful of leaves right into the mix. Suddenly, they’re part of the magic, and there’s no fear of messes or accidents.
- Choose sturdy, break-proof items.
- Let kids scatter mini pumpkins or cinnamon sticks.
- Use mason jars and baskets instead of glass vases.
These details turn wedding prep into a family memory, not a stressful chore.
They Work in Any Space
One of the best surprises? Rustic fall wedding centerpieces look good everywhere. I’ve set up mason jars on picnic tables and filled vintage trays for long farmhouse tables. They don’t need perfect symmetry or matching colors. Instead, the charm comes from mismatched details and a lived-in look.
Try these settings:
- Outdoor barn or backyard tables
- Picnic benches with plaid runners
- Simple tables draped with neutral linens
The style adapts, whether you have five tables or fifty, which is a lifesaver for busy families!
Cozy, Inviting Colors
What really makes these centerpieces stand out are the colors—deep reds, golden yellows, and rusty oranges. They bring out the warmth in any room. Sometimes all it takes is a handful of colored leaves or a bright, chunky candle to tie everything together.
- Mix dark green eucalyptus with gold candles.
- Add pops of burgundy or burnt orange napkins.
- Pair white pumpkins with soft tan blankets for instant coziness.
Guests always notice how inviting the tables look with these touches, which helps everyone settle in and enjoy the celebration (kids, too).
Budget-Friendly With Big Impact
Last but not least, rustic fall wedding centerpieces save the day when it comes to costs. Most of my favorite looks use items you already have—think basketfuls of apples, leftover jars, even bits from your own backyard! That means you can go big on style without blowing your budget.
Here’s a quick list of easy, low-cost ideas:
- Fill jars with dried wheat or wildflowers.
- Use wooden trays, crates, or cutting boards as a base.
- Gather leaves, acorns, and pinecones from family walks.
With a little imagination—and maybe some kid-powered foraging—your centerpiece becomes the talk of the table, and you still have money left for dessert!
Core Elements of Rustic Fall Wedding Centerpieces

When I think about what truly brings rustic fall wedding centerpieces to life, it’s always a mix of natural beauty, cozy texture, and that magical glow you only get as the leaves start falling. These centerpieces combine comfort and elegance, so every table feels like a warm hug—even if you’re sneaking a bite between chasing kids! If you want centerpieces that feel welcoming, look beautiful, and work for busy families, these are the heart and soul behind every great rustic fall table.
Nature’s Bounty: Incorporating Seasonal Fruits and Foliage
There’s something special about seeing what the season offers and using it right in your centerpiece. For rustic fall wedding centerpieces, I love slipping in little surprises from nature that make the table come alive. Here’s how I do it with the help of my boys:
- Apples and Pears: Tuck in red apples or little green pears for a pop of color and a nod to fall’s harvest. These look so cute in wooden bowls or lined up along a runner. Kids love placing them, and sometimes even sneak a bite—so I always wash them first!
- Acorns and Pinecones: We make it a family project to gather acorns or chunky pinecones. I scatter them between candles or pile them into mason jars for texture. It’s simple, earthy, and totally foolproof.
- Cinnamon Sticks: Tie a bundle with twine and set it out for a soft, sweet smell. You can even add them to little glass jars or nestle them next to foliage for a cozy touch.
- Colorful Leaves: Let the kids collect fresh leaves in shades of gold, orange, and red. Spread them along the middle of the table, or tuck them into clear vases for a hint of color. If real leaves make you nervous, grab some faux options—they look just as nice and don’t crumble if handled.
- Mini Pumpkins and Gourds: These are always a big hit. Their unique shapes and colors give a wild, playful vibe that kids find magical.
The best part? All these natural elements are budget-friendly, easy to switch out, and even after the party, you can compost them or reuse them in other fall décor.
Mixing Textures with Wood, Metal, and Glass
If you want that lived-in, gathered look, mixing materials is the secret. Rustic fall wedding centerpieces shine when you use different textures side by side. Imagine how fun it is to combine old barn wood with shiny glass or galvanized metal for that perfect homey-meets-chic table.
- Wooden Pieces: I keep a collection of wooden trays, crates, and cutting boards handy. They give a soft, worn feel—like something found in an old farmhouse. Place one in the table’s center, and you have an instant anchor for all the pretty things on top.
- Metal Accents: Add simple tin buckets, bronze candleholders, or even worn metal trays for a little shine. These pieces balance out the wood and bring a touch of country style.
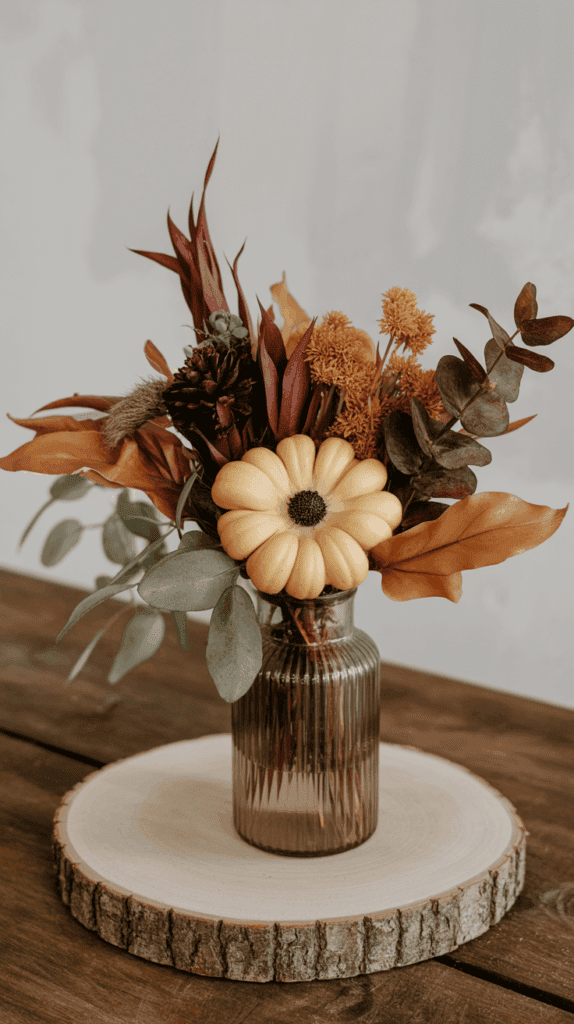
- Glass Jars and Bottles: Mason jars, vintage glass bottles, or tiny vases are perfect for bouquets or even single sprigs of wheat. Clear glass lightens up the arrangement and gives space to show off what’s inside—be it acorns, fairy lights, or cinnamon sticks.
- Twine and Burlap: Wrap jars or vases with twine or set everything on a burlap runner. The rough edges make the scene feel relaxed and friendly, not stuffy.
Here’s how I pull it together:
- Start with a wooden base, like a box or tray.
- Add a layer of burlap or a lace cloth (even an old scarf works!).
- Arrange your vases or jars in the center.
- Slide in metal accents or a lantern for height and shimmer.
- Scatter your seasonal fruits and foliage to fill in empty spots.
Combining rough and smooth textures makes the centerpiece interesting to look at and touch. Kids love helping with this part, and there’s no way to mess it up—everything looks right at home.
Candlelight and Lanterns for Cozy Atmosphere
Nothing makes a table feel warm quite like soft candlelight. As a mom, I know real flames can be nerve-wracking especially with little ones running around, but you don’t have to miss out on that cozy glow. Candlelight is the heart of rustic fall wedding centerpieces and sets the mood for laughter and long, happy conversations.
- Safe Candle Tricks:
- Use battery-operated LED candles. I’ve found ones with flickering “flames” that look real but are totally safe for kids to touch.
- Place real pillar candles inside tall glass cylinders or lanterns. This keeps little fingers out and still lets the candle shine.
- Cluster a few tea lights inside sturdy mason jars and keep them toward the center of the table, out of reach.
- Getting the Longest Glow:
- If you use real candles, trim wicks to about a quarter-inch before lighting. They burn slower and make less mess.
- Pop a little salt in melted wax around the base. It can help candles last longer and keeps the wax neat.
- For LED candles, pick up a pack of rechargeable batteries so you never run out of light halfway through dinner!
Lanterns are my favorite for rustic fall tables—they’re charming and remind me of camping trips and backyard stories. Metal or wooden lanterns bring instant autumn magic, indoors or out.
- Set one big lantern as a centerpiece, then surround it with little pumpkins and scattered leaves.
- Use several small lanterns lined up in a row if you have a longer table.
- Tuck fairy lights inside for extra twinkle (kids love this part!).
With the right setup, you get all that dreamy warm light with zero stress. Everyone feels wrapped in comfort, and the table feels made for slow meals and sweet conversations. It’s the finishing touch that brings everything together—just like a family around the table!
DIY Rustic Fall Wedding Centerpiece Ideas (With Kid-Friendly Options!)
Now for the really fun part—turning rustic fall wedding centerpieces into family memories you can see right on the table! If you have little helpers at home like I do, skip complicated floral arrangements and reach for materials that are kid-proof and still gorgeous. Here are my favorite easy, family-friendly centerpiece ideas that add charm, color, and personality. No stress, no fancy skills needed, just simple steps and a whole lot of heart.
Pumpkin and Mason Jar Vignettes
Pumpkins and mason jars have become my parenting superpower during wedding season. They’re tough enough to survive little hands, and they look so stinkin’ cute together! You can pull off a centerpiece that looks like you spent hours but really took fifteen minutes with a pack of kids at your side.
Here’s how I do it:
- Pick Your Pumpkins
- Go for mini pumpkins in white, orange, and even the pretty green ones if you find them. I let the boys each pick their favorite shapes at the store.
- Wash them well so sticky fingers don’t spread dirt to the table.
- Gather Mason Jars
- Any size works, but pint or quart jars fit best on a dinner table. If they’re a little cloudy, I just run them through the dishwasher.
- Layer in the Goodies
- Fill mason jars with whatever makes your heart happy—think faux berries, cinnamon sticks, dried corn kernels, or just a simple votive candle.
- For color, I love a mix of real leaves and wooden spoons sticking out the top. The kids always sneak in an extra acorn or two!
- Arrange Your Display
- Place jars in the middle of the table, then tuck pumpkins around them. Make groups of three or scatter pieces for a casual look.
- Let younger kids be in charge of setting the pumpkins—they love the trust, and it never needs to look perfect.
- Add Finishing Touches
- Tie a ribbon or twine around the neck of each jar. If you feel extra fancy, loop a hand-written thank you tag for each guest!
Tips for Moms: Pumpkins last weeks if stored cool, and mason jars are hard to break. If a pumpkin rolls off, you have a funny story, not a mess! This centerpiece style can even serve as kid entertainment—give them each a jar to design during setup.
Dried Flower and Wheat Bundles

Dried flowers and wheat bundles are like little bouquets that never wilt, even if they get dropped a hundred times! These are perfect for rustic fall wedding centerpieces since they’re safe for kids and last way beyond the big day.
Let’s break it down:
- Supplies You Need
- Bunches of dried wheat (usually at craft stores or you can order online).
- Bundles of dried wildflowers in fall colors—think sunflowers, baby’s breath, or lavender.
- Brown floral tape, ribbon, or twine for wrapping.
- Set up a Mini Assembly Line
- Set up a simple “workstation” at the kitchen table. I let my boys each grab a handful of wheat and a few stems of dried flowers. The more uneven, the better.
- Stack wheat in the center, then add flower sprigs all around for a full, round shape.
- Wrap and Tie
- Secure tightly with brown floral tape (or even a rubber band if you’re short on time).
- Cover the tape with a ribbon, strip of burlap, or twine for a rustic finish.
- Let the kids tie simple bows or use extra leaves to decorate their bundles.
- Display the Bundles
- Stand each bundle upright in a mason jar, mini bucket, or tie one at each place setting.
- Scatter stray petals or wheat pieces along the table runner for a soft look.
Bonus: These bundles double as take-home favors. If there’s a mess, it’s just tiny bits of dried grass—not a disaster. Plus, kids get that proud “I made this!” grin every time they walk past the table.
Mini Harvest Crates and Place Cards
Mini harvest crates might just be the most fun centerpiece project for little ones. They’re sturdy, cheerful, and do double-duty as both décor and table place cards. Kids get to play “wedding helper,” and guests get a sweet, personal touch right where they sit.
Here’s how it goes:
- Gather Crates
- Look for small wooden crates at the craft store, or even repurpose berry baskets. I grab a few in different stains and sizes.
- Fill with Fall Favorites
- Line the bottom with shredded brown paper, straw, or even raffia.
- Let your kids pick what goes inside—mini gourds, a small apple, acorns, or wrapped candies.
- Add in a couple of fake fall leaves, cinnamon sticks, or sprigs of dried lavender.
- Make Personal Place Cards
- Use cardstock or pre-cut tags. Have the kids write each guest’s name (even if it’s wobbly and in crayon—it’s precious!).
- Attach cards to the front of the crate with a clothespin, tape, or string.
- Arrange on the Table
- Place each crate at a dinner spot, mixing up the colors and fillings for a playful look.
- Guests find their seat and a sweet little crate just for them. The kids love “assigning” seats and showing off their handiwork.
Why I Love It: These crate centerpieces pull their weight as both natural décor and a personal welcome. Plus, cleanup is a breeze—everyone takes their crate after dinner! Kids will stay busy with the assembly, and you’ll end up with tables that look homemade and heart-filled, never stiff or store-bought.
Whether you go with tiny pumpkins and jars, dried flowers and wheat, or harvest crates with kid-made name cards, these rustic fall wedding centerpieces promise laughter, fun, and plenty of family flair. That’s the kind of wedding table where everyone feels like they belong!
Personalizing Your Rustic Fall Centerpieces for Lasting Memories
When I think about rustic fall wedding centerpieces, what really sticks with me is the way personal touches make them unforgettable. You want your tables to tell a story, to feel like they’ve been part of your family for years. Adding meaningful items and letting kids add their magic make the whole vibe warm and inviting, not just pretty but personal. Here are two ways I love to make rustic fall wedding centerpieces part of family memories that guests will talk about long after the day is over.
Adding Family Heirlooms or Memory Pieces
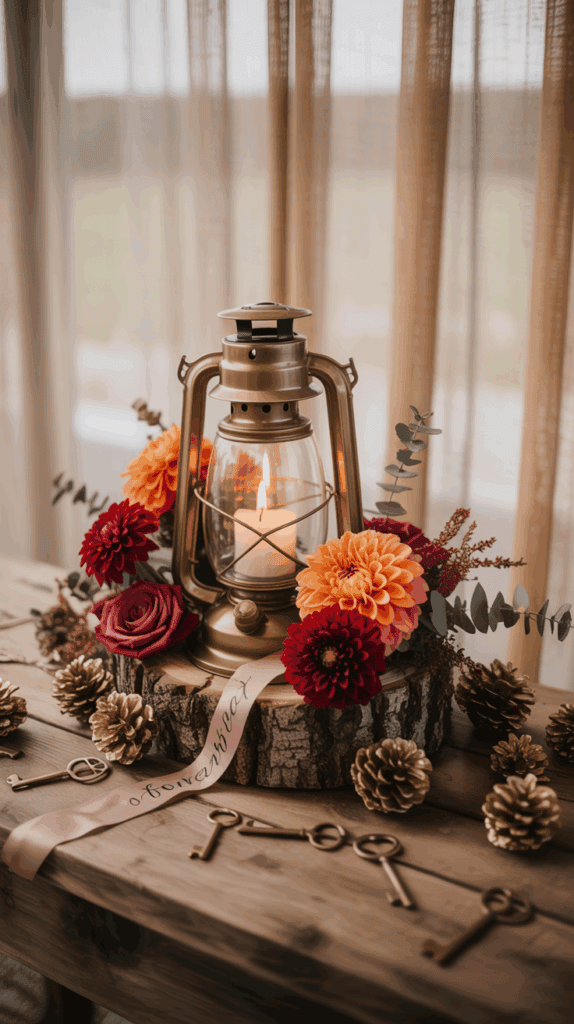
Nothing brings that feeling of home quite like slipping in family heirlooms or special keepsakes. These aren’t just decorations; they carry stories that weave through your centerpiece like threads of love and history. I love using simple, everyday treasures for this—oldtimey keys, embroidered linens, or a special mug passed down through generations.
Here’s how you can show off these treasures without crowding the table:
- Oldtimey Keys: Tie a cluster of vintage keys with twine, then nestle them among pumpkins or pinecones. They sit perfectly on wooden trays or burlap runners, giving a little hint of mystery and nostalgia.
- Embroidered Linens: Fold an heirloom napkin or handkerchief and drape it under a candle holder or a mason jar. The worn stitches add texture and a soft, timeless look.
- Special Mugs or Teacups: Use a delicate heirloom mug as a vase for small blooms or a bundle of wheat. It’s such an easy way to bring character without overpowering the rest of the décor.
I like to mix these heirloom bits with natural elements so everything feels grounded and inviting. Remember, the goal isn’t a museum display but a cozy gathering spot where stories and smiles flow easily.
Kid-Crafted Accents
I’m always amazed by how the little details kids add can turn a centerpiece into a real family treasure. Having my boys help create small accents for the table brings out their creativity and gives them a role in shaping the day. Plus, these kid-crafted touches add a whimsical charm that no store-bought décor can match.
Some of our all-time favorite kid-friendly projects include:
- Mini Pinecone Animals: Using pinecones, googly eyes, and tiny felt pieces, kids can make playful little critters. We set these on or around the centerpieces. They bring life and smiles to the tables!
- Painted Rocks: These are simple and portable. Little hands can decorate smooth stones with autumn colors or simple patterns. We scatter them across the table like colorful little gifts.
- Hand-Drawn Table Numbers: Instead of printing cards, we let kids create their own version on craft paper. The uneven lines and bright colors make every table sign one of a kind—and such a conversation starter.
These accents don’t just decorate the table; they invite guests to appreciate the joy of family effort and creativity. Plus, the kids beam with pride seeing their work displayed. It’s a win-win that makes rustic fall wedding centerpieces feel genuine and joyful.
Adding personal and kid-crafted touches makes your rustic fall wedding centerpieces more than just décor. They transform the space into a warm, lived-in setting full of laughter, memories, and heart. That’s what I want every table in my home to say—and every wedding table can, too!
Tips for Stress-Free Setup and Tear-Down (So You Can Actually Enjoy the Day!)

Putting together rustic fall wedding centerpieces can feel like one more big task on your busy mom-plate, but it doesn’t have to be stressful! The key to enjoying your own wedding day—or anyone’s special celebration—is keeping setup and tear-down simple and organized. If you’ve ever scrambled last minute with tired kids in tow, you know how chaotic it gets. I’ve learned some tricks that help me stay calm, get things done efficiently, and still have time to soak in those precious moments around the table.
Here’s how to keep everything smooth from start to finish.
Plan Ahead With Clear Roles and a Checklist
Nothing beats a solid plan, especially when you have little helpers who might get distracted easily! I make a checklist for setup and break it down into simple steps. This way, every task feels doable. Assigning clear roles keeps everyone busy, so you’re not doing it all alone (which is impossible with three boys, by the way).
- Write down each step from unpacking to arranging centerpieces.
- Assign specific jobs for kids, like passing items or placing pumpkins.
- Pack items in labeled bins for quick finding.
- Keep a small emergency kit handy with scissors, tape, and twine.
Having a plan means you’re not running around asking yourself what’s next, and when kids are involved, that peace saves the day.
Choose Lightweight, Durable Materials
When it comes to rustic fall wedding centerpieces, I lean on pieces that are easy to carry and hard to break. You don’t want to be worrying about delicate glass or fragile pumpkins slipping out of your hands.
- Use mason jars instead of heavy vases.
- Pick mini pumpkins over large ones that are tough to maneuver.
- Opt for wooden crates or trays as bases—they’re sturdy and easy to move.
- Avoid anything with loose parts that might scatter everywhere.
This way, everything can be transported from car to table in one trip if you’re lucky, or at worst, a quick round-trip without sweat or tears.
Set Up Early, Then Step Away
It’s tempting to wait until the last minute to set centerpieces, but getting as much done as possible early is a game-changer. I aim to set up the tables at least a few hours before guests arrive. This gives time for adjustments and saves a mad rush at the last moment.
If you’re at a venue with limited access, try to arrive before the chaos starts and work in small zones. I usually start with bases like crates or trays, then add pumpkins, candles, and flowers last. That keeps things flexible and minimizes accidental bumps.
Involve the Kids, But Keep Their Tasks Simple
Kids want to help, but too much responsibility can overwhelm them. Giving small, fun jobs helps keep their attention and keeps the pace moving.
- Let them scatter pinecones or tuck in leaf clusters.
- Have them tie twine or ribbons around jars.
- Assign them the pumpkin placement role—they love this!
- Keep sugary snacks or small drinks handy to keep energy up.
Their little hands make the whole process part of the celebration instead of another chore. Plus, it’s a memory you’ll all cherish.
Prepare a Design “Kit” for Easy Tear-Down
When the party ends, tear-down can feel like a mountain. I pack a simple kit to make this step painless and quick:
- Reusable bags or boxes for pumpkins, jars, and candles.
- Extra paper towels to wipe up spills.
- A flashlight if you’re packing up as it gets dark.
- A place to stash kid-friendly snacks as a quick bribe (trust me on this).
Having a designated spot for everything helps you avoid “where did this go?” moments. It also speeds things up so you can grab your coat and head home without lingering stress.
Keep It Casual and Enjoy the Process
This is the big one. No matter how polished your centerpieces look, the real magic comes from the vibe you create. If setup and tear-down feel like a hassle, it’s easy to miss out on the fun!
I remind myself that rustic fall wedding centerpieces are meant to look natural and a little imperfect—just like family life! When you relax and enjoy the moment, everyone around you will too. The kids feel proud helping, guests notice your warm touches, and you get to be part of the joy instead of stuck in the background.
With these tips, setup and tear-down don’t have to steal your spotlight. Instead, they become part of the memory, and you get to enjoy the day you’ve worked so hard to create.
Conclusion
Rustic fall wedding centerpieces bring warmth and a touch of home to every table, with charm that’s easy to create and even easier to share with the kids. These centerpieces aren’t just decorations—they’re about making memories with little helpers, enjoying the process, and creating a space where everyone feels welcome.
If you’ve been waiting for the right time to try your hand at these cozy, family-friendly ideas, now’s the moment! Gather your pumpkins, mason jars, and natural treasures, and invite your kids into the fun. I promise, the laughter and pride you all share will be just as unforgettable as the centerpiece itself.
Thanks so much for reading! I’d love to hear how your rustic fall wedding centerpieces come together—feel free to share your stories and photos in the comments. Let’s keep this warm, busy-mom community inspiring each other!
This post may contain affiliate links. Read the full disclosure here.