How To Start Decorating With Velvet Pumpkins This Fall
As a mom of three wild and wonderful boys, I know how busy and noisy fall can feel at home. Last year, I decided to try decorating with velvet pumpkins, and it instantly brought so much warmth and coziness into our house! Suddenly, our living room felt softer and more inviting, and the boys couldn’t stop playing with those little pumpkins (no matter how many times I set them back on the shelves).
It’s such a simple touch, but it made autumn come alive for us. I found it easy, affordable, and honestly, just plain fun. If you’re ready for something that feels both stylish and family-friendly, you’re in the right place!

Why Velvet Pumpkins are a Must for Fall Decor

I cannot talk about decorating with velvet pumpkins without smiling. These cute pumpkins are my secret trick for making our house feel like fall. The soft, plush fabric reminds me of a cozy sweater, and the colors pop in all the best ways. If you want to add comfort and fun to your space this season (with a bonus that kids love them just as much as you do), let me share what makes velvet pumpkins so special.
Instant Warmth and Texture

Nothing beats the feeling of something soft when the weather turns cool. Velvet pumpkins add a layer of warmth that regular pumpkins just can’t. When I set them on the mantel or coffee table, our living room instantly feels more inviting. That’s a big win for family movie nights.
The touchable velvet also stands out against wood, metal, and glass, so the pumpkins create a pretty contrast wherever I tuck them. They make a space feel finished without needing to buy a whole new set of decorations.
Family-Friendly and Durable

With three boys running around, I need decorations that won’t break at the first bump. Velvet pumpkins are soft, plush, and safe for little hands (and even the occasional wild toss across the room, which happens more than I’d like to admit). There’s no worry about shattered glass, chipped paint, or sharp edges.
Plus, these pumpkins can handle being squished, dropped, or used as silly props. After fall, I just pack them away, and they look brand-new next season. I love finding pieces that last.
Instant Style With Zero Effort

I chase after boys all day, so if I find something that looks great in seconds, I’m hooked. Velvet pumpkins are stylish without the fuss. I scatter them on our dining table, nestle them in baskets, or even line them up along the windowsill. Within minutes, my house feels festive.
Here’s what makes them an easy style upgrade:
- They come in every color you can think of (traditional orange, whites, jewel tones, and even blush pink!).
- They look higher-end than cheap plastic decor, but they don’t break the bank.
- The little “stem” details often look surprisingly real, which makes me smile every time I walk by.
The Magic of Mixing and Matching

One of the best things about velvet pumpkins is how easily they mix with the fall decorations you already have. I pair mine with:
- Real pumpkins or gourds for a fun, natural look
- Candles and fairy lights for a cozy glow
- Pinecones, leaves, or wooden beads for extra texture
No need for a trip to the craft store every time you want to refresh your table.
Kid-Approved and Playful
Maybe it’s just my crew, but my boys always gravitate toward the velvet pumpkins. They become all sorts of things in their games (tiny mountains or softballs for an epic living room showdown). Instead of telling them not to touch, I can relax! These little pumpkins add joy to my decor because they invite play.
If you’re looking for a family-friendly option that still feels grown-up and classy, I can’t recommend velvet pumpkins enough. They blend right into busy family life without sacrificing style or comfort.
Getting Started: Choosing and Sourcing Velvet Pumpkins

Honestly, the best part about decorating with velvet pumpkins is how easy it is to get started. When fall hits, the mix of colors and textures makes our home look like a cozy retreat from all the rainy soccer games and after-school chaos. If you’re ready to jump in, all you need is a little know-how and a dash of excitement! Here’s what I wish I’d known before I filled my cart and started making those cute velvet pumpkins a big part of our autumn routine.
Picking the Perfect Velvet Pumpkins

There’s something special about finding just the right pumpkins to fit your space and style. When I started, I had a vision of what I wanted (soft, bright, and a little bit whimsical). There are a few musts I stick to whenever I’m shopping:
- Size variety is key. Mixing small, medium, and even a few extra-large pumpkins gives a natural, “plucked from the patch” look. I love nestling mini pumpkins on our entry table or bathroom shelf, while bigger ones go right on the mantel.
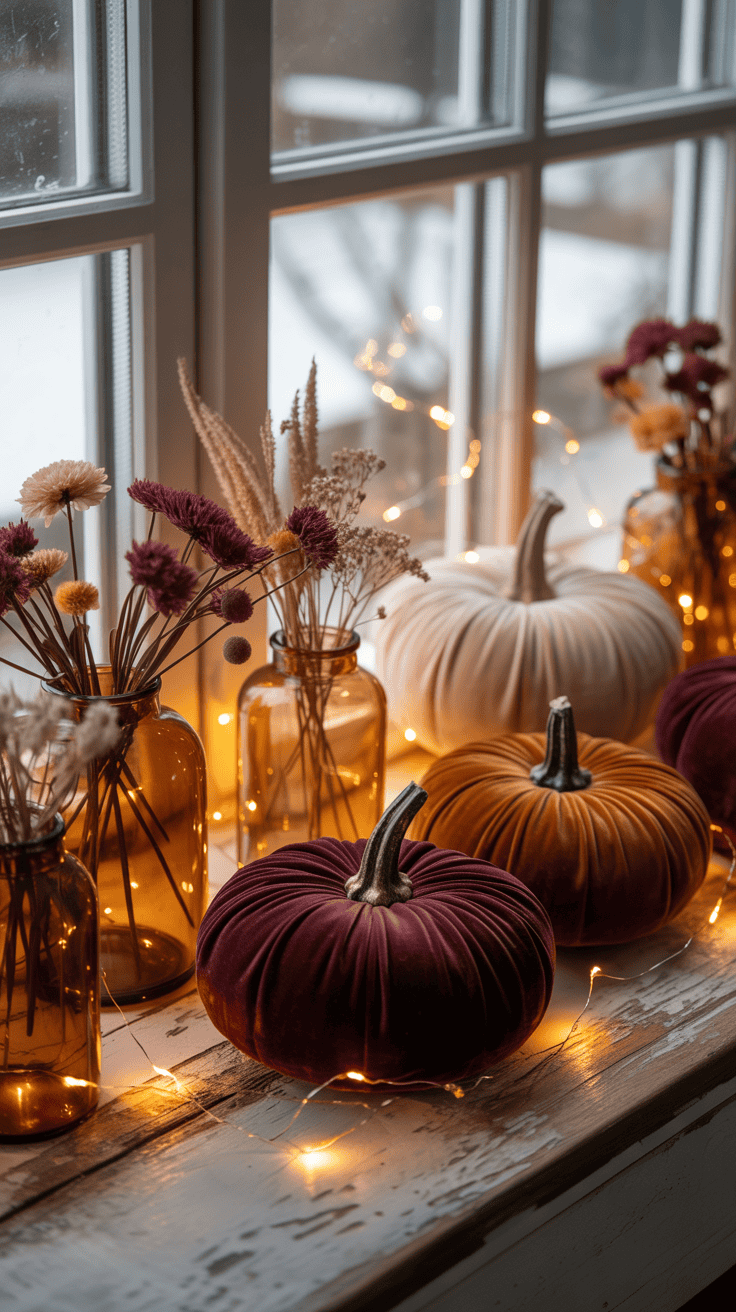
- Mix up the colors! I’ve discovered that pumpkins don’t have to be orange. I pick a mix of classic burnt orange, deep green, white, and a few fun pops like dusty blue or blush pink. It keeps the look cheerful, not stuffy.
- Feel the fabric. Some velvet pumpkins feel cheap or rough. I always check for soft, plush material when possible. If shopping online, I read reviews and look for close-up photos. Thin or scratchy velvet never lasts long here.
Here’s a quick breakdown of what works well for me when buying for different rooms:
| Room | Best Size | Favorite Colors | Extra Touches |
|---|---|---|---|
| Living Room | Medium/Large | Orange, green, white | Stacked in baskets |
| Entryway | Small/Medium | Gold, burgundy | Arranged with pinecones |
| Kitchen Table | Mixed sizes | Cream, blush | Clustered by candles |
| Kids’ Spaces | Small/Soft | Brights/Neons | Safe for play |
A solid mix of sizes and colors makes everything feel collected and cozy. Go with your gut and pick what makes you smile!
Where to Shop: Online vs. In-Store
I’m a busy mom, so I’ll be the first to say that convenience wins most of the time. But when it comes to sourcing velvet pumpkins, I do a mix of both online hunting and in-person shopping.
Here’s what I’ve found works:
In-Store Shopping Pros:
- You can actually feel the velvet quality (huge if you want super soft pumpkins).
- Fun for a quick outing with the kids. Mine love picking their “favorite pumpkin” for their rooms!
- Immediate gratification—you bring them home that day.
Online Shopping Pros:
- Huge variety of styles, shapes, stem details, and colors.
- Easy to compare prices and find sets or bundles for less.
- Great for rare colors or sizes you can’t easily find nearby.
My go-to spots? Local craft stores (they always stock cute, affordable options by mid-September), big-box retailers, and home decor aisles at Target or TJ Maxx. When shopping online, I love browsing Etsy for handmade options or searching Amazon for fast shipping and bundle deals.
Mom tip: If budget is top of mind, grab pumpkins right after Halloween for next year. The sales are wild, and I’ve snagged the prettiest pumpkins for a fraction of the price.
DIY Velvet Pumpkins: Yes, You Can Make Your Own!
Sometimes we make our own velvet pumpkins at home, usually as a weekend project right before Halloween. If you have some basic craft supplies, it’s simple (and pretty fun for the kids). You’ll need:
- Soft velvet fabric (old shirts work too!)
- Fiberfill stuffing
- Needle and thread
- Cinnamon sticks or twigs for stems
Cut a big oval, sew running stitches around the edge, pull it tight, and stuff. Pop in your stem and gather the top. Even if they’re a little wonky, they look adorable piled up in a bowl! My boys are so proud to see their pumpkins in the line-up.
DIY makes a mess, but it gives us memories… and a few extra decorations I never have to worry about keeping perfect.
How Many Velvet Pumpkins Do You Really Need?
Okay, real talk. I started small, thinking two or three velvet pumpkins would do the trick. Now, each year, I can’t stop adding a few more. For a cozy, full look without going overboard, I suggest:
- 3-5 for a mantle or table: Mix sizes for depth.
- Up to 10 for an entryway: Especially if you have space for a big basket or tray.
- Just 1-2 in unexpected spots: Try the bathroom, kitchen window, or bedside table.
Keep it playful and flexible. The best thing about decorating with velvet pumpkins is that you can move, swap, and group them any way you like. Play around and see what feels right for your space!
With a few smart picks and a spirit of fun, you’ll have the building blocks for a home that feels (and looks) ready for fall!
Creative Ways to Decorate with Velvet Pumpkins around the Home

Decorating with velvet pumpkins brings serious coziness into my home each fall. These soft, squishy pumpkins add a touch of magic that works in every room, even with kids underfoot! I’ve found there are so many fun ways to use them—on tables, bookshelves, porches, and every little corner that needs a bit of autumn joy. If you’re wondering how to get the most out of your pumpkin stash, let me share my favorite tricks for making velvet pumpkins feel special, playful, and family-friendly.
Making Magical Centerpieces with Velvet Pumpkins
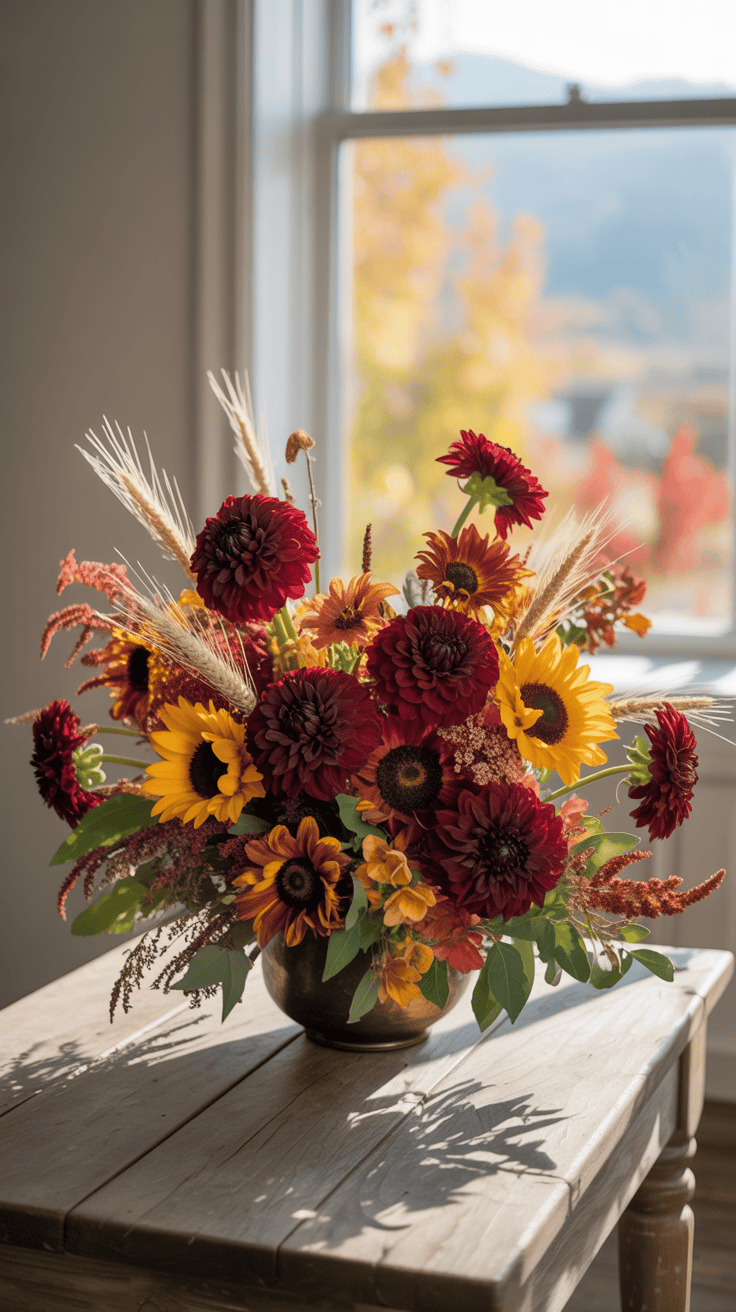
One of my favorite ways to start any fall celebration is with a standout centerpiece. Velvet pumpkins are perfect because they’re soft, colorful, and safe for little hands to help arrange. Building a centerpiece is easier than you might think!
Here’s how I create a display that feels warm and inviting:
- Pick Your Base: I grab a simple tray, a favorite serving platter, or even a rustic cutting board. Any flat surface works.
- Gather Pumpkins in Different Sizes: Mixing mini pumpkins with medium and large sizes keeps things interesting. I love using at least three colors. My go-to mix is burnt orange, moss green, and creamy white.
- Add Extra Texture: Velvet looks so good paired with natural touches. Around the pumpkins, I scatter pinecones, dried leaves, acorns, or wooden beads. Sometimes, I sneak in a sparkly garland if I want extra shimmer.
- Layer in Softness: For a fancy touch, set the whole display on a cloth napkin or a woven placemat. It adds depth and anchors the look.
- Finish with a Focal Point: Place the largest pumpkin in the center, then nestle smaller ones around. If you’re feeling whimsical, pop a candlestick or a vase of fall flowers right in the mix.
Kid Tip: My boys love helping arrange the pumpkins. Sometimes they get creative and stack them or “hide” tiny ones under leaves! Decorating becomes a family activity instead of a solo chore.
Mix and Match Suggestions:
- Use metallic pumpkins for a bit of sparkle.
- Try velvet pumpkins in blues, blush, or even purple for a modern twist.
- Swap in fresh fruit (like apples or pears) for a fun, edible touch.
Letting kids join in always makes the display even more charming—messy or not!
Cozy Corners and Easy Vignettes for Family Fun

Some days, my favorite fall decorations aren’t the big, fancy ones. It’s the tiny moments where a velvet pumpkin sits quietly on a shelf or windowsill, making everything feel softer and happier.
Here’s where I love to tuck them around the house for instant comfort:
- Bookshelves: I slip a mini pumpkin next to a stack of old storybooks or family photos. It’s a sweet surprise every time we reach for a bedtime story.
- Kitchen Counters: I gather a couple of pumpkins in a little basket or bowl, then add cinnamon sticks for that amazing fall smell. Cooking dinner feels extra festive.
- Window Sills: If your windows get good sun, add a few pumpkins alongside little potted plants. The light catches the velvet and gives it a soft glow.
- Bathroom Shelf: This one always makes guests smile! I stick a baby pumpkin on top of the folded towels. It turns the tiniest spot into something special.
- Nightstands: One soft pumpkin and a tiny LED candle make my room feel peaceful at night.
Personal story—decorating with three little boys running wild means nothing stays in place for long. I used to fuss but now I laugh when our pumpkins go “missing” and turn up in a Lego fort or a shoe! Decorating these simple vignettes with the kids is a memory in itself. Sometimes their ideas give me new inspiration, even if it means finding velvet pumpkins lined up with superhero toys.
Outdoor Welcomes: Velvet Pumpkins on the Porch

Velvet pumpkins don’t need to stay inside! I love greeting friends and neighbors with a pile of pumpkins by the front door. The trick is making sure they look good (and survive the wild weather or grabby toddler hands).
Here’s how I keep outdoor displays cozy and safe:
- Stay Sheltered: I always place velvet pumpkins on a covered porch or stoop. Rain is their worst enemy since velvet soaks up water. If your porch isn’t fully covered, use a tray or wooden crate that’s easy to bring inside on wet days.
- Layer in Durable Decor: I mix velvet pumpkins with real or foam gourds, small baskets, and sturdy lanterns. If anything drops, nothing breaks.
- Keep Them Up High: I set the velvet pumpkins on benches, railing ledges, or steps that little hands can’t reach too easily. If I’m worried about kids or pets, I simply use a larger basket with handles so we can tuck them in at night.
- Protect from Wind: Sometimes, I add a dab of double-sided tape or putty underneath the pumpkins so they don’t blow away. It’s a small hack but works wonders on windy days.
A quick table for porch display ideas:
| Pumpkin Placement | Add-Ons | Weather Tip |
|---|---|---|
| On a crate | Lanterns, pinecones | Move indoors if it rains |
| Railing or steps | Dried corn, faux foliage | Use putty to keep secure |
| In a basket | Mini gourds, leaves | Pick up basket overnight |
With cozy textures greeting you at the door, the whole house feels ready for fall. Plus, nothing cheers up a chilly afternoon like seeing pops of color outside—especially when you know your velvet pumpkins are safe from soggy surprises!
Every decorating trick I try with velvet pumpkins ends in laughter and a little extra mess. That’s the beauty of it. For busy families, these pumpkins add softness and style to every corner, one squashy pumpkin at a time.
Making it a Family Tradition: Crafting Your Own Velvet Pumpkins
There’s something so sweet about starting a new fall tradition, especially one that brings the whole family together. When I first started decorating with velvet pumpkins, I realized how much more special it felt to make a few with my boys each year. Homemade decorations always hold memories, and for us, these little velvet pumpkins turn into keepsakes that we use every autumn. If you’re searching for a way to add fun and warmth to your home, why not start your own family tradition with a velvet pumpkin-making day?
Gathering Supplies Together: The Start of Something Special
The best part about making velvet pumpkins is how simple the supply list is. Before we even sit down, I set the mood. I’ll pop on a cozy playlist, light a fall candle, and let my boys pick out fabric colors. It’s a whole mood shift and sets the stage for happy chaos.
Here’s what we grab for our pumpkin workshop:
- Velvet fabric scraps (the softer, the better)
- Scissors
- Sewing needle and strong thread (sometimes embroidery floss)
- Polyfill or cotton stuffing (even old pillow fluff works!)
- Cinnamon sticks or twigs for the stem
- Hot glue gun (I handle this part for safety)
- Ruler and small bowl or plate for tracing circles
I love letting the boys rummage through my fabric basket for just the right piece. Reusing old shirts or thrift store finds makes it extra fun. Setting everything out on the kitchen table in small baskets keeps the mess in check and gives each kid their own pile.
Simple Steps for All Ages
Let’s be real—when you have kids helping, easy steps are a must! There’s no need for perfection because each pumpkin will come out a little different, and that’s the magic of it.
Our process goes like this:
- Trace and Cut: We use bowls or plates to trace a big circle onto the fabric, then snip-snip! The bigger the circle, the bigger your pumpkin.
- Sew the Edge: With a kid-safe needle, we thread around the edge in big, loose stitches. This part usually turns into lots of giggles and “Oh! I poked it again!” But that’s okay.
- Stuff and Shape: The boys love stuffing the fabric pouches. I show them how to pull the thread tight so it closes up, making a little pouch.
- Add the Stem: A dab of hot glue holds a cinnamon stick or twig in place. If you want a sweet fall smell, go big on cinnamon. My boys always insist on at least one “twisty stick” per batch.
Each of my boys puts their own spin on their pumpkin. Sometimes, one gets a funny shape or bulges a little—those always turn into family favorites. Every time we pull them out, we point and laugh, “Remember when you made this one, buddy?” The wonky ones bring the best stories.
Why Kids Love It (and Moms Do, Too)
Making velvet pumpkins as a family isn’t just about adding new decorations; it’s about creating a cozy memory together. My boys get such a kick out of seeing their finished pumpkins mixed in with my store-bought ones. Each pumpkin has a story. Sometimes the youngest’s creation ends up front and center on the table because he’s so proud.
Why do we all love it?
- It lets kids feel included in decorating.
- No stress if it comes out lopsided—imperfection is half the charm.
- The soft velvet is safe for even little hands and won’t break or chip.
- It gives us a reason to chat about fall, school, or just be silly together.
I’ll take a messy table and a dozen giggles any day if it means our home feels full and loved. It’s a “look what we did!” moment that lasts all season.
How to Make It an Annual Family Favorite

Each year, we pick a Saturday to make our velvet pumpkins. It’s marked on the calendar, and everyone knows what’s coming. Little traditions like this give us touchpoints as a family. There’s something wonderful about pulling out the old pumpkins, then sitting down to add a few more each fall. The boys even try to “outdo” their past pumpkins with fun new colors or the world’s wackiest stem!
Here’s how we make it special:
- Take a quick family photo each year with your new creations.
- Use fabric that holds a memory (maybe from a favorite old shirt).
- Write the year on the bottom of each pumpkin so you remember which was made when.
- Celebrate with a pumpkin treat—pumpkin muffins or cider are always a big hit at our house.
Before I know it, the season changes, and these velvet pumpkins are the first thing we unpack to decorate the house. I see last year’s wacky creations and remember that afternoon at the table. For my family, that’s the real fall magic.
Starting the tradition of making velvet pumpkins has added a whole new layer to our autumn decorating. Give it a try and let your little ones get creative. I bet you’ll treasure these quirky, squeezable pumpkins as much as we do!
Caring for Your Velvet Pumpkins to Last Every Fall
Decorating with velvet pumpkins is one of my favorite ways to make our home feel extra cozy each autumn! These charming little pumpkins add soft texture and a pop of color, and with just a bit of care, they’ll look as beautiful next year as they do right now. If you’ve ever wondered how to keep your velvet pumpkins looking their best (even with grabby kids in the mix), I promise it’s not complicated. A little love goes a long way, and they’ll keep brightening your fall for many seasons to come.
Keeping Velvet Pumpkins Clean (Even with Kids!)
I’ll be honest, in a house full of busy boys, keeping decorations clean can feel like a real challenge. Velvet pumpkins might look fancy, but they’re a lot tougher than you’d expect! Here’s how I keep ours looking fresh, even after weeks of play and handling.
- Shake Off Loose Dust: I give each pumpkin a gentle shake before putting them out. Most dust just falls right off, which is a relief when I remember how much they get tossed around.
- Spot-Clean for Spills: If someone (usually one of my boys!) gets food or sticky fingers on a pumpkin, I grab a clean, damp cloth and gently dab the spot. I avoid rubbing since velvet can get worn down with too much scrubbing.
- Soft Brush for the Win: Every so often, I use a clean makeup brush or soft paintbrush to sweep away crumbs or hair. It’s gentle and works way better than my old lint roller.
Quick tip: If a pumpkin gets really messy, a tiny drop of mild dish soap on a wet cloth handles nearly anything. Just be sure to let it air dry all the way before tucking it back in its spot.
Safe Storage: How to Pack Velvet Pumpkins After Fall
I wasn’t always good at packing away decor, but velvet pumpkins taught me to slow down a little. Storing them right means they stay fluffy and bright year after year, ready for their next moment in the spotlight!
- Clean Before You Pack: I always spot-check for crumbs or stains before putting pumpkins away. Clean and dry storage means nothing smells musty the next year.
- Keep Them Squish-Free: Velvet can flatten if it sits under heavy things. I pack our pumpkins in a plastic bin by themselves, with just a layer of tissue paper or old tea towels between them. No squished stems or floppy sides!
- Avoid Damp Places: I never store them in the garage or basement, since even a little bit of moisture can ruin velvet. A dry, temperature-controlled spot (like an extra closet) is best.
If you want to get fancy, you can store each pumpkin in a zip-top bag with a bit of air. This keeps dust and odors away, especially if you have pets (like our always-curious cat). But honestly, a simple bin on a shelf works just fine in my busy house.
Preventing Fading and Flattening
I learned the hard way that velvet, while strong, isn’t a fan of long stretches in direct sunlight. The color can fade if left in a sunny window for weeks. Here’s what works for us:
- Mix Up Display Spots: I move our pumpkins around every few weeks. This keeps the colors looking bold and gives me a reason to freshen up different rooms (plus, it’s fun for the kids to find “where the pumpkins went” this week).
- Fluff as Needed: If a pumpkin or two looks a little flat, I just give it a squish and a twist. Fluffing the stuffing inside brings it back to life.
- Keep Stems Upright: Those little stems look their best when they aren’t bent or pressed. I check them when packing and sometimes tuck a bit of tissue at the base if they look wobbly.
Sunlight Rule of Thumb: If you love having velvet pumpkins in your brightest room, just try to pull them a bit away from the window. Morning sun is gentler, so I set ours on the kitchen table and move them before the hot afternoon light hits.
Quick Table: My Velvet Pumpkin Care Routine
I like routines that don’t feel like a chore. Here’s the simple maintenance plan I follow so we’re always ready for next year:
| Task | How Often | How I Do It |
|---|---|---|
| Shake off dust | Weekly | Gentle shake before rearranging |
| Spot clean | As needed | Damp cloth, don’t over-rub |
| Fluff & rotate | Every 2-3 wks | Squeeze and swap display spots |
| Store safely | End of season | Bin with tissue, cool dry closet |
A little care each fall lets us unpack our pumpkins and let the decorating with velvet pumpkins excitement begin all over again! Seeing them come out looking perfectly fluffy and colorful (even after a busy season) makes autumn decorating feel twice as special. And I love knowing our family traditions are wrapped up in all those soft, happy pumpkins—year after year!

Conclusion
Decorating with velvet pumpkins has become one of my family’s favorite ways to make fall feel joyful and special. Every soft pumpkin in our home comes with a memory, whether it’s from a weekend craft or a fun trip to the store with my wild crew. The simple act of spreading these bright, squishy pumpkins around the house turns “just another season” into weeks full of smiles and shared excitement.
Trying out these cozy ideas can bring just as much laughter and beauty to your fall, no matter what your family looks like. I hope you feel inspired to make your own memories, try a new color, let the kids help, or even start a yearly pumpkin day tradition. It’s the togetherness that matters most, and these pumpkins are now a sweet part of ours.
If you give decorating with velvet pumpkins a try, I’d love to hear about it! Please share your photos, ideas, and stories in the comments or tag me on social media. Let’s keep this cozy fall tradition growing, one pumpkin (and happy memory) at a time. Thank you for being here and bringing your own warmth to the season!
This post may contain affiliate links. Read the full disclosure here.