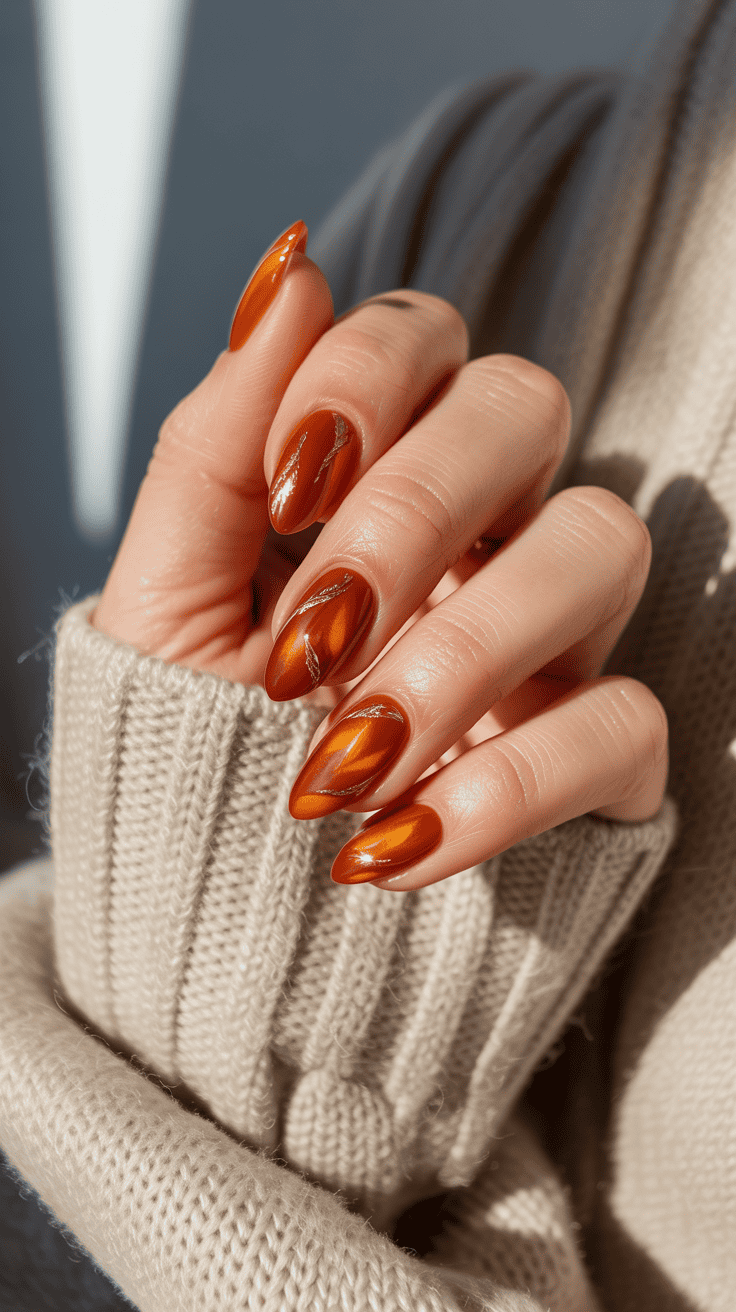
Trying Fall Leaves Nail Art For The First Time And Loving It
As a mom of three wild and wonderful boys, quiet moments for myself feel pretty rare. After weeks of busy schedules and sticky handprints, I wanted to do something just for me, so I finally decided to try fall leaves nail art!
These tiny accents make me happy each time I glance down, and honestly, I’m loving the results! It’s a simple way to celebrate the season, bring a little bit of autumn color into my day, and just have a bit of fun. If you’re craving something festive, quick, and super mom-friendly, this might be the perfect thing to try.

Why I Wanted to Treat Myself to Fall-Inspired Nails
Autumn is my favorite time of year, so when I saw “fall leaves nail art” taking off on Instagram, I knew I needed to try it. Sometimes I get caught up in caring for my boys, keeping the house in order, and making sure everyone gets to soccer practice with the right shoes on (which is harder than it sounds). Lately, though, I realized I rarely do something just for myself. That’s why I set aside time for a little seasonal pampering. A small thing like nail art was exactly the cozy treat I needed, and it turned out to be more fun and rewarding than I expected!
Craving a Bit of Autumn for Myself
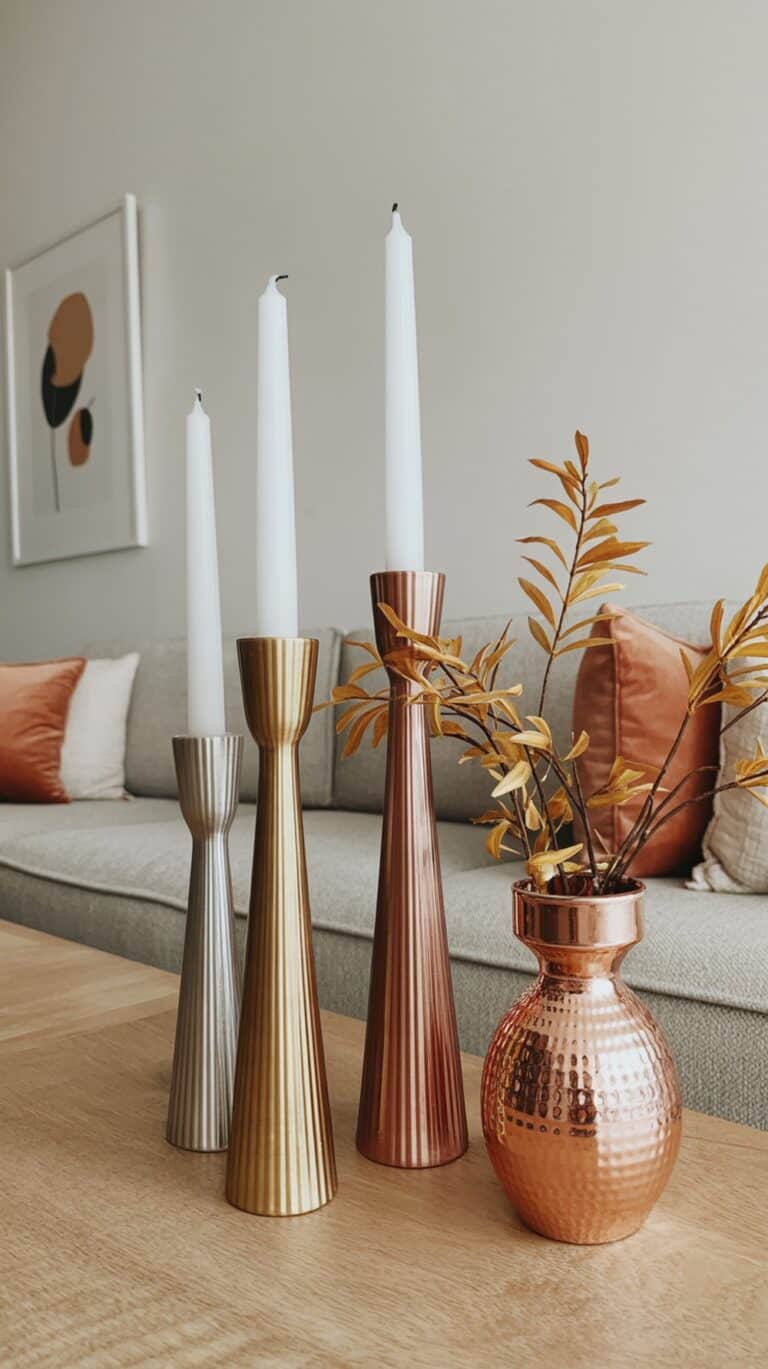
As soon as the first leaves start to fall, I feel the urge to welcome autumn into every corner of my life. I already light cinnamon-scented candles and bake pumpkin bread with the kids, but I wanted something just for me. Painting my nails with cute fall leaves felt like sneaking a piece of that golden October sunshine right onto my fingertips. When you spend so much energy on others, these little bursts of color can be a small act of self-kindness.
- It adds real autumn charm.
- Shows off my love for the season.
- Gives me something pretty to enjoy in the busyness of mom life.
Needing a Mood Booster
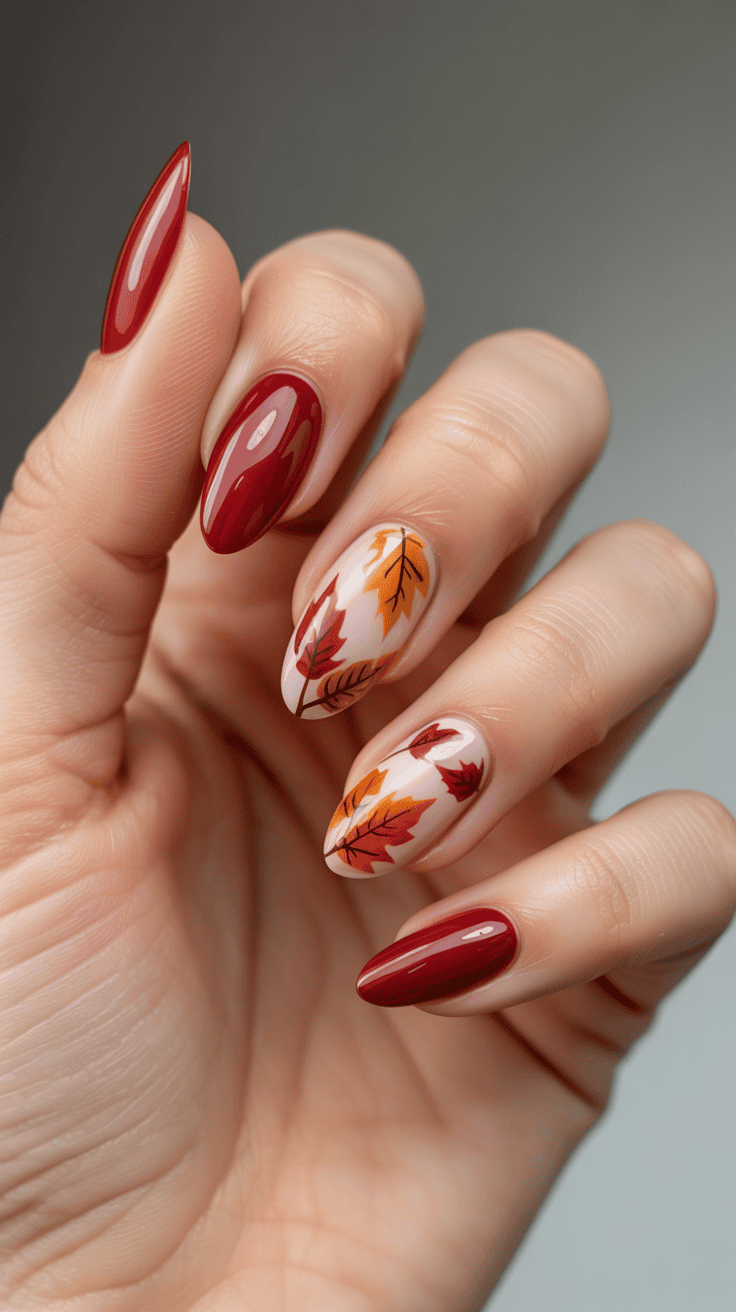
Let’s face it, motherhood is joyful but tiring! Between after-school snacks, endless laundry, and those moments when everyone suddenly “needs Mom right now,” I found myself reaching for simple ways to lift my spirits. Fall leaves nail art is bright, warm, and playful. Every time I glance down and see those orange, red, and yellow leaves, I get a quick smile. It’s a little reminder that I’m more than just “Mom, where’s my shoe?” — I’m someone who deserves joyful, pretty things in her day.
Wanting a Fun, Low-Stress Project
I love a good DIY burst, but big craft projects are not always realistic right now. Nail art fits perfectly into a nap time or after the boys go to bed. There’s no mess, no giant setup, and I don’t have to chase anyone with glue in their hair. Trying fall leaves nail art was fun, relaxing, and honestly easier than I expected. It was a simple project that gave real results — instant mood lift, no stress.
Celebrating the Small Stuff
Sometimes the best days are about celebrating tiny wins. Maybe I managed a full hour where nobody spilled juice, or I got everyone to bed before nine. Treating myself to pretty nails felt like a grown-up gold star. It’s easy to lose track of myself in all the routines. Giving myself this small attention helped me reclaim a bit of my own sparkle and bring back some joy.
If you’re a mom craving a little bit of autumn magic, a simple project like fall leaves nail art can feel like a well-deserved treat. It’s a visual pick-me-up during the busiest days, and it lets a little more of the season you love show up in everyday moments!
Planning My Fall Leaves Nail Art Adventure
Before I started my own fall leaves nail art, I treated it like a little adventure just for me. Juggling school runs, snack time, homework, and sibling squabbles means my schedule fills up so fast. If I was going to pull this off, I needed a real plan. I wanted this to be something joyful, not another task squeezed between “Mom, I need help!” and “Is dinner ready yet?” So, I mapped out some easy steps to make this mini project feel special and totally doable.
Choosing the Right Time (and Guarding It!)

I quickly realized that picking the perfect window of time was half the battle. I wanted my fall leaves nail art to feel relaxing, not rushed. For me, nighttime works wonders—after the boys are tucked in, the house is quiet, and I finally get true “me time.” If evenings aren’t your jam, a weekend nap time or an early morning could work too.
- Right after bedtime is golden. No interruptions!
- Try during nap time if your kids still nap.
- Sometimes, a cup of tea and a calm playlist can transform even ten stolen minutes.
Blocking off that hour on the family calendar made it real. Once it was “mom’s nail art time,” I didn’t let anything steal it away. Even if someone needed “just one more glass of water.”
Gathering Supplies (Without a Big Shopping Trip)
I didn’t want this project to turn into a long, expensive scavenger hunt. My goal was to keep it simple and use what I had when possible. Here’s what ended up on my must-have list for fall leaves nail art:
- Base coat and top coat for staying power
- Autumn colors (think orange, deep red, mustard, brown, even a shimmer or two)
- A thin nail art brush or toothpick for details
- Nail polish remover and cotton swabs for quick clean-up
- Stickers or decals (if painting tiny leaves feels like too much!)
I checked my old bins and found colors that worked. If you need to shop, you can actually grab everything during a regular Target run—no specialty stores required.
Getting Inspired (With Real Leaves and Pinterest!)
I get so much inspiration just from stepping outside. The boys love bringing me their “best” leaves, and I kept a few pressed in a book as color guides. For designs, Pinterest is packed with ideas for all skill levels. Some ideas are so simple, you honestly just dot on a few different colors to get a leafy look.
I saved a few photos, laid out my favorite leaves, and felt ready to put my own spin on things. The best part? There’s no wrong way to do it! Every tree changes in its own quirky way, so messy lines and different colors just add character.
Making It Fun (Not Serious or Stressful)
I made a promise to myself—no stressing if things didn’t look perfect. I put on my coziest pajamas, brewed some tea, and set up a little tray by the couch with all my supplies. I even let myself pick some feel-good music, because why not make it an event?
Here are a few ways I kept my mood light:
- Celebrated every tiny leaf I finished (even the lopsided ones)
- Took phone pics as I worked (so satisfying to see progress)
- Set a “no fixing and fussing” rule—if I made a mistake, I let it be part of the design
- Treated it like adult playtime, not another “should do” task
I knew I wasn’t at a fancy salon—and honestly, that made it even more relaxing. It became a sweet little project just for me, by me, and I liked it that way.
In the end, planning made the whole fall leaves nail art adventure simple and rewarding. I didn’t wind up scrambling for supplies or rushing through something that was supposed to feel special. When you live in a world of chaos and snack crumbs, planning your own moment (even for nail polish!) can feel like rooting a new tradition.
Step-By-Step: How I Created My Fall Leaves Nail Art at Home
Let’s get honest for a minute. When I first started my fall leaves nail art, I had high hopes—and very little actual experience. With three boys running wild, it’s pretty rare I get to slow down and do something just for me! Still, I wanted those pretty autumn colors on my fingertips, so I grabbed my tools and gave it a whirl. Was it perfect? Not even close! Did I enjoy every second of it? Absolutely. If you’re curious about how real-life “mom nails” come together, here’s what happened on my first try.
Beginner Mistakes (And How I Fixed Them)
When I say I’m not a nail pro, I mean it! My first swipe of polish looked like a preschooler playing with finger paint. But the fun part about fall leaves nail art is that it’s supposed to look playful and natural—kind of messy, just like real leaves. I made plenty of little mistakes along the way, and I want to share how I fixed them or just let them be.
Some of my classic mom slips:
- Smudging before the polish was dry
I was so eager to finish before someone needed a snack, I forgot to let layers dry! When this happened, I dipped a brush in a bit of nail polish remover and gently evened out the spot. If it looked really rough, I’d just layer a fresh color leaf on top. - Leaf shapes that looked more like blobs
Freehand leaves are not as easy as some videos make it look. My first few tries looked more like polka dots gone wild than actual leaves. Here’s what saved me: I used a toothpick to carve out points on the blobs, which instantly made them look more leafy. And if I still didn’t love it, I’d just call it an “abstract fall” and move on! - Getting color everywhere but my nail
If your hand shakes or the polish splatters, cotton swabs dipped in remover can work magic. I cleaned up the edges after everything was dry, so I didn’t smear the art I just worked so hard on. - Too much fussing making it worse
My biggest lesson: stop touching it. When I tried to fix tiny lines, I’d just smudge more. I set a “no fuss” rule and reminded myself—leaves in nature are full of quirks and spots! The more I embraced those wobbly strokes, the more I actually loved my nails.
What actually matters most? Letting go of perfection. There was a moment when two little handprints appeared on my arm mid-paint and I had to laugh. I realized I’m here for the process, not a picture-perfect finish. The quirks made my nails feel homemade and extra special.
Making Fall Leaves Nail Art Last Longer
This is the true test: can fall leaves nail art hold up to real mom life? I put my nails through a lot each day. From washing dinner plates to scooping up bubble bath toys, my hands are almost always busy (and sometimes sticky). So I came up with a few tricks to help keep my nail art fresh, even when the day turns chaotic.
Here’s what actually helps keep “fall on my fingertips” looking good:
- Double up on base and top coat
I always use a good base coat to protect my nails, but with busy days, an extra layer of top coat is my secret weapon. It seals in the art and gives that shiny finish I love, helping colors last longer. - Touch up chips fast
If a corner chips (thanks, mystery Lego in the laundry), I keep my main colors handy. I do a quick dab and seal with another layer of top coat. Nobody can tell, and it buys me a few days before the next full refresh. - Gloves for big jobs
When I know I’m about to scrub pots, dive into bath time, or start a cleaning spree, I pull on a pair of kitchen gloves. It feels over-the-top, but it saves my nail art from peeling or fading, especially right after a fresh paint. - Moisturize every night
I use hand cream before bed. Dry hands make polish flake way faster, so this helps more than you’d think. - Short nails, less trouble
Long nails look fancy, but I’ve learned short nails survive better with kids around. Less breakage, less chipping, and you don’t have to worry about dirt getting stuck under all that pretty color. - Skip the super-hot water
I try not to soak my hands in piping hot water, since that can loosen polish. Lukewarm does the job and keeps my nails happy.
Most important, I celebrate the little wins. If my nails catch the light and make me smile, that’s enough. Even if there’s a little chip or a quirky leaf, I remember why I did this in the first place—to brighten my days and bring a bit of fall inside, no matter how wild it gets!
How My Fall Leaves Nail Art Refreshed My Spirit

If you’ve ever found yourself craving something fresh, colorful, and just for you, fall leaves nail art will light up your mood in a big way. As a busy mom of three, finding even a sliver of time for myself feels rare. Yet, when I saw those rich autumn leaves dancing across my nails, I couldn’t stop smiling. It was a tiny creative act that gave me more than pretty fingertips. It truly lifted my spirit during a hectic season of life with kids, clutter, and nonstop activities.
Rekindling My Sense of Self
Motherhood can make you feel a bit like you’re always playing catch-up. So often, my identity gets tangled in to-do lists, schedules, and everybody else’s needs. The act of sitting down to do my own fall leaves nail art started small—just some bottles of polish and a quiet half-hour—but it felt huge. It wasn’t about Instagram or looking perfect. It was about me, right then, choosing color and beauty for my own joy.
As I brushed on those warm orange and golden shades, I remembered that I am still creative and playful, not just a referee for sibling battles or a snack distributor. Those tiny leaves became a celebration of the person inside the mom.
- Even a tiny spark of self-care restores energy.
- Doing something new shifted my mindset in such a lovely way.
- Every time I glanced down, I saw proof that I deserved something nice too.
The Emotional Boost of Color and Change
Seasonal changes always stir up big feelings for me. Fall is my favorite season, but some days, as the air gets cooler, I slip into a little slump. Between early sunsets and after-school chaos, I feel drained—maybe even invisible.
Bringing fall right to my nails worked like a mini mood reset! The vivid reds and gentle browns felt cozy and grounding. Art, even nail art, has this way of warming you from the inside out. I noticed my energy shift. My patience grew longer. I even felt more playful with my boys as if I had pressed a hidden reset button tucked away in those tiny leaf designs. It’s wild how something so simple can lift the cloudiest day.
- Bright nails made chores feel less dull.
- Seeing leaves on my fingers gave me a daily pick-me-up.
- New traditions can start with the smallest step.
Feeling Put-Together When Everything Else Is Messy
Life with kids is full of sticky, unpredictable moments. One minute the living room is tidy, and the next, LEGO bricks take over. Somehow, having my nails looking fresh and pretty made me feel put-together, even when nothing else in the house was.
There’s real power in a little polish. I might be in yoga pants, but my hands looked festive and fun. That tiny bit of polish reminded me that even in the wildest days, I can create beauty and order, if only on ten small canvases.
- Cute nails made me more likely to show my hands instead of hiding chipped polish.
- I felt proud when friends or teachers noticed my fall leaves at pick-up.
- It felt good to do something that lasted longer than clean laundry ever seems to.
Inspiring My Kids (And Myself) With Joyful Details
My boys noticed right away. “Mom, look! Are those real leaves?” The excitement in their voices told me they saw how a little thing could be special. They started asking about my next design and even wanted to try their own simple art on weekends. If showing up with fall leaves on my nails helped my kids see how fun small creative acts can be, I call that a win.
I realized these little moments matter. They give us a break from routine and let us sprinkle a bit of joy in unexpected places.
- Small acts of creativity boost everyone’s spirits.
- Sharing something whimsical encourages my kids to embrace their own ideas.
- I want my kids to see that it’s okay to take time for yourself and celebrate the season in your own way.
Giving Myself Permission to Slow Down
The world pushes moms to go, go, go. Taking even 30 minutes for fall leaves nail art felt like claiming a tiny victory for self-care. The process forced me to slow down—waiting for polish to dry and being careful with details. I noticed my breath slowed. My mind wandered into happy autumn memories from when I was little.
This wasn’t just about polish. It was about rest, reflection, and remembering that sometimes, pressing pause is the most powerful thing you can do in a crowded week.
- Slowing down helps my energy last longer.
- The act of pausing for myself recharged my patience with the kids.
- Doing something just for the fun of it reminded me to let some things go.
Fall leaves nail art didn’t change the world, but it changed my week—and honestly, my whole mood. It brought a sprinkle of charm to my daily life, gave me a pocket of peace when I needed it most, and let me share a smile with anyone who asked about my vibrant fingertips!
Mom-to-Mom Tips For Trying Fall Leaves Nail Art Yourself!

Let’s be real, trying fall leaves nail art for the first time can feel a little intimidating, especially when you’re used to only giving yourself five-minute manicures between school runs and snack breaks. But if I can pull it off as a busy mom of three, you absolutely can too! After my first try, I picked up a handful of tips and shortcuts that make the process easier, a whole lot more fun, and way more relaxing. These aren’t rules—they’re “mom-to-mom” secrets picked up from lots of real-life, real-messy attempts!
Make “Perfect” the Least Important Part
The best thing I learned is not to worry about making every leaf look exactly the same or perfectly placed. Real leaves aren’t perfect, and your nail art shouldn’t be, either! I started out trying for symmetry and crisp lines, but honestly, the more I relaxed, the cuter and more playful the leaves looked.
- Overlapping colors looks like a pile of leaves.
- A little mess adds to the “autumn on your nails” feel.
- Small imperfections? Just call them “whimsical details.”
When I stopped chasing perfection, I enjoyed myself way more. That’s when the fall leaves nail art really felt like a treat, rather than another task.
Pick Colors You Already Love
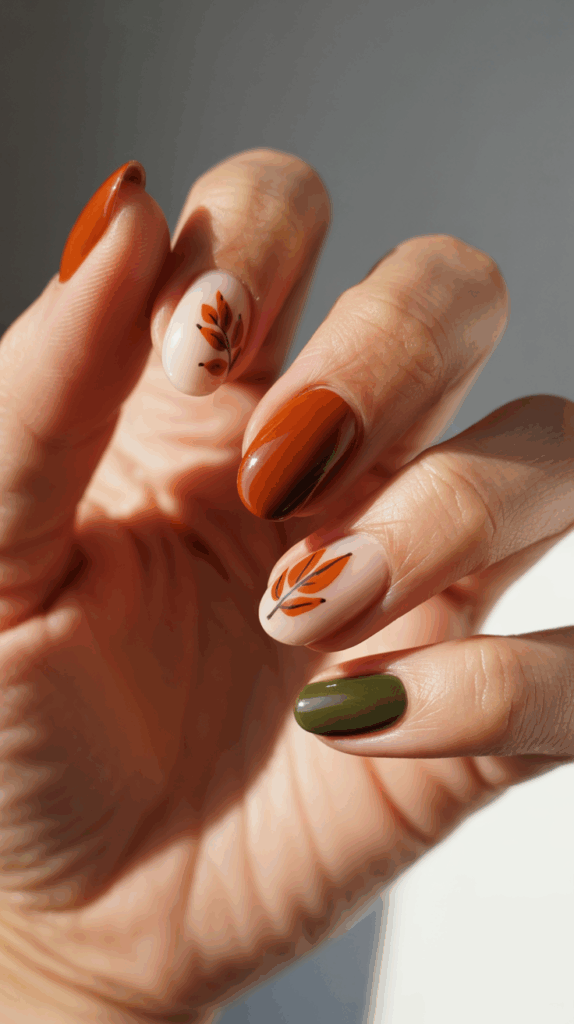
Don’t stress about having every shade of fall in your drawer. I used whatever autumn colors I already owned, even if they weren’t exactly what Pinterest models used. Warm oranges, mustard yellows, a pop of deep red, or even a shimmery copper—mix and match what you have! Your favorite polishes will always make you smile the most.
Try grouping a few options together and test them out on a piece of paper before you begin. Sometimes, the unexpected color combos end up looking the most unique and special. Plus, using what you have means less to clean up later.
Simplify the Tools—You Don’t Need Fancy Stuff

I used to think I needed a whole drawer of tools for nail art. The truth? You can do most of this with just a toothpick, a bobby pin, or even the side of a clean paintbrush! If you want extra details, you can grab a dotting tool online for a couple of bucks, but I swear the kitchen toothpick is often best.
Here’s a quick list of “mom hacks” for nail art tools:
- Toothpicks for leaf points and little stems
- Cotton swabs for cleanup around your nails
- A bobby pin for easy dots or rounded shapes
- Tape if you want to block off a straight line
Use what’s on hand—you don’t need a pro kit!
Start Simple, Then Add More If You Want
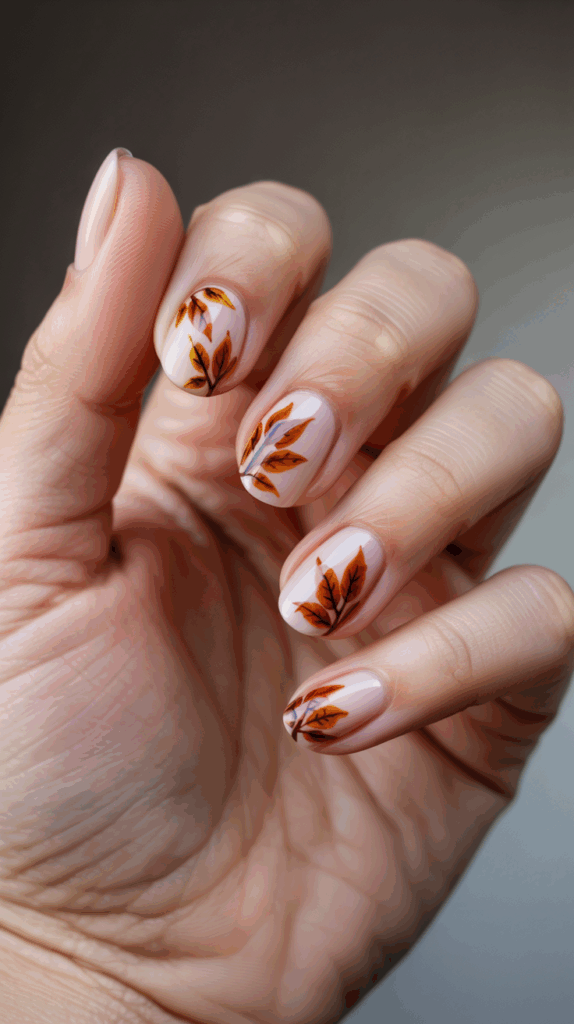
When I tried fall leaves nail art the first time, I started with just one or two leaves per nail. That was it! Once I felt more confident, I started playing with layers, adding a glitter topcoat here or outlining a few leaves for extra pop. Less really is more, especially when you’re trying to get everyone to bed by 9.
Don’t feel like you need a full forest on every nail. A few leaves on a neutral background look charming, and they’re a lot less stressful to paint.
Try Stickers or Stamps for Extra-Quick Results
Not every mom wants to freehand tiny designs, and that’s totally fine. On nights when you only have fifteen minutes, nail stickers or stamping plates are a lifesaver. There are great fall leaves options at the drugstore or online, and applying them is as easy as peel-and-stick. Just seal with a good topcoat, and you’re done!
A few times, I cut up my kids’ old sticker sheets and used mini leaf decals right on my nails. The boys thought that was hilarious, and they helped pick out their favorites.
Do a Practice Nail First
Before doing all ten nails, I sometimes paint a “practice leaf” on my thumbnail or even on a piece of paper. This little step helps me figure out how thick or thin the polish needs to be, and sometimes I change my mind about a whole color combo! No surprises when you practice first—just a smoother finish and less stress.
Don’t Rush—But It’s Okay to Pause
Sometimes, life interrupts—even when you’re mid-paint! If you have to stop for school pickup or snack time, don’t panic. It’s perfectly fine to let each step dry and come back to it later. In fact, this can help avoid those smudges I used to get when I rushed.
When I split painting over two short sessions, my designs came out way neater. Plus, it fit better into my always-busy week.
Make It a Mini Event for Yourself
The best tip I can offer? Turn this into a mini, just-for-you celebration. I grab my favorite tea, turn on cozy fall music, and set up in a sunny spot—kids’ artwork in the background and all. Treat yourself to a relaxing moment, not just “another thing to do.” Even if you get interrupted every five minutes, you’re still making time for yourself. And trust me, you deserve it.
- Lay out everything before you start.
- Pick a spot where you won’t have to move mid-mani.
- Light a candle or put on a happy playlist while you work!
Teach Your Kids or Friends—Let’s Make This Fun

My boys love watching me do my nails and sometimes join in on a thumb or two. If you have kids or friends who want to try fall leaves nail art with you, let them jump in! The results are always more playful, and nobody cares about perfect lines when you’re laughing together.
It turns a quiet nail painting night into a memory that sticks around way longer than the polish.
Trying fall leaves nail art for the first time might look tough, but with these tips, it’s a lot easier and way more joyful. Let go of perfection, use what you have, pause when you need to, and always celebrate the little wins! If you try it, tag me—I’d love to see how you make fall your own.
Conclusion
Trying fall leaves nail art for the first time was a bright spot in my season! I found so much happiness in those autumn colors, right on my fingertips, and honestly, it was just what I needed to break up my normal routine as a mom of three. It reminded me to find small moments for myself, even on the busiest days.
If you’re a fellow mom, I hope my story encourages you to treat yourself in some sweet, simple way too. Maybe you’ll grab some polish and try your own fall leaves nail art or maybe you’ll pick your own special self-care moment. Either way, you deserve it!
I would love to hear about your own nail art adventures or any little traditions that help you recharge. Share your favorite tips or your latest wins in the comments—I can’t wait to celebrate with you! Thanks for joining me on this colorful little journey.
This post may contain affiliate links. Read the full disclosure here.