How to Make a Halloween Flower Bouquet That Feels Fresh
If you’re anything like me, you want your Halloween flower bouquet to do more than just sit on the table—you want it to look cool, feel festive, and not remind anyone of plastic spiders or cheap orange ribbon. As a mom of three wild boys, I’m all about finding simple ideas that make a splash without looking goofy. With just a few smart choices, it’s easy to pull off a bouquet that’s perfect for fall, but also stylish enough for any room. If you love Halloween (but can’t stand tacky decorations), you’re in the right place!
Rethinking Halloween Decor: Why Flowers?
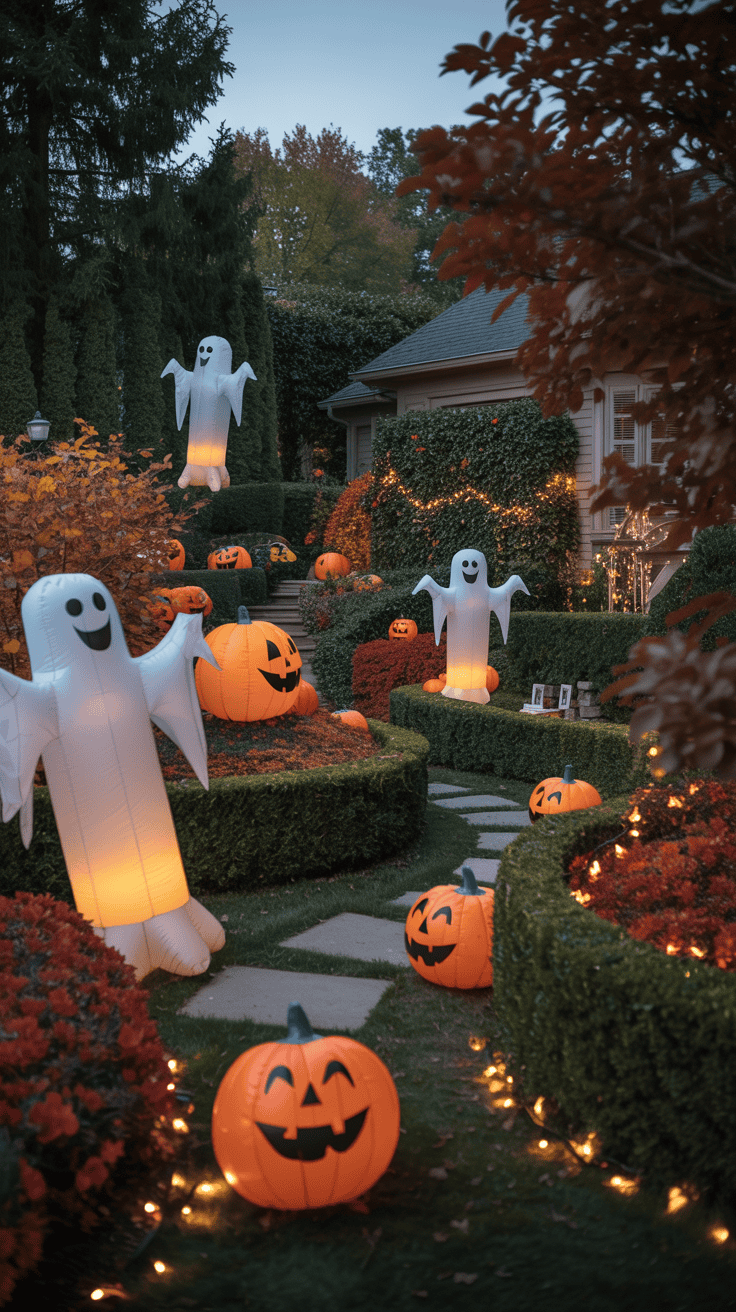
You know that feeling when Halloween rolls around and suddenly your house is overflowing with orange plastic? Me too. But last year, I wanted something different for our living room. I decided to put together a halloween flower bouquet for the first time, and let me tell you, it changed everything! Swapping cheap, squeaky plastic for real flowers instantly made our space look magical, but not over-the-top. If you’re tired of the same tired decorations, flowers are an easy way to bring in the spooky vibe—minus the mess and the cheese!
Ditching the Plastic: Elevating Your Spooky Style

It’s easy (and tempting) to grab a bag of foam pumpkins or spiderweb runners, especially with wild kids at home. But every time I tried to make those things work, they either ended up broken or tossed between the couch cushions. Real talk: plastic just looks, well, plastic. After a few days, my house felt more like a discount store than a cozy home.
So, what worked better? Beautiful natural materials! When I switched to flowers and a few handmade touches, our Halloween decor actually felt grown-up and special. Here’s why fresh flowers level-up your spooky style:
- They actually smell good. No more weird burnt plastic smells or headaches from scented candles.
- Gorgeous colors and textures. Real flowers just look richer—with petals, stems, and leaves that make a bouquet pop in the middle of your table.
- No guilt when the season’s over. Flowers naturally break down, so cleanup is literally just tossing them in the compost.
- Great with kids. My boys loved picking out blooms with me at the store! It made decorating feel like a family event, not just another “mom project.”
Plus, anytime I’d see a fresh bouquet on the counter (instead of more orange plastic), it felt like hitting the reset button. The house was still super festive, but also peaceful and pretty.
Flowers That Set the Mood
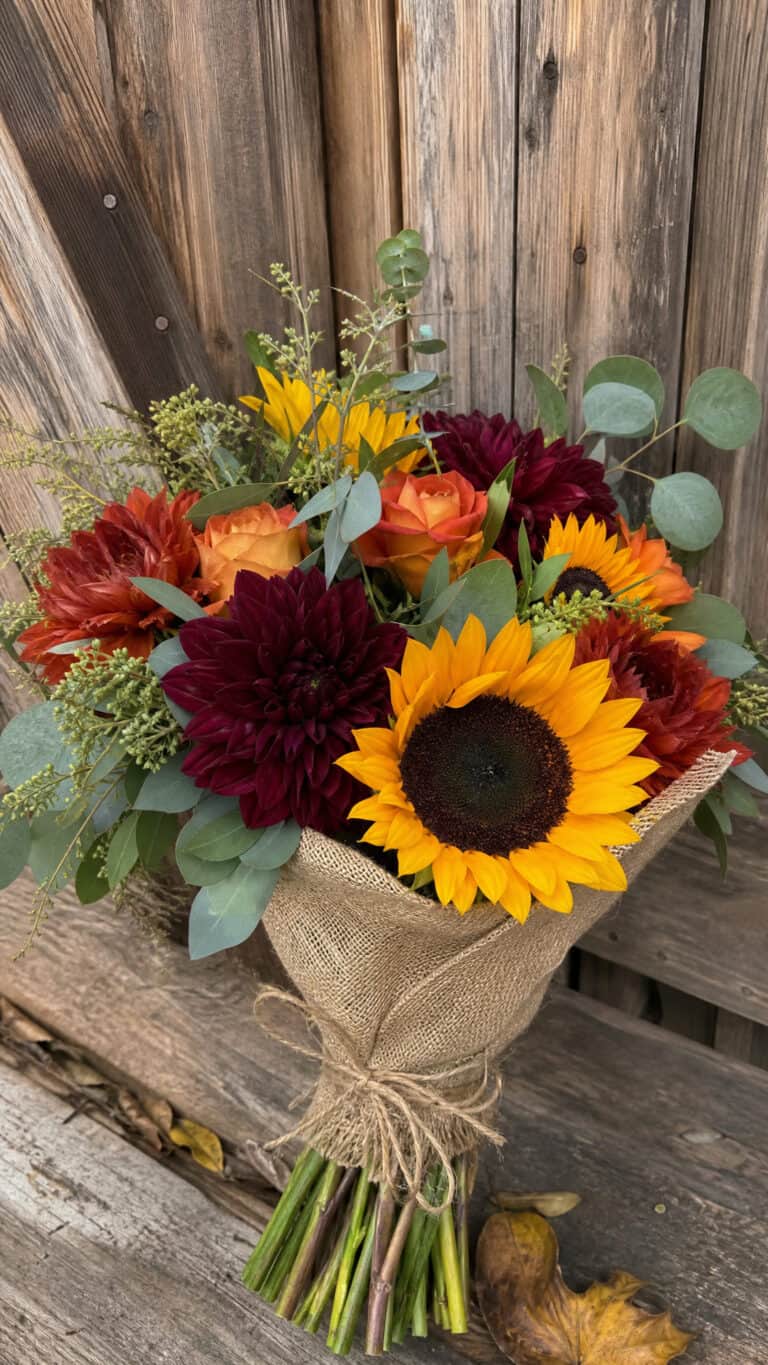
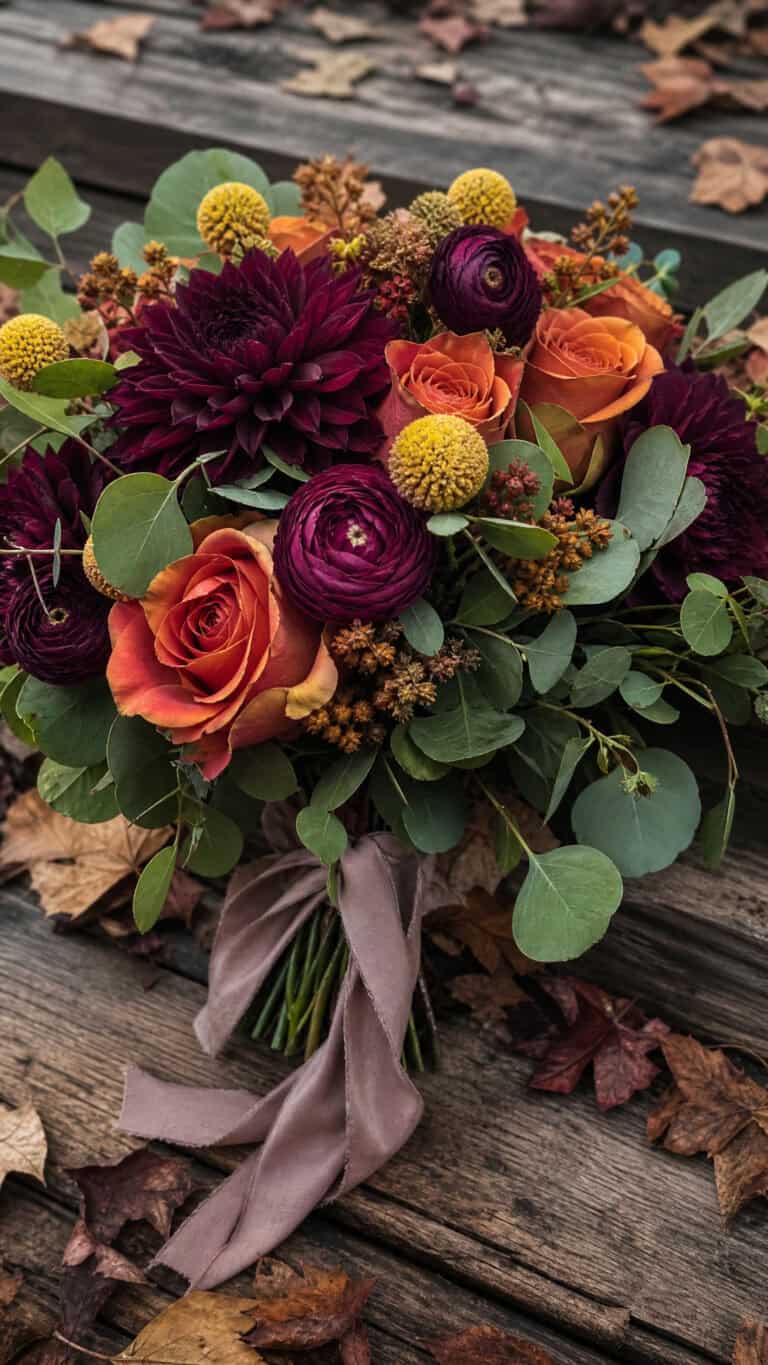
Here’s the secret to a Halloween flower bouquet that doesn’t look cheesy: pick flowers with rich, moody colors and wild textures. Forget plain daisies or sunflowers for a minute. Go for those deep, dramatic shades that feel just a little mysterious.
When I was searching for the right flowers, I made a list of colors and shapes that reminded me of Halloween but still looked classy. These are my go-tos every year:
- Deep purples and burgundy: Think dahlias, carnations, or calla lilies. They almost look like velvet in the right light!
- Inky blacks: Black roses are rare but striking. Scabiosa and dark ranunculus give a similar effect without breaking the bank.
- Rustic oranges: Marigolds, mums, and orange tulips bring that pop of pumpkin color without looking forced.
- Earthy greens: Eucalyptus, olive branches, or even mossy ferns give some balance and help tone things down.
- Unexpected accents: Seed pods, thistle, little ornamental grasses—these add an extra layer of spookiness in the best way.
I don’t stick to just one type of flower. Mixing a few different shapes and sizes makes a bouquet look natural, not fussy. If I can, I let my youngest pick out his favorite “weird plant” for a fun touch. Sometimes it’s a twisty branch or a bunch of berries that look right out of a storybook—so much better than glow-in-the-dark spiders!
With the right palette and a little imagination, you can turn simple flowers into the star of your Halloween decor, and trust me, your house will feel special and grownup but still totally kid-approved.
Choosing Your Color Palette and Theme

Picking the right colors is what makes a halloween flower bouquet go from “just fall flowers” to a head-turning centerpiece with real Halloween energy—without making the dining room look like a costume aisle exploded. I always start here because it sets the vibe for the whole project. If you’re like me and want that wow factor but can’t stand too much orange or black everywhere, it’s time to get creative with your palette and play around with textures.
Timeless Halloween Hues with a Twist
Black and orange are the stars of Halloween, but honestly, using only those shades can feel heavy (and a little too obvious). I love taking those familiar colors and mixing in some surprises to keep things classy and grown-up. Here’s how I balance the traditional look with an extra layer of style:
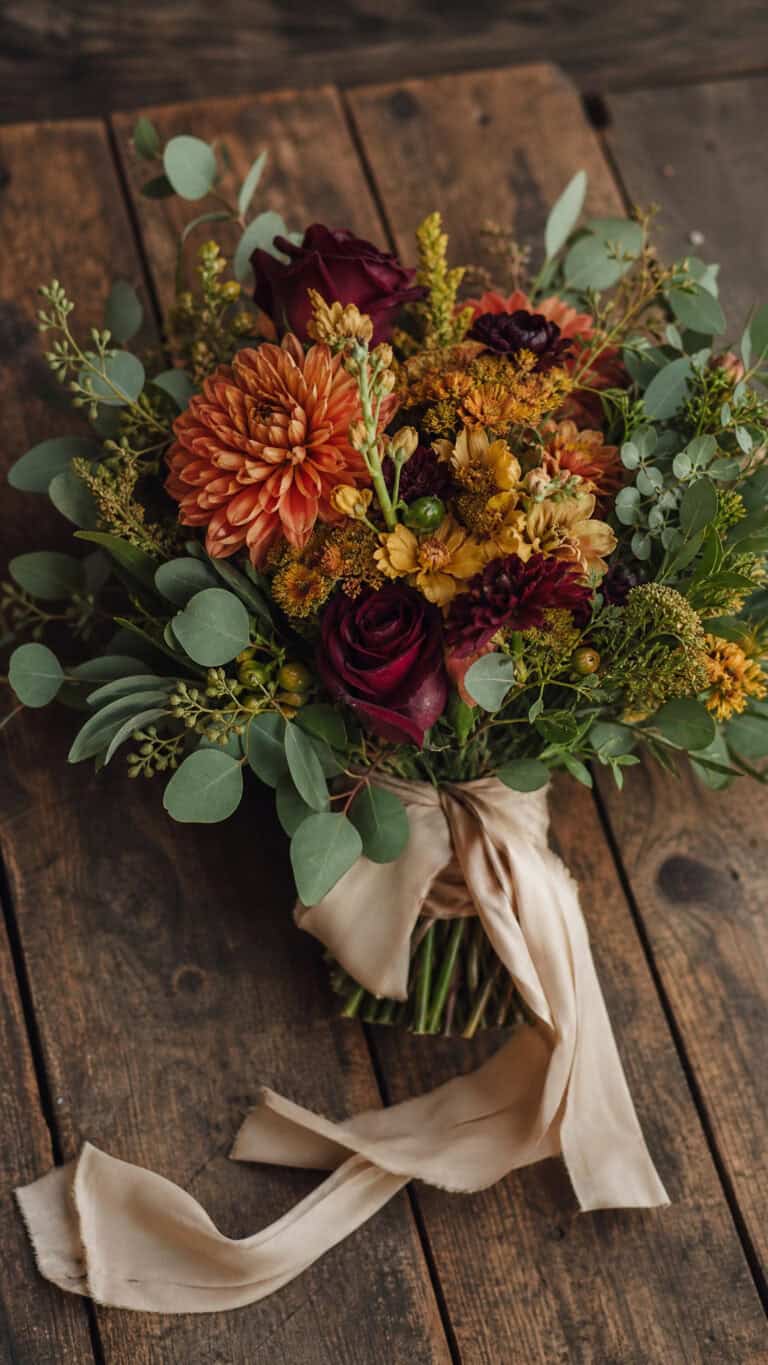
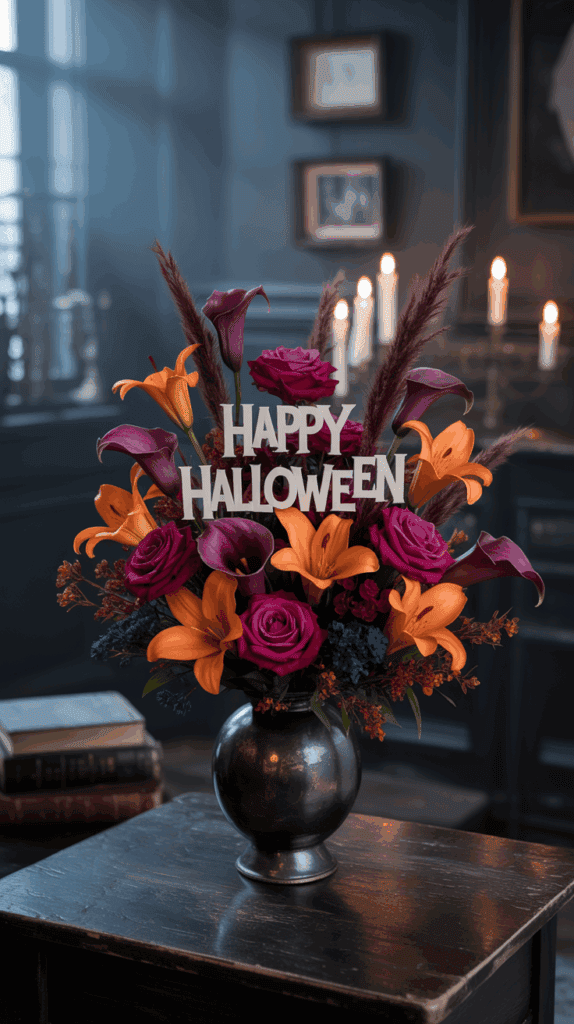
- Mix in moody jewel tones. Deep purples, sapphire blues, and lush burgundies look amazing against black or rust, and they’ve got that mysterious, late-fall magic. I sometimes grab purple lisianthus or burgundy dahlias for moody drama.
- Add metallics for some shine. A few gold or copper accents (think painted eucalyptus leaves or a metallic vase) make the whole bouquet look richer. My youngest even loves helping dab gold paint onto eucalyptus—so easy, and it dries fast!
- Ground everything with neutral shades. Soft white or cream flowers, pale gray foliage, and natural tan stems can calm the whole look. I always tuck in some bunny tail grass or ivory roses to help everything blend together.
If I stick to these combos, I end up with flowers that feel just right for Halloween but never cross into tacky territory. Plus, the extra shades mean the bouquet matches more rooms (not just the kitchen table). A few favorite combos I return to:
- Burnt orange, black, and burgundy
- Purple, gold, and deep green
- Black, white, and a pop of rust
Adding that twist to classic Halloween hues makes everything look extra special—almost like a gothic fairytale brought to life!
Playing With Texture: Blooms, Branches, and Berries

A pretty color palette is great, but what really makes a halloween flower bouquet stand out is playing with texture. No joke—my boys love picking out the weirdest, most interesting pieces at the store, and that’s what gives the bouquet its spooky, one-of-a-kind vibe. Here’s how I always make ours full of character:
- Eucalyptus and dark foliage. These greens add depth and that perfect “overgrown” haunted look. I layer seeded or spiral eucalyptus with dark ruscus or even purple basil for extra moodiness.
- Bold, wild shapes. Certain flowers like spider mums, scabiosa pods, or ranunculus give incredible texture. They look wild and untamed (in the best way).
- Berries and seed pods. Fresh hypericum berries, pepper berries, and even dried blackberries bring in a pop of real Halloween mischief. Sometimes I’ll even use little crabapples!
- Feathers and branches. Yes, you read that right—feathers and skinny, twisty sticks make a bouquet look straight out of a witchy storybook. The kids love helping find cool branches in the backyard.
- Herbs for a twist. Rosemary, sage, or bay leaves make everything smell amazing, plus they hold up well. Fresh herbs soften up the look and add a gorgeous natural touch.
When I grab a mix of these textures, arranging a bouquet feels a bit like putting together a mini haunted forest. It’s simple, fun, and each bloom or branch adds a little personality. And honestly? Everyone who comes over says they want to try it too. This is one of those family projects that actually feels magical, no tricks or cheesy treats in sight!
Selecting and Preparing Your Flowers and Supplies
Once I had the color palette in mind for my halloween flower bouquet, it was time to track down the perfect blooms and get everything ready for assembly. With three kids in tow, I know how important it is to find gorgeous flowers without blowing my whole holiday budget. Prepping everything ahead of time also keeps the whole project running smoothly—especially when little helpers want to join in! Let’s talk about where I get my blooms, plus all the tools and extras that make bouquet-building straightforward and stress-free.
Where to Find the Best Blooms (on a Budget!)
Every year, I’m amazed at how easy it can be to score beautiful flowers without spending a fortune. You really don’t have to buy fancy arrangements, and honestly, the hunt is half the fun! Here’s how I find the best options for a halloween flower bouquet, saving both money and time:
Some of my favorite affordable flower sources:
- Grocery store bouquets: The floral section at my local grocery store is a lifesaver. They almost always have fresh mixed bunches in all sorts of fun fall colors. I pick through the buckets for bunches with rich shades like deep burgundy, orange, and purple.
- Warehouse stores: Places like Costco or Sam’s Club carry larger bundles at a great price. If you need enough flowers for a few arrangements or you want some leftovers for the kids’ room, this is the spot.
- Farmers markets: Local markets are full of surprises! I always find more unique flowers here, like quirky grasses or moody dark dahlias, plus friendly growers happy to chat about what’s in season.
- Local flower farms: Some towns have “cut your own” farms, which are always a highlight for the boys. It’s an adventure and the flowers stay fresh much longer.
- Discount and dollar stores: You’d be shocked at how often I spot handy extras—like dried grasses or faux stems—that can add amazing texture to bouquets for pennies.
- Backyard finds: The backyard or neighborhood walks are treasure hunts! A few snips of herbs or twisty branches from the yard add a wild touch for free.
Pro tip: For a playful Halloween vibe, I watch for anything a little different—thistle, spiky grasses, or even wild seed pods. The kids always pick out the “weirdest” flowers and somehow, those oddballs become the bouquet’s star.
Buying tips I stick to:
- Look for the healthiest flowers with firm stems and petals that aren’t droopy or brown.
- Choose a mix of sizes—think big statement blooms, smaller “filler” flowers, and greenery for balance.
- Don’t worry if some of your finds are a bit unexpected—quirky bits and wild greens make everything special!
Tools and Extras That Make a Difference

Having the right supplies makes assembling a halloween flower bouquet twice as simple and way more fun (especially if you’ve got little hands eager to help). I always set up everything before we start, like my own at-home flower shop on the kitchen counter.
Here’s what I keep on hand:
- Sharp scissors or floral shears. Good scissors make all the difference when cutting stems. Dull blades squish flowers and make cleanup messier, so I stick with a simple kitchen pair just for flowers.
- Floral tape. Inexpensive and easy to use, floral tape helps shape bouquets and keep little clusters in place while arranging.
- Vase or mason jar. A simple glass vase, cute jar, or even a coffee mug works. For a Halloween spark, I sometimes wrap a vase with black ribbon or pop in a gold-painted can.
- Twine, ribbon, or raffia. Tying off the bouquet with a soft ribbon or jute string gives it a polished look. The boys love picking out the spools!
- Water and plant food. Mixing up the included flower food helps your blooms last longer. If I run out, a drop of lemon juice and sugar in the vase does the trick.
- Bucket for stem trimming. Having a bucket nearby for snipped ends keeps the mess off my counters. It’s the kind of little thing that’s a big help.
Kid-friendly supplies I rely on:
- Child-safe scissors. If your kids want to help with the greenery, blunt-tipped scissors are perfect. My youngest loves “helping” trim eucalyptus.
- Plastic or unbreakable vases. For little ones, I stick with a plastic cup or small mason jar so there’s no risk of broken glass.
- Aprons or old T-shirts. Making bouquets is fun but a little messy! Old shirts or easy aprons keep the stains off their clothes.
- Easy clean-up wipes. A pack of damp cloths makes cleaning sticky fingers or flower sap quick and painless.
Before we start arranging, I lay out all the flowers, do a quick trim on the stems, and remove any extra leaves that would sit below the water line (this keeps the water fresh, trust me). Then, we’re ready to build a Halloween bouquet without any fuss, just pure fun and family time!
Step-by-Step: Creating Your Chic Halloween Flower Bouquet

Building a chic halloween flower bouquet that looks stylish (and not at all cheesy) is totally possible, even with a house full of busy kids. I love taking a few quiet minutes—okay, sometimes just five!—to put together a centerpiece that feels personal and festive but still modern. The trick is starting simple, adding layers, and giving yourself permission to have some fun. If you’re a mom who wants beautiful Halloween touches without the mess or plastic, this process is about to be your new go-to.
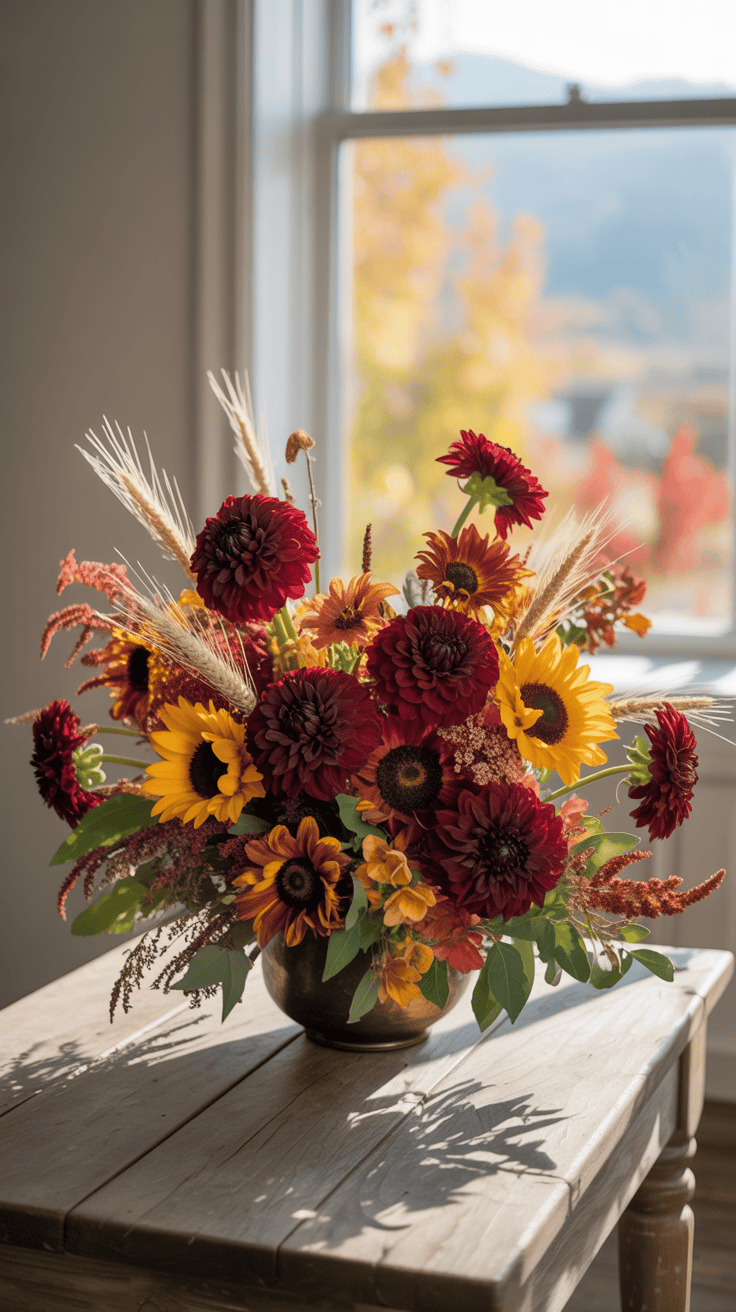
Building Your Base: Structure for Lasting Style
I always start my halloween flower bouquet by building a good base. Think of this as laying the bones for your arrangement. Moms, this part is a breeze and honestly, it makes everything so much easier when you get to the fun flower part.
Here’s how I build a strong and stylish foundation:
- Pick your greens or branches first. Eucalyptus, olive branches, or even foraged twigs from the yard work great.
- Remove any leaves that will sit below the water. This keeps things fresh and stops the dreaded funk!
- Place your greens in a crisscross pattern inside your vase or jar. This creates a nest for your flowers to rest in later. If you’re using a wide container, start by leaning the tallest branches toward the outer edges.
- Don’t stress about perfection. The base should look loose and a little wild, like the backdrop for a storybook garden. That’s part of the magic!
If you have young helpers, let them pick the branches or leaves. My boys love bringing in floppy ferns and anything that “looks spooky.” Even if it’s just a bundle of backyard sticks, the key is that the base feels full and sturdy. It really helps flowers stand upright and makes the whole bouquet look bigger and more lush—like you spent a lot more time (and money) than you did!
Arranging Like a Pro: Layering and Balancing Details
Here’s where the bouquet gets its cool, polished look. Adding layers and balancing different shapes gives the halloween flower bouquet its snap, while still being totally doable for any mom at home. I promise, you don’t need a florist’s touch, just a little patience and an eye for what looks good to you!
My go-to steps for arranging flowers:
- Add your largest, boldest blooms first. Place these slightly off-center. The bouquet should look interesting from every angle.
- Layer in medium-sized flowers. Tuck these next to the big blooms, letting some peek out higher or lower. This helps keep things from looking flat or too matchy-matchy.
- Work in texture. Slide in unique bits like seed pods, thistle, or wild grasses between the main flowers. These add depth and a sense of movement.
- Fill empty spots with smaller accents. Little flowers, berries, or even twisty dried stems can go wherever the bouquet needs to feel fuller.
- Step back, spin it around. I like to set the bouquet on the table, take a step away, and check from all sides. Adjust anything that looks off, then return a few stems until it feels just right.
If something looks too heavy on one side, I just move a stem or two. The magic is all in the tweaking! A balanced mix of flower heights and shapes always stands out. Wild and free is usually my favorite style, and it plays so well for Halloween.
Truly, this part is easy to personalize. Some weeks our bouquets look moody and dramatic, with big purple dahlias and dusty greenery. Other times, they feel light and playful, with orange marigolds and soft bunny tails. No rules—just balance and a mix of textures!
The Little Details: Adding Personal (and Kid) Flair
This is my favorite step! The little details are where your halloween flower bouquet goes from pretty to unforgettable. Who says Halloween can’t have a little personality? Around here, it’s all about adding a clever, sweet touch without slipping into silly or cheesy territory.
A few of our favorite (family-tested!) add-ons:
- Tiny bats or ghosts on sticks. I pick these up at craft stores, or we make our own using black construction paper and toothpicks.
- Ribbons in rich fall colors. Velvet, satin, or even a piece of lace tied around the vase is simple and pretty. I let the kids pick, and sometimes we braid in two colors for fun.
- Hand-drawn tags. I ask the boys to draw a small pumpkin face or write “Happy Halloween” on a tag, then attach it to the bouquet. It feels personal and makes them proud!
- Mini pumpkins or gourds at the base. Set a few around the vase for an instant tablescape that looks pulled together.
- Feathers or glittery accents. If we’re feeling fancy (or the kids found the craft drawer), I stick in a few black feathers or a single gold stem for a touch of magic.
The key is keeping these extras sweet and not going overboard. Adding a pop of family creativity is what gives your bouquet a heart; it feels special and unique, not like you copied something off a clearance shelf. Plus, the kids love seeing their handiwork right in the center of the table!
With these steps, my halloween flower bouquet always ends up fun, stylish, and anything but ordinary. Family moments, a little mess, a lot of love, and not a single plastic spider in sight!
Displaying and Enjoying Your Halloween Flower Bouquet
Once your halloween flower bouquet is set and looking fabulous, the real fun begins! There’s just something magical about seeing it in the perfect spot, where it catches the light and everyone actually notices. I’ve learned a thing or two about how to make a bouquet last (which is a must in a house full of rowdy boys). Let’s talk about where to show off your masterpiece and how to keep those blooms looking fresh all month—without constant fuss.
Choosing the Perfect Spot (Away from Curious Littles!)
Nothing ruins a beautiful bouquet quicker than sticky fingers or a ninja leap from the family cat. I always try to pick a display spot that feels fancy, but also keeps my halloween flower bouquet out of the line of fire. Let’s be honest, with kids running around, vase safety is just as important as style!
Here are my favorite safe (and stylish!) display spots:
- Entryway table: This spot gets tons of traffic, so your bouquet greets everyone who comes in. Set the vase back from the edge and away from kid-height shoes or backpacks.
- Dining table centerpiece: Looks grand at family meals! If your kids love to help set the table, place the bouquet on a tray or cake stand—they’ll see it, but can’t knock it over as easily.
- Kitchen island: The heart of the home! Just keep the bouquet away from busy prep corners or places you put hot dishes.
- Living room mantel: High up and safe. The boys admire our flowers from a distance, and I don’t worry about spills or flying Nerf darts.
- Bedroom dresser: Brightens up your morning and adds a hint of spooky charm where little feet aren’t often found.
Pro tips for parents:
- If I’m really worried about spills, I use heavy ceramic or squat vases. Lower, wide jars are a lot harder to tip.
- For high-traffic areas, I sometimes put the bouquet inside a larger basket. It hides the water and gives the base extra stability.
- If all else fails, top the vase with a removable lid (just cut a hole for the stems) so wandering hands don’t get too curious.
You know your house and your kids best! Pick a spot that lets everyone enjoy your bouquet, but keeps it looking beautiful for more than one afternoon.
Extending the Magic: Caring for Your Creation
There’s nothing sadder than watching fresh flowers wilt after a few days—especially after all the work that goes into a halloween flower bouquet! I have a few super simple tricks to keep blooms pretty and perky, even in a busy home.
Here’s my go-to flower care routine:
- Change the water every two days. Fresh water is the magic ingredient. If the water looks cloudy or smells, swap it right away.
- Trim stems a little bit each time. Use sharp scissors and cut about half an inch off at a slant. This helps flowers soak up more water.
- Pull out any sad or droopy blooms. A quick refresh every few days keeps everything looking intentional and tidy.
- Keep away from direct sunlight and hot spots. Flowers wilt fast near sunny windows or on top of heating vents.
- Move away from fruit bowls. Ripening fruit releases a gas (called ethylene) that makes flowers age quicker. Who knew?
- Add plant food or make your own. Sometimes I mix a pinch of sugar and a drop of bleach in the water if I run out of flower food. My grandma’s trick really works!
If you want the bouquet to stay fresh all month (or as long as possible):
- Mist the petals and leaves lightly with water. This feels fancy and keeps things hydrated.
- Swap out a bloom or two mid-month. If you notice something fading, tuck in a few new stems from the grocery store or yard.
- Remove extra leaves below the water line. This slows down any smell and keeps water clear.
Don’t forget, some flowers last longer than others. I’ve had eucalyptus, berries, and dried grasses look good for weeks. When the main blooms tire out, just snip a fresh dahlia or marigold and pop it in. That way, your halloween flower bouquet keeps the vibe going strong all season!
A little care goes a long way. With just ten minutes every few days, your bouquet stays cheerful, spooky, and totally gorgeous—even in the wild joy of a family home.
Conclusion
Making a halloween flower bouquet that feels grown-up and fun is not only possible, it’s a total joy—especially when the kids get to help out. All it takes is some bold colors, a few quirky textures, and the freedom to get a little creative. There’s no single “right” way to do this, and your own ideas are what bring it to life.
If you’ve ever felt stuck with decorations that don’t fit your style, now’s the time to switch things up. You don’t need a florist or a big budget—just a spark of inspiration and a bit of family teamwork. Moms, you’ve got this! Celebrate the season with something you’re proud to show off, and let your halloween flower bouquet set the stage for the happiest fall memories.
Hope you and your family have the best, most festive Halloween yet! Thanks for spending a little time here with me, and I’d love to hear about the bouquets you make with your own crew!
This post may contain affiliate links. Read the full disclosure here.