New Year Centerpieces Ideas That Pop on Any Budget
I’m kicking off the year with fresh inspiration and real-life new year centerpieces ideas that work for busy families. As a mom of three young boys, I need decor that survives snack time, nerf battles, and sticky fingers. My goal is simple, chic looks that are affordable, kid-proof, and quick to set up. If that sounds like your kind of party, you’re in the right place!
I always shop my house first. Trays, bowls, vases, and even a cake stand can be stars. Then I hit the dollar store or a thrift shop for the fun fillers.
Simple materials do the heavy lifting, and they look great. I reach for mirrors to bounce light, ribbon for color, LED lights for safe sparkle, ornaments for shine, and a bit of greenery for freshness. Grocery store blooms are my secret, they make everything feel pulled together.
I keep setups fast and safe. No messy glitter, no lit candles near little hands, and no breakables at kid height. It’s all about sturdy, pretty, and easy to clean.
Here’s what you’ll find inside, clear budget tiers for every price point, smart kid-safe swaps for glass and flame, and last-minute builds you can pull off in 10 minutes. Let’s make your table pop without stress!

Set the Vibe: Color Themes, Table Fit, and What I Already Own

Before I build anything, I set the mood. I think about color, table size, and what I already have at home. That way my new year centerpieces ideas stay fun, simple, and easy on the budget.
Choose a Color Story That Feels Like New Year

Color sets the party tone in seconds. I keep it tight, just 2 or 3 main colors, so the table looks clean, not busy. Then I echo the colors with ribbon, napkins, and a few ornaments.
- Black and gold: Classic, bold, and rich. Black fades in low light so the gold pops like fireworks. It also photographs beautifully next to candlelight or warm LEDs.
- Silver and white: Bright, crisp, and airy. White reflects any little twinkle light. Silver adds cool shine that looks great in nighttime photos.
- Jewel tones: Think emerald, sapphire, and ruby. These deep colors glow under soft lamps and string lights. They make even simple items look fancy.
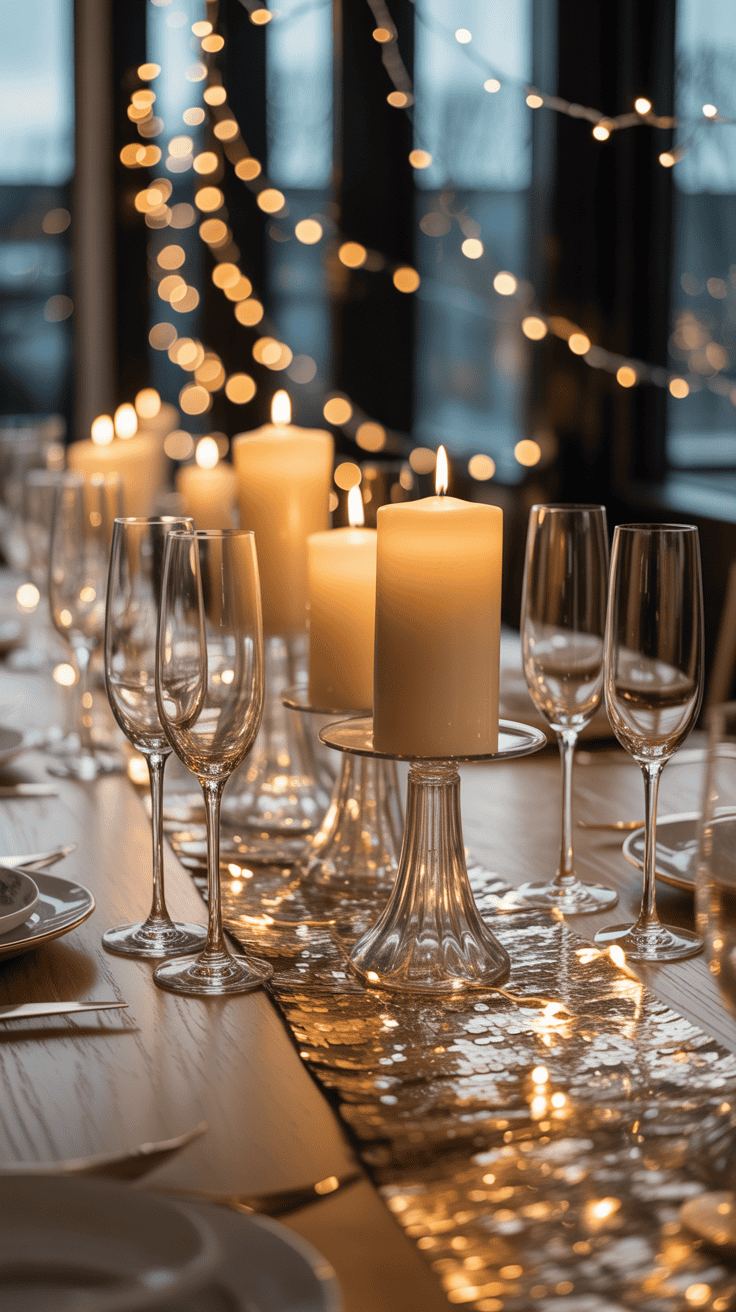
- Champagne neutrals: Soft beige, cream, and metallic champagne. Sophisticated and calm. The shimmer keeps photos from looking flat.
- Kid favorite pop: I add a small hit of electric blue. It feels fun and wintery. One ribbon or a few ornaments are enough to make the boys cheer.
I repeat the palette with easy pieces I already own. Ribbon ties on napkins, colored ornaments in jars, and napkins stacked in a simple pattern. It is quick and it pulls the whole table together.
Match the Focal Point to Your Table Shape and Size

Scale matters. I pick a focal setup that fits my table so guests have room to eat and chat.
Here is a quick guide I use on busy nights.
| Table shape | Go-to focal point | Height guide | Spacing cue |
|---|---|---|---|
| Round | One strong cluster centered | Balanced heights, tallest in middle under 12 inches | Leave 16 to 18 inches for each place setting |
| Rectangle | Low runner with repeat elements every 12 inches | Keep low through center line | Anchor ends with slightly taller pieces |
| Narrow | Keep everything under eye level | Under 12 inches across the span | Use slim pieces and skip wide bowls |
| Coffee table | One tray to contain everything | Low and layered | Leave space for remotes and snack bowls |
- Round table: I build one clustered focal point. A sturdy vase or candle holder in the center, then shorter items around it. The heights feel balanced and the table stays open for plates.
- Rectangle table: I run a low line. Think garland, jars, or mini vases repeated every 12 inches. It looks full and still leaves space for serving.
- Narrow table: I keep it sleek. I aim for under eye level so we can see each other. Slim cylinders and flat greenery work well.
- Coffee table: I use a tray. It corrals everything, which means fast cleanup when the boys land with snacks.
I always keep 16 to 18 inches free for plates and cups. That spacing saves me from juggling elbows and spills.
Shop My House First

Before I buy anything, I raid my cabinets. I lay items on the counter and group them by color. Then I try a quick mock-up right there. If it looks good on the counter, it will look good on the table.
Items I grab first:
- Cake stands
- Cutting boards
- Woven baskets
- Trays and mirrors
- Clear jars and vases
- Ribbon and twine
- Leftover ornaments
- String lights and LED candles
- Fresh or faux greenery
- Real candles if kids will not reach them
- Wrapping paper scraps for runners or accent mats
How I build from stash:
- Pick 2 to 3 colors from what I have. Example, silver, white, and electric blue.
- Place a base, like a cutting board, mirror, or tray.
- Add height with a cake stand or stacked books.
- Fill jars with ornaments or tealights. Tuck greenery around the base.
- Finish with ribbon and a few shiny pieces near the edge.
Tip I swear by, odd numbers look best. Groups of 3 or 5 trick the eye into seeing balance without feeling stiff.
Add Height and Balance Without Blocking Faces

I want sparkle, not barriers. We still need eye contact for family jokes and kid stories.
- Safe heights: I keep most pieces under 12 inches in the center. If I want height, I use tall, slender stems at the ends of the table where they do not block anyone.
- Stagger levels: I slide books or upside-down bowls under a cloth or runner. It lifts a few items without adding clutter.
- Shine low: I tuck small shiny bits near the table surface, like votives, mirrored coasters, or tiny ornaments. That low sparkle makes photos look rich and warm.
- Do the seat test: I sit where a guest would sit and check the sightline. If I cannot see faces with a relaxed posture, something gets moved or lowered.
These small choices keep the table beautiful and practical. The room glows, the kids can reach the cookies, and nobody hides behind a centerpiece. Perfect party win!
Budget Tiers That Wow: Under $10, Under $25, Under $50

Big shine on a small budget is my happy place, and these builds prove it. I keep supplies simple, light safe, and kid friendly. Here are my favorite new year centerpieces ideas that stretch every dollar without looking cheap. Pick a tier, grab what you have, and let the glow do the work!
Under $10: One Bold Focal and Simple Sparkle

I love a single star piece with tiny accents. It looks intentional and it sets a party mood in minutes.
What I use:
- Thrifted glass vase or a clean jar
- A handful of ornaments
- Ribbon bow
- Confetti or cut foil paper
- 1 to 2 LED tea lights
How I build it:
- Drop ornaments into the vase, then tuck in one LED tea light. I hide it near the center so the glow feels soft.
- Tie a ribbon bow at the neck of the vase. Keep tails short so little hands are not tempted to yank.
- Sprinkle confetti or tiny foil squares around the base. A light scatter is enough.
- If the table needs more shine, set one extra LED beside the vase.
Why it works:
- Shine and light do the heavy lifting. The vase becomes a little lantern.
- The look is clean, not cluttered, which reads chic in photos.
- It packs up fast, which is golden when bedtime hits.
Sources I raid: dollar store, thrift shop, my holiday bin.
Optional upgrade:
- Slide a small mirror tile under the vase for instant glow. It doubles the light and makes the base feel finished.
Best tips:
- Stick to one color family for the ornaments. Silver and white, or black and gold, both look luxe.
- Use plastic ornaments if kids help. Less stress, more fun!
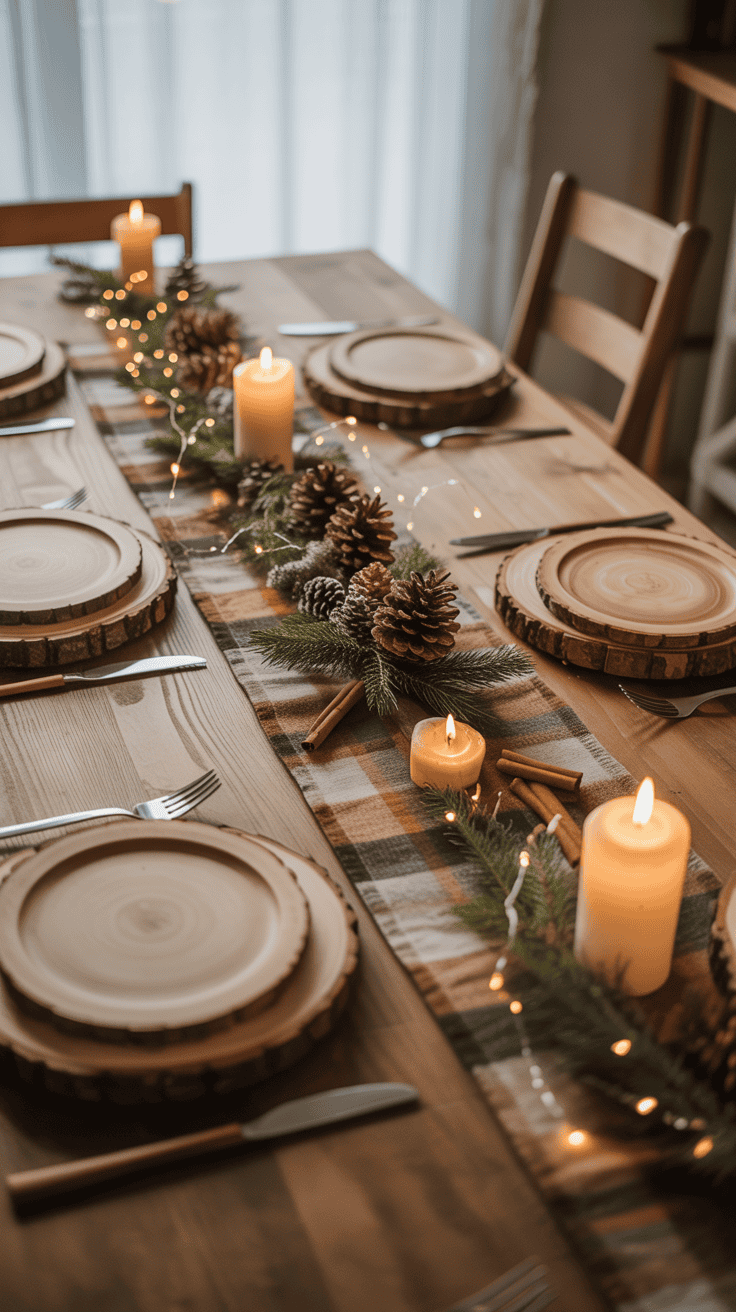
Under $25: Layered Tray With Greenery and Glow

This is my go-to for a rectangle table. It feels full, but guests still have space for plates and snacks.
What I use:
- Neutral tray or cutting board base
- Faux or fresh greenery
- 3 LED tea lights
- Metallic picks or mini disco balls
- Slim vase with a single market bloom
How I build it:
- Place the tray in the center. Add a light drape of greenery, keeping the edges tidy.
- Nestle three LEDs in a zigzag line, not a straight row. It looks natural.
- Tuck in metallic picks or a few mini disco balls for sparkle.
- Add the slim vase with one striking bloom, like a white mum or a rose. One stem is enough.
- Adjust heights so the vase is the tallest, with everything else low and glowy.
Why it works:
- Layered textures make it feel expensive, even when it is under $25.
- The single bloom reads modern and keeps the footprint small.
- It is easy to lift the whole tray if the kids show up with board games.
Where I find it: dollar store for LEDs and picks, grocery floral for the bloom, craft aisle for greenery.
Upgrade:
- Slide a satin ribbon runner under the tray. Pick a color from your palette for pop.
Quick styling notes:
- Choose greenery that fits your table width. Trim pieces that stick out.
- If you use fresh greens, add a damp paper towel under the stems to keep them perky.
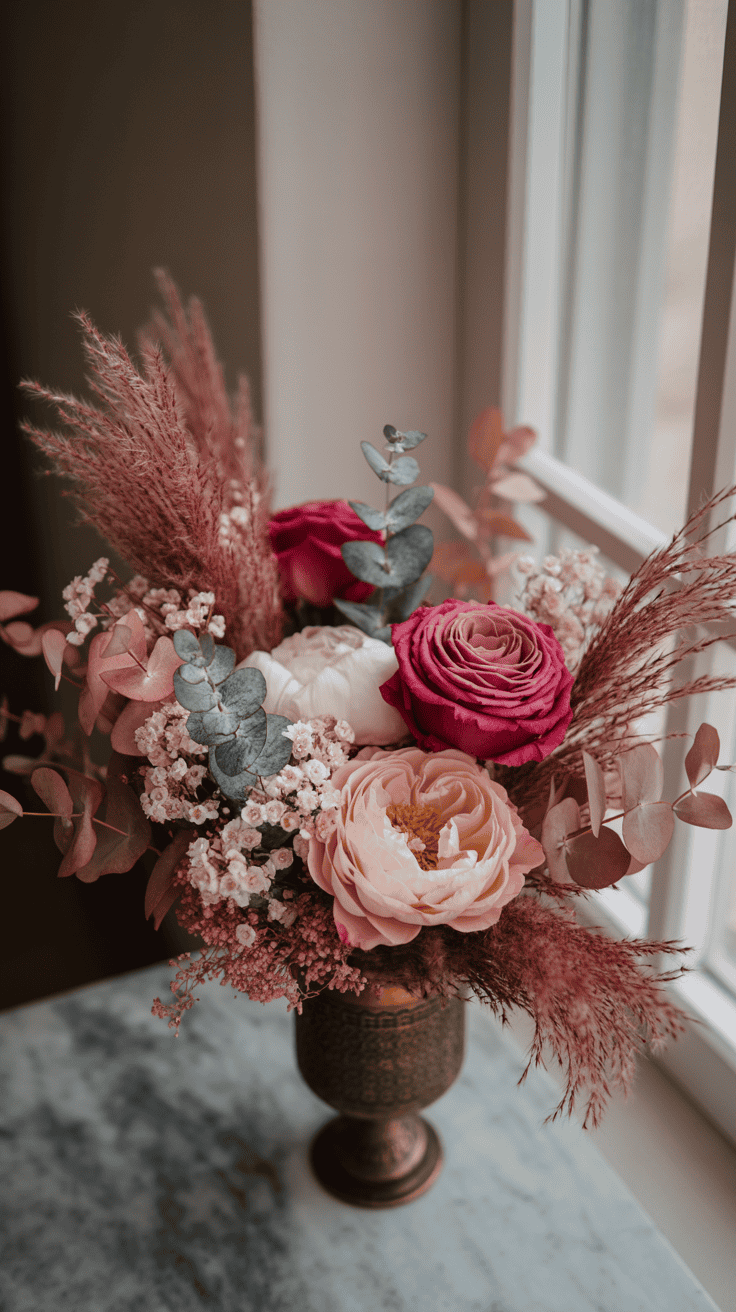
Under $50: Statement Runner With Mirrors and Blooms

This one is party-level pretty. It looks custom, but it is still practical with kids around.
What I use:
- Runner of mirror tiles or one long thrifted mirror
- 5 to 7 LED tea lights
- Faux eucalyptus or fresh greens
- Two medium vases with mixed grocery blooms
- Scattered ornaments for shine
How I build it:
- Center the mirror runner on the table. Wipe it clean so the light bounces.
- Lay a soft line of greenery down the middle. Keep the edges low so faces stay visible.
- Place tea lights every 8 to 12 inches. Stagger them so the glow feels even.
- Add two vases, one near each third of the table. Fill with a mix of blooms, like mums, alstroemeria, and a few roses.
- Scatter small ornaments along the mirror, keeping clusters tighter near the vases.
Why it works:
- Mirrors multiply light, so the whole table shimmers.
- Repeating elements, like vases and LEDs, makes it feel styled, not random.
- Grocery blooms stretch the budget and still look rich.
Sources I love: thrift store mirrors, grocery floral deals, dollar store lights and ornaments.
Upgrade:
- Add one or two small disco balls near the vases. The sparkle is playful and so fun in photos.
Easy color wins:
- White and silver for crisp winter shine.
- Champagne, cream, and soft gold for a warm glow.
- Jewel tones if you want drama without fuss.
Where I Save vs. Splurge

I think about cost per use and storage before I buy anything new. If it can work for birthdays and graduations too, it is a yes.
Save on:
- Ornaments: Plastic looks great and stores well in a shoe box.
- Ribbon: Buy by the spool. One spool lasts several parties.
- Faux greenery: Pick bendable stems that can be shaped for trays or runners.
- Tea lights: LED multipacks are perfect for kid nights.
- Trays: Neutral wood or white plastic trays hold up and clean fast.
Splurge a little on:
- A good mirror base: A long thrifted mirror or a set of tiles you will use all year.
- Fairy lights: One quality strand with a hidden battery box gives a soft, even glow.
- Two versatile vases: Medium height, clear or smoked glass. They work for every season.
Cost-per-use mindset:
- A $20 mirror used for New Year, birthdays, and graduations, used five times in a year, feels like $4 per party. That is a smart buy.
- Two $12 vases are my workhorses. I use them for school events, family dinners, and even on the mantel.
Storage tips that save sanity:
- Wrap mirrors in a towel and slide behind the sideboard.
- Coil fairy lights into a zip bag with the batteries removed.
- Keep ornaments by color in clear shoebox bins, one bin per color family.
- Store ribbons on a pants hanger to prevent wrinkles.
- Tuck greenery into a tall gift bag so stems do not get crushed.
Small swaps that stretch the pieces:
- Swap ornaments for mini flags in summer, or paper stars for birthdays.
- Replace winter greens with eucalyptus or lemon leaf for spring.
- Change the ribbon color and it feels brand new.
Each tier makes the table shine without stress. Pick one that fits your night, pull from your stash first, then fill in gaps. You will get style, glow, and happy faces at dinner, which is always the win!
Dollar Store and Thrift Glow-Ups That Look Luxe

I love a good bargain that looks fancy. These tricks turn simple finds into centerpieces that feel special, and they work with busy family life. If you want fast, pretty, and practical new year centerpieces ideas, this is the sweet spot!
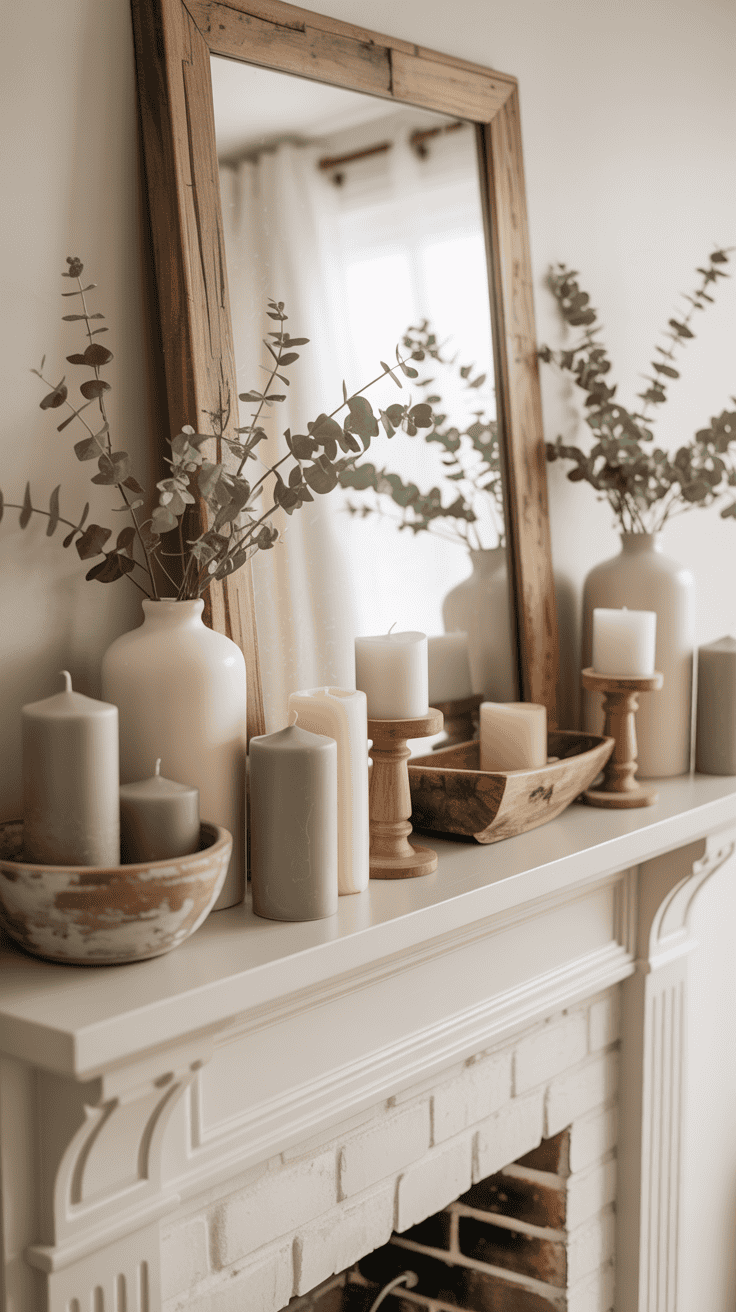
Mirrors, Vases, and Glassware That Fake Luxury

Glass and mirrors add instant shine, even if the pieces cost a dollar. I grab small round mirrors, cylinder vases, and clear jars, then style them like a high-end set.
- Stack trick: Slip a smaller jar inside a larger one to hide stems and wires. It keeps the look clean.
- Mirror base: Slide a round mirror under candles or a vase for glow. It doubles the light, which is so pretty at night.
- Cluster in threes: Group three sizes, tallest in the center, to add depth without clutter.
- Shine tip: Wipe glass with vinegar for a streak-free finish. I do a quick polish right before guests arrive.
Kid bonus, plastic ornaments and LED tea lights keep everything safe and bright.
Spray Paint and Rub-on Metallics for Instant Glam
A $2 frame can look like boutique decor with a little metallic. I keep a can of gold or silver spray paint in the garage for quick fixes.
- Light coats outdoors, then let items dry fully. Pinecones, thrifted figurines, and old frames all take paint well.
- Rub-on wax adds soft shine on raised details. It looks antique without mess.
- No-paint option: Wrap items with foil or metallic contact paper. It is fast and renter friendly.
- Temporary holds: Use glue dots to secure pieces on trays or mirrors. They peel off cleanly.
I hand my boys a drop cloth and let them place the painted pieces. They love the job, and it saves me time.
Faux Florals, Picks, and Disco Balls That Catch Light

I build texture so the table looks full, not fussy. Faux stems are my secret for late-night setups.
- Choose mixed textures like eucalyptus, berries, and a few glittered picks.
- Tuck mini disco balls near tea lights to bounce sparkle across the table.
- Keep the palette simple. Two or three colors feel cohesive and calm.
- Add one surprise texture, like a velvet ribbon or a clip of tinsel. That little twist makes it fun.
Example, silver and white stems, a soft champagne ribbon, and two mini disco balls by the vase. So easy and so pretty!
Smart Sourcing: Thrift Stores and Buy Nothing
The best pieces are often secondhand. I check the thrift aisle for plain glass, candleholders, and mirrors. Then I peek at Buy Nothing or Marketplace for free or cheap lots of ornaments and vases.
- Always wash and sanitize. I run glassware through a hot cycle or soak with vinegar and soap.
- Do not worry about matching shapes. Shared color or metal finish makes mixed pieces look chic.
- Look for sturdy items that can live on a tray. Quick cleanup is key when dessert hits.
I group finds by tone, like all silver bits together. It looks planned, it shines in photos, and it fits any budget!
Kid-Proof and Pet-Safe Centerpieces That Still Feel Chic

I want pretty things on the table without chaos. My boys and our dog have energy to spare, so I build smart. These new year centerpieces ideas keep the glow and style, and skip the stress. Think soft light, sturdy bases, and decor that can handle sticky fingers.
I plan for bumps, tugs, and curious paws. I also plan for quick cleanup, because bedtime comes fast. Here is how I get the cozy look and keep it safe.
No-Flame Glow That Feels Like Candlelight

I still want that candle vibe, just without the flame. LEDs save the day and look lovely at night.
- LED tea lights: I scatter a few inside jars and around trays. Warm white reads soft and cozy. Cool white can feel harsh in photos.
- Fairy lights in jars: I drop a small strand into a clear jar or vase. I use warm white bulbs, then swirl the wire for even light.
- Battery lanterns: Metal or wood lanterns give structure. I tuck an LED inside for a gentle glow that pets ignore.
Smart tricks that make a difference:
- Hide battery packs under folded napkins, inside bowls, or behind greenery. Keep the switch facing up for quick access.
- Add a timer feature so lights turn on at dusk. My favorite setting runs 6 hours, then off by bedtime. No extra steps while I wrangle dishes.
- Mix heights with safe items only. Low jars, short lanterns, and tiny mirrors keep light bouncing without blocking faces.
Example I love: one medium jar with a fairy light strand, flanked by two small jars with tea lights. All warm white. Battery packs tucked under a napkin stack. So easy and so pretty!
Shatter-Free Bases That Stay Put

If it can fall, it will. I keep bases sturdy so the whole setup stays in place when little elbows fly.
- Wood boards: Cutting boards or bread boards make a solid anchor. They also look warm in photos.
- Woven baskets: Use shallow baskets as trays. They grip items and hide cords.
- Metal trays: Lightweight, wipeable, and strong. Great for quick lifts when the dog zooms past.
- Plastic chargers: Cheap, flat, and unbreakable. Layer two for a wider base.
Placement and balance tips:
- Museum putty: Place tiny dots under slippery items. Jars stay put, even if nudged.
- Weight near the center: Keep heavier pieces in the middle. Place soft items, like ribbon or faux greenery, near the edges.
- Skip tall glass near edges: Save it for a mantel or sideboard. The table edges are a danger zone during dinner.
Quick test I use: I tap the tray with two fingers. If anything wobbles, it gets putty or it gets moved.
Edible and Interactive Centerpieces

Snacks as decor are a hit with my boys. Guests love it too. I keep it tidy with a simple rule.
- Fill jars with gold-wrapped candies, marshmallows, or citrus. Lemons and clementines look fresh and smell great.
- Fruit tower: Stack grapes, berries, and pineapple chunks on skewers. Build the tower on a foam cone or a halved apple for grip.
- Cupcake toppers: Add little flags that say 2026. They bring the New Year vibe without extra clutter.
House rules that keep it calm:
- Eyes first, hands after dinner. Everyone can look, then we pass the snacks when plates are clear.
- Snack bowls away from the candle area. I set a small bowl off to the side for grab-and-go bites. No bumping into the lights.
Simple build that works:
- One wide basket lined with a napkin.
- Three clear jars filled with citrus, marshmallows, and wrapped chocolate.
- A mini fruit skewer stack in the center.
- Two 2026 toppers tucked in for fun.
It looks playful, it photographs well, and nothing breaks if a jar tips.
Spill and Cleanup Tips for Real Life

Spills happen. I plan the reset so I can smile and move on.
- Washable runners: I use cotton or polyester runners I can toss in the wash. Darker colors hide little drips until cleanup.
- Small bin under the table: I keep wipes, extra napkins, and a spare runner inside. I can swap and reset in one minute.
- Glitter-free picks: Loose glitter sticks to everything. I use large sequin confetti instead. It sweeps fast and still sparkles.
- Coasters and napkins within reach: One coaster per glass near the centerpiece area catches drips before they spread.
Fast reset plan I swear by:
- Lift the tray off the table to clear space.
- Blot with a towel, swap the runner, and wipe the tray.
- Set the tray back and fluff greenery. Done!
A pretty table should not make you nervous. With soft light, sturdy bases, and an easy cleanup plan, your setup stays chic and safe. Your kids and pets can be themselves, and you still get the glow. That is the win!
10-Minute New Year Centerpieces for Last-Minute Hosts

When guests text that they are five minutes away, I lean on fast new year centerpieces ideas that still look intentional. These take almost no prep, use simple supplies, and hold up to kids, snacks, and a busy night. Quick, pretty, and stress-free, which is exactly what I need with three boys racing around!
Champagne Bottle Vases With Ribbon or Tinsel
This one looks fancy, but it is so simple. I grab an empty bottle from the recycle bin, or a full one we plan to chill later, and dress it up.
- Remove labels, or wrap the bottle in black paper and tape the seam at the back.
- Tie a satin ribbon snug around the neck. A neat bow makes it feel finished.
- Pop in a single stem, like a white mum or eucalyptus, or use a sparkler pick for shine.
- Set the bottle on a mirror tile and place two tea lights beside it.
- Slide the trio down a narrow table. It reads sleek and leaves plenty of plate space.
Why it works:
- One tall focal, two tiny lights, and a reflective base do the heavy lifting.
- The slim footprint keeps chatter flowing across the table.
- You can make two or three bottles in minutes and space them evenly.
Styling tips:
- Stick to one ribbon color per table for a clean look.
- If little hands will touch, swap glass tea lights for LED tea lights.
Balloon Cluster Centerpiece With Weighted Base

Balloons feel festive without taking over the table. I keep the palette tight and the shape tidy.
- Inflate 5 to 7 mini balloons in one color family, like silver, white, and smoke.
- Tie the balloon ribbons together, then secure them to a small weight.
- Hide the weight in a low bowl filled with ornaments or tinsel.
- Nestle a few mini disco balls around the base for extra sparkle.
- Place the bowl at the center. Keep the balloon height above eye level so faces are clear.
Why it works:
- Tall, light, and safe. No blocked views, and it looks great in photos.
- The filled bowl looks finished and keeps the weight out of sight.
- Easy to move if you need space for dessert later.
Quick wins:
- Use a wrapped bag of rice as the weight if you are in a pinch.
- Trim ribbon tails so they do not dangle into plates.
Confetti Runner With Mirror Tiles and Tea Lights
When I want instant glow down the center of the table, I build a low runner that guests can reach across easily.
- Lay mirror tiles in a straight line, edge to edge, down the center.
- Sprinkle large sequin confetti lightly across the mirrors.
- Place LED tea lights every 12 inches to create even light.
- Add a few small jars tied with ribbon bows, spaced between lights.
- Keep everything low so conversation stays easy and natural.
Why it works:
- Mirrors multiply light, so a few LEDs look like a lot.
- Large sequins read festive and sweep up fast after midnight.
- The jars add texture without stealing space from plates.
Cleanup plan:
- Lift jars first, tilt the mirror tiles, and sweep confetti into a dustpan.
- Wipe tiles with a soft cloth so they are ready for the next party.
10-Minute Pre-Party Checklist
When time is tight, I run through this quick list. It saves me every single time.
- Put batteries in and set light timers. Aim for warm white for cozy shine.
- Wipe mirrors and glass so reflections look crisp.
- Clear plate space, at least 16 inches per seat.
- Place drink coasters near the centerpiece zone to catch drips.
- Tuck away extra decor that clutters the table.
- Turn off overheads and let the table glow. Add one lamp for soft fill.
- Take a quick phone photo to check balance and sparkle. Adjust spacing if anything looks heavy on one side.
Pro tips I lean on:
- Odd numbers look balanced, so group in threes or fives.
- Keep the tallest piece centered or at the table thirds.
- Hide battery packs under napkins, inside bowls, or behind greenery.
These fast builds buy me peace and a pretty table, even on kid-chaos nights. Pick one, set it, and enjoy the party glow!

Conclusion
From a single bold vase to a mirror-lit runner, I have shared practical, pretty new year centerpieces ideas that work with real family life. The heart of it is simple, safe sparkle, sturdy bases, and pieces you can shop from home. You can impress without stress or a big spend, even with little boys zipping past the table. Keep it kid-friendly, keep it low, and let the glow do the heavy lifting.
Pick one idea and build it tonight. Set timers, clear plate space, and tuck battery packs out of sight. Snap a few photos before guests arrive, the lights look dreamy right at dusk. If you have five minutes, add ribbon. If you have ten, layer greenery on a tray. Done and pretty.
I am cheering you on, mama! You have got this. Share your favorite look or tip in the comments, I love seeing what you create. Thanks for spending part of your day with me, and happy New Year to you and your crew!
This post may contain affiliate links. Read the full disclosure here.