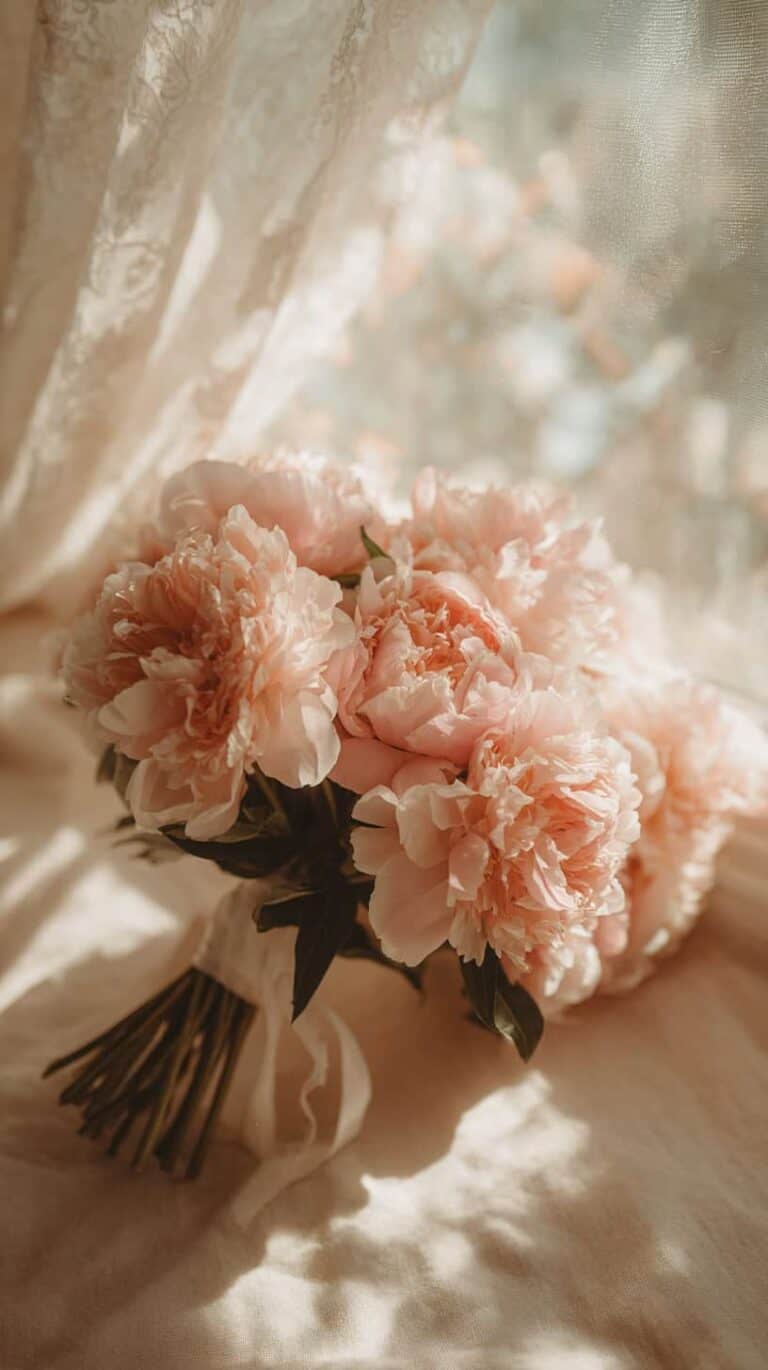
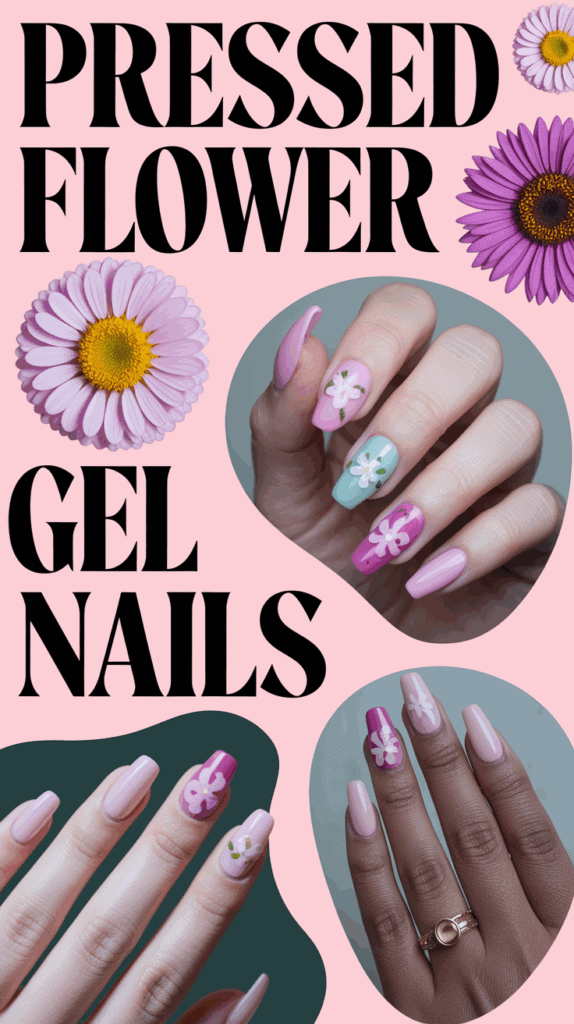
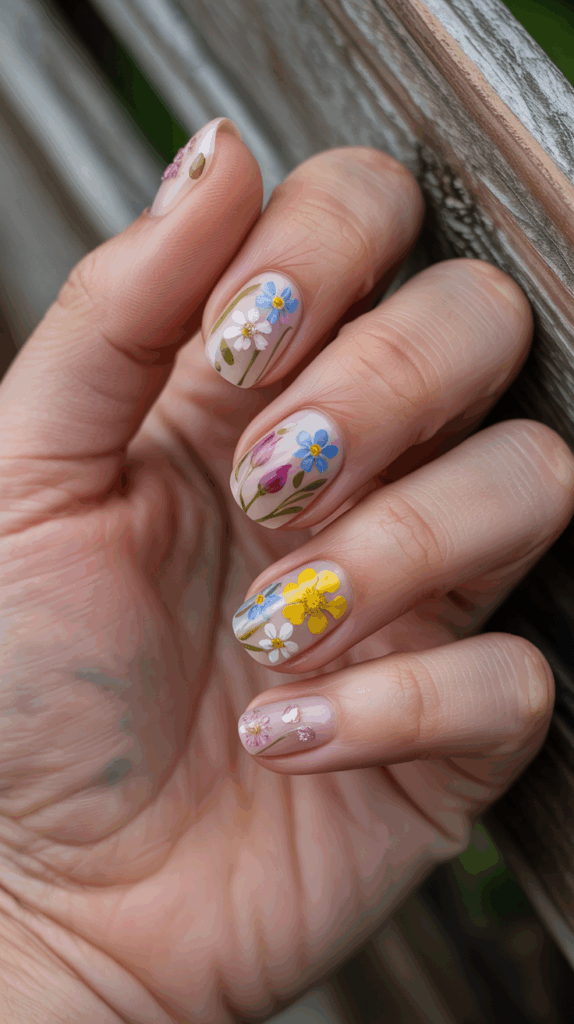
Pressed Flower Nail Art Designs That Look So Delicate
If you’re anything like me, you could use a little slice of calm and beauty in the wild ride that is mom life with three boys. Pressed flower nail art designs feel like a treat I give myself—a gentle, delicate touch that brings nature right to my fingertips! There’s something magical about fresh flowers pressed onto my nails, especially on days when little hands are everywhere and the house is full of energy.
I love how these designs bring a light, airy look that’s both playful and elegant. It’s a simple, sweet way to pause for a moment and enjoy something lovely, even when life is moving at full speed.
Why Pressed Flower Nail Art Designs Are a Mom’s Best Friend
Being a mom means balancing everyone else’s needs, and sometimes your own fall to the bottom of the list. But with pressed flower nail art designs, I have a simple way to bring a touch of beauty and calm into my day. These sweet floral nails make me feel polished, even when I’m chasing my three wild boys around or heading to a parent-teacher meeting. There’s something uplifting about glancing at my hands and seeing those tiny blossoms looking so lovely, even during the most chaotic moments!
Timeless Natural Beauty

Pressed flower nail art designs have a charm that never goes out of style. I always feel like I’m carrying a little piece of nature with me, which honestly makes those grocery store trips feel a bit more magical. The real flowers add a gentle, breezy look—nothing feels fussy or too much. These aren’t just pretty designs; they’re a reminder of slowing down and appreciating small, beautiful things.
I have had so many friends (and even strangers!) ask, “Are those real flowers on your nails?” There’s a softness and elegance you just can’t get from stickers or polish alone. Whether you’re a fan of daisies, tiny violets, or even bits of baby’s breath, each nail becomes a mini bouquet. I love that the look works in any season, and I never feel out of place with a splash of nature on my fingertips.
Endless Customization for Any Mood or Event
One of the best parts about pressed flower nail art designs is how easy it is to customize. Being a mom means lots of surprise events—a birthday party, a quick coffee date, even a school concert might pop up at the last second! I love that I can pick colors and patterns that fit my mood or the occasion. Want something playful and bright? Go for bold wildflowers. Need something soft for a special dinner? Choose delicate white petals on a sheer background.
Here’s how I like to mix things up:
- Soft pastels for spring picnics or Easter brunch.
- Bright pops of color for birthday parties or playdates.
- Muted neutrals that work at the office or on school runs.
- Tiny greenery for an earthy vibe at family get-togethers.
Even better, my kids love helping me pick out flowers for my nails. It turns into a little tradition—one of those sweet moments that make me smile every time I look down at my hands.
Long-Lasting Delicacy—Even on Busy Hands

If there’s one thing I’ve learned as a mom, it’s that my hands are never still! From making lunches to digging for lost toys, I need nail art that can hold up. Pressed flower nail art designs actually last longer than I expected. The flowers get sealed under a strong topcoat, keeping them safely tucked away from scratches, soap, and even toddler tugging.
Here’s what I noticed:
- The flowers stay bright and pretty, even with daily chores.
- Chips and cracks are less noticeable, since the designs are soft and natural.
- You don’t need constant touch-ups, which is always a win!
When I finally do get a moment to myself, I don’t have to fix my nails. They’re already ready for whatever adventure comes next! Keeping a bit of beauty on my fingertips is one of my secrets for feeling just a tad more put-together—and who doesn’t need that as a mom?
Getting Started: How to Create Pressed Flower Nail Art at Home
Pressed flower nail art designs can make any mom feel a little more put-together, even when life is spilling over the edges. And the best part? You can make your own right at home, no fancy salon needed! I promise, the process is way simpler than it sounds. With just a few thoughtful steps, you get that perfect, delicate finish that looks like you spent an hour at the spa, even if you only had a little break between snack duty and bedtime stories.
Choosing and Prepping the Right Flowers
I love starting this project with a walk outside, often with my boys by my side, searching for tiny treasures in the yard or park. Pressed flower nail art designs work best with small, flat flowers. Think baby’s breath, violets, forget-me-nots, or even tiny petals from the ends of wildflowers. If you don’t have a garden, you can pick up pressed flowers online or from craft stores. There are so many lovely options!
Here are a few quick tips for picking and prepping your blooms:
- Choose fresh, small flowers or petals (smaller than your nail bed).
- Avoid thick, juicy petals—they won’t press flat.
- Gently blot with a paper towel to soak up extra moisture before pressing.
- Press flowers in a book lined with parchment paper. Stack a few heavy books on top for at least 24-48 hours.
- For super moms in a hurry, you can also use a flower press or an iron (set on low, with parchment between the iron and flowers for a few seconds).
The flowers should be dry and paper-thin once ready. This makes them both easy to work with and helps them stay fresh-looking under your polish.
Tools and Products Every Mom Needs

Before you get started, gather your essentials. Trust me, nothing adds stress to mom time like missing supplies when you finally sit down for yourself! Here’s what you’ll need for pressed flower nail art designs that look like you had all the time in the world:
- Base coat (clear polish adds an even surface)
- Neutral or sheer nail polishes (white, nude, or blush pinks look dreamy and don’t hide the flowers)
- Small pair of tweezers (for picking up and placing tiny blossoms)
- Pressed flowers (prepared ahead or purchased)
- Clear, strong topcoat (for sealing in the flowers and adding shine)
- Nail scissors or cuticle trimmer (to snip away any overhanging petals)
- Cotton swabs and polish remover (for quick clean-ups if needed)
If you’re a mom on-the-go, putting all your nail art tools in a cute container makes it easy to start even when you just have a spare ten minutes between the kids’ activities.
Simple Steps to Achieve Delicate Pressed Flower Nails
Even with three little guys running around, it’s easy to sneak in some nail art time that feels special. Here’s how I do it, step by easy step:
- Prep your nails. Start with clean, dry nails. Shape and buff for a smooth surface.
- Add a base coat. This helps protect your nails and gives the flowers something to stick to.
- Paint your chosen background color. Soft shades really make the pressed flowers stand out.
- Place the flowers. Using tweezers, gently lay a flower or petal on your nail while the base polish is still slightly tacky. Arrange them how you like. Press down softly so they stay put.
- Seal everything in with a topcoat. Apply a thick, clear layer and make sure to cover the edges. This helps the flowers melt into the polish and last longer.
- Tidy up. Use nail scissors to trim away any petals that poke over the edge. Swipe a little remover around your cuticles if you need to clean up.
I like to do one nail at a time so the polish stays tacky, and the flowers adhere before it dries. The finished look is light, airy, and pretty enough to make any day feel a little softer.
Time-Saving Tips for Quick Nail Art Sessions
As a mom, I know my seconds are precious. Some days, my nail art session sneaks in while dinner is on the stove or the boys are busy with LEGOs. You don’t have to sacrifice style for speed! Here’s how I keep things quick and doable:
- Prep flowers ahead in batches. Store dry, pressed flowers in a small envelope or box; keep them handy for last-minute inspiration.
- Do accent nails. Try decorating just one or two nails per hand—super fast, but still eye-catching!
- Use a quick-dry topcoat. This will help you get back to life (and sticky fingers) in no time.
- Stick with sheer polish. Mistakes are less obvious, and the flowers peek through even better.
- Involve your kids. Let them help pick the flowers or pass the tweezers (older kids only for safety); it turns the process into a sweet, shared moment!
- Clean up as you go. Keep cotton swabs nearby for quick polish fixes, so you don’t get stuck with dried polish in all the wrong places.
Pressed flower nail art designs give me a lovely, delicate finish even on the busiest mom days—no salon necessary and no extra stress.
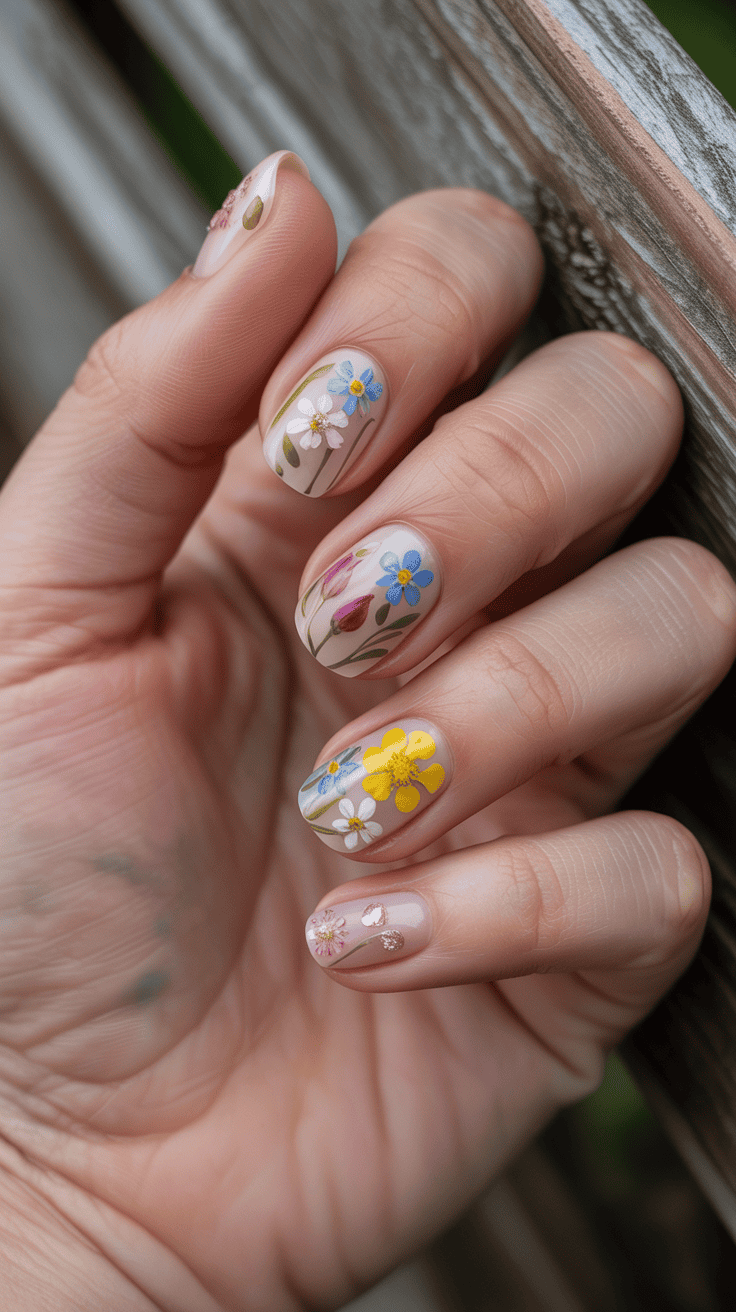
Trending Pressed Flower Nail Art Designs for 2025

Pressed flower nail art designs are blooming big in 2024 and I am here for it! For those of us juggling the never-ending adventures of motherhood, these dainty, flowery nails feel like a sweet secret garden we get to carry with us every day. Nature-inspired designs are everywhere right now but nothing beats the actual beauty of real, pressed petals on your fingertips. Moms need a tiny dose of serenity and joy, and fresh floral nail art brings that gentle magic without a ton of effort. Let’s get into the styles that are popping up everywhere this year and find the perfect one for your next quick self-care moment.
Minimalist Petal Accents
Sometimes less is truly more, especially if you want something low-fuss and classy that still feels extra special. Minimalist petal accents are perfect for moms who love a touch of floral charm without a busy pattern. This style is easy to do and always looks fresh, even after a week of wrangling kids or loading lunchboxes.
Here’s why I love minimalist pressed flower nail art designs:
- One tiny petal or bloom, placed off-center, can look so sophisticated.
- Great for short nails or if you want to keep things subtle.
- Petal accents work well with clear or sheer polish, making it easy to hide tiny chips.
It’s like wearing just your favorite piece of jewelry—simple but brightens your day. Plus, a minimalist petal on your ring finger or thumb always seems to spark happy comments from other moms at school drop-off.
Full Floral Arrangements
If you love a bouquet’s lush look, full floral arrangements just might be your thing. This style puts several pressed flowers, leaves, and even tiny sprigs across each nail, creating a garden effect that feels so dreamy with every glance. It’s a fun way to add a pop of color and personality without taking up your whole afternoon.
What makes this style stand out:
- You can mix colors and shapes for a wildflower vibe.
- Works beautifully for special events, spring parties, or when you need an extra pick-me-up.
- Feels a little like carrying a mini field trip on each hand.
I let my boys pick out flowers for these full arrangements, turning nail day into a sweet family moment. The result looks so cheerful and packed with personality! Some days, I only go bold on a few accent nails and leave the others simple for a mix-and-match look.
French Tips with a Botanical Twist
The French tip is such a classic, but pressed flowers give it a gentle update. Instead of a plain white edge, try tucking a little pressed daisy or sprig just where your nail’s edge meets the tip. It’s crisp, pretty, and feels both familiar and fresh—like spring showed up just for your fingertips.
Reasons to try a botanical French tip:
- Easy to pair with work outfits or casual weekends.
- Keeps nails looking neat with a surprise twist at the edges.
- Makes short or grown-out nails look intentional and cute.
For busy weeks, I sometimes skip color and just do a clear base with pressed flowers on the tips. It’s quick, mom-friendly, and gets so many “How did you do that?” questions. These tips are proof that you can be practical and still carry a little secret garden around.
Pastel Backgrounds with Tiny Blooms

Pastel backgrounds have that soft, happy feel that I need when life gets noisy and busy. Pairing them with pressed flower nail art designs lets those tiny blooms shine, and the whole look comes together without feeling overdone. Colors like blush pink, baby blue, mint, or butter yellow bring out the floral shapes and give your nails a sweet, airy vibe.
Here’s how to make the most of this trend:
- Start with a single pastel shade on all nails for an easy canvas.
- Add miniature daisies or bits of baby’s breath for delicate detail.
- Works great for baby showers, family photos, or days when you just need your hands to feel extra pretty.
I’ve noticed that pastel backgrounds hide small flaws too (so helpful with mom life) and make even store-bought pressed flowers look like a fancy treat. This style is my favorite pick-me-up when I want cheerful nails without spending a lot of time.
No matter which style you pick, pressed flower nail art designs for 2024 are all about adding a gentle moment of beauty to even the busiest hands. These trends make it easy to change things up and stay connected to nature, even if your garden is mostly made of LEGO bricks these days!
Care and Longevity: Keeping Your Pressed Flower Nails Flawless
Once you fall in love with pressed flower nail art designs, you want them to stay perfect as long as possible! I know the thrill of looking down at lovely, delicate petals on my nails—especially when the kids are bouncing around and I need a little beauty boost. Caring for your pressed flower nails doesn’t have to be complicated. With the right habits, tricks, and gentle touch, you can help those sweet blooms look fresh for over a week. Let’s chat about how to keep your new favorite manicure going strong.
Top Coating and Sealing Tricks
The secret to lasting pressed flower nail art designs is the topcoat. I like to think of it as the “glass dome” that keeps your real flowers safe from daily life, sticky fingers, and endless hand washing. Here’s how I lock in that just-done shine:
- Use a thick, quality topcoat. I really layer it on, making sure every petal and edge gets covered.
- Wrap the tips. After sealing the top, I run the brush along the free edge of each nail. This helps stop lifting and chipping, even when the kids are fighting over the same toy (again).
- Go slow with application. Quick swipes can miss a spot, so I like to float the brush and let it self-level.
- Double up for protection. Sometimes, I come back an hour later and add a second layer—especially if my hands will be in water a lot that week.
- Choose a long-lasting, chip-resistant formula. Fast-dry is great, but not if it peels. I go for one that’s flexible but durable.
Adding an extra coat every few days helps keep everything glossy and solid. That shine makes the pressed flowers almost glow! If any edge feels rough, a tiny dot of topcoat fixes it before snagging starts.
Dealing with Chips, Smudges, and Little Mess Makers
With three boys in the house, my nails are in the line of fire all day! Dings and smudges happen, but a few quick fixes make sure your pressed flower nail art designs don’t lose their charm.
For small chips:
- Lightly buff the area. Use a soft nail file only where the chip happened. This smooths sharp spots without tearing the flower.
- Spot-treat with topcoat. Dab a little at the chip and reseal the whole nail if needed.
For smudges and dents:
- Nudge it back in place. If caught early, use a clean finger or small brush to press the flower or polish flat again.
- Apply another layer of topcoat. This melts away minor marks and helps the petals settle back in.
For little hands that love to “help”:
- Keep nails out of harsh chores when you can. Wear gloves for dishes or cleaning to protect the design.
- Touch up busy fingers first. My dominant hand and thumb always need a little extra care!
Extra tricks to keep those nails looking sweet:
- Avoid peeling anything with your nails—use a spoon or card instead.
- Moisturize your hands daily. Dry cuticles and nails crack faster.
- Quick hand wipes instead of endless washing help reduce polish breakdown.
Even as life gets messy, these little hacks let me keep my pressed flower nail art designs pretty and cheerful.
When and How to Safely Remove Pressed Flower Nail Art
All good things must come to an end, but you can say goodbye to pressed flower nail art designs in the gentlest way possible. Rushing or picking at the design can damage your nails. Here’s my simple, fuss-free removal process that even works between making snacks or reading bedtime stories!
- Soak a cotton pad in acetone polish remover.
- Stick with pure acetone; it breaks down the layers much faster.
- Place the soaked pad over each nail.
- Wrap gently with foil or press it down with a clip—just a few minutes is usually enough.
- Let it sit for 5-7 minutes.
- I use this time to sneak in a cup of coffee or catch up on a favorite show!
- Slide the pad off.
- Most of the art should come away in one sweep. If not, reapply the pad for a couple more minutes.
- Gently nudge off any leftovers.
- Use a wooden stick or soft pusher—never scrape. The flowers and polish should slip right off.
Afterward, I wash my hands and treat my nails to a little TLC. Massage in some cuticle oil and hand cream to rehydrate. Your fingertips will be ready for another round of pressed flower nail art designs or a break with bare, happy nails!
Taking care of these flowery treasures keeps my hands looking fresh and gives me a quick burst of joy every time I glance down—even smack in the middle of a busy day.
Conclusion
Pressed flower nail art designs give me a little spark of joy, even during the busiest days with my boys. A touch of beauty really goes a long way when life is filled with sticky fingers, messes, and a schedule that never slows down. With just a few simple steps, anyone can bring a hint of nature and calm to their routine, whether you have five minutes or an afternoon to spare.
If you’ve been wondering whether to try this for yourself, give it a shot! You deserve those pretty, delicate nails. Share your nail art moments, or swap ideas with another mom—sometimes the smallest details help us feel our best. Thanks for following along, and let those fingertips shine, knowing a little brightness can make such a difference.
This post may contain affiliate links. Read the full disclosure here.