Kitchen Christmas Tree Ideas for a Festive Heart of the Home
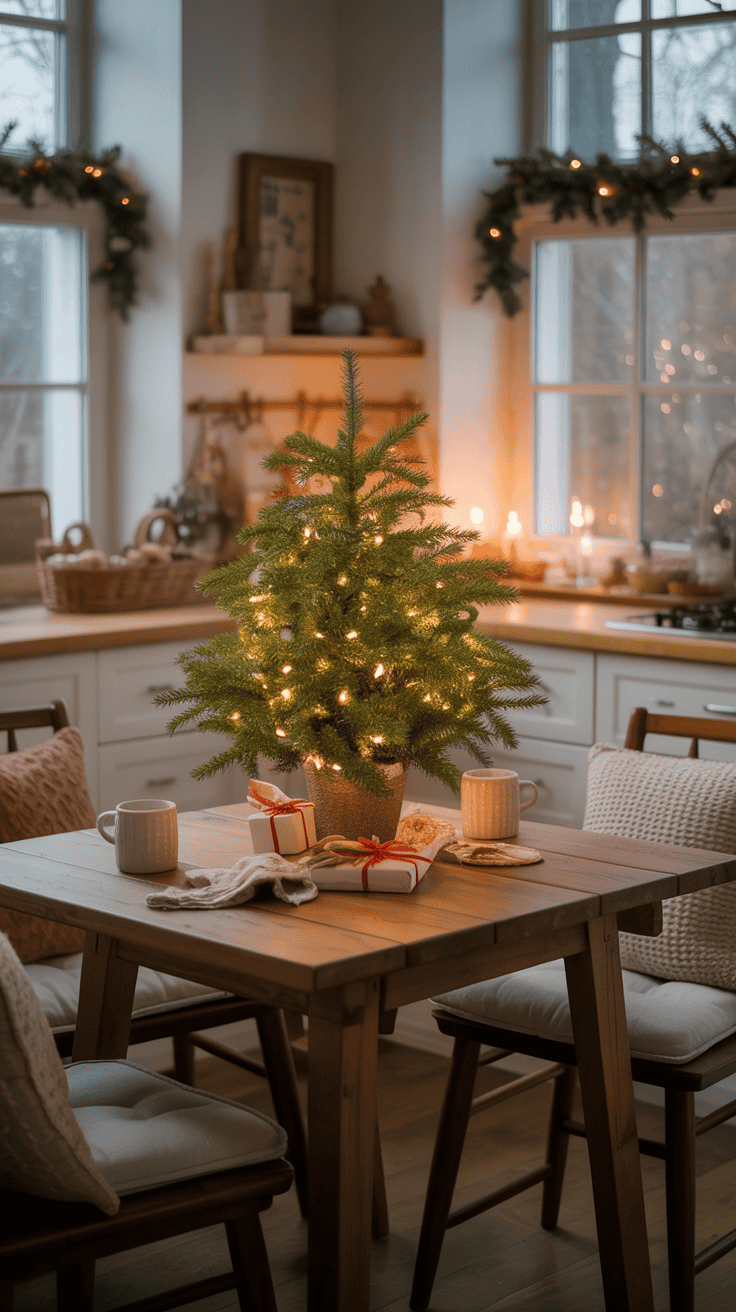
The kitchen is our cozy hub, where my three boys snack, do homework, and sneak cookie dough while we bake. This year I’m adding a Kitchen Christmas Tree to make the heart of our home even brighter. I’m keeping it simple and cheerful, perfect for small spaces and busy nights. You’ll get easy ideas that work with real life, not just Pinterest.
I’ll start with planning the space and safety, because cords, outlets, and tiny hands matter. We’ll talk about splash zones near the sink, open flames, and traffic paths. I’ll show you how to keep counters clear and still get that glow.
Next comes choosing the right tree and spot. Maybe a mini on a tray, a slim floor tree by the breakfast nook, or a tabletop cutie on the kitchen cart. I’ll share fun themes that feel playful and homey, like candy cane stripes, gingerbread, or a cocoa bar vibe, which the boys love.
We’ll make easy DIY ornaments together, with things you likely have at home. Think salt dough shapes, dried orange slices, cinnamon sticks, felt stars, and paper chains. It’s simple, fast, and kid approved.
Finally, I’ll show you how to style it so it shines all season without blocking cooking. Timers for lights, shatterproof ornaments, and wipeable ribbons keep things stress free. I’ll cover daily care, quick cleanup, and smart storage so it stays charming from breakfast to bedtime. Let’s dress up the kitchen, keep dinner moving, and make memories that sparkle!

Plan Your Kitchen Christmas Tree for a Smooth, Safe Setup

I want the kitchen to sparkle without slowing dinner, so I plan my Kitchen Christmas Tree like I plan weeknight meals. Simple steps, smart choices, and a spot that fits our routine. With three boys racing through the room, I choose sizes and supplies that work hard and stay safe. Here is how I set myself up for easy decorating and zero stress later!
Measure Your Space and Pick the Right Tree Size

Before I pull out bins, I measure. A few minutes with a tape measure saves a lot of reshuffling. I check height, width, and any doors or drawers that swing out, including the pantry and fridge. I also keep the work triangle in mind, so the tree does not block the path from sink to stove to fridge.
- Measure height from floor to ceiling, then subtract 6 to 12 inches for a topper and airflow.
- Measure width in the planned spot, cabinet to cabinet, or island to wall.
- Open nearby doors and drawers to see how far they swing. Leave 3 to 6 inches of space.
- Note traffic paths, stools that tuck in, and the dishwasher door that loves to surprise knees.
Here is what works best in busy kitchens:
- 6 to 7 ft pencil tree: Great for corners or a breakfast nook. It is tall, narrow, and tucks in neatly.
- 4 to 5 ft slim tree: Fits tight floors near an island or next to a cart. Still gives a full look.
- 2 to 3 ft tabletop tree: Perfect for counters, a rolling cart, or a sideboard.
- Wall-mounted or half tree: A space saver for tiny kitchens, especially behind a table or on a bare wall.
I also look for a sturdy, narrow base. I want it to slide under bar stools or sit snug next to the island. A heavy base or weighted basket keeps the tree centered and safe. If I need extra floor room, I pick a tree with nesting or low-profile legs that do not trip little feet.
Example I love: a 5 ft slim tree by the eating nook, with the base tucked under the overhang of the counter. It stays out of the cooking zone and still shines.
Kid Proof Placement and Heat Safety

Hot appliances and eager helpers do not mix, so I keep the tree away from heat and moving parts. This is my short list for safety and sanity.
- Keep the tree at least 3 feet from stovetops, ovens, toasters, and coffee makers.
- Avoid heat vents and space heaters. Dry trees and hot air are not friends.
- Give the dishwasher door a full swing zone. Wet ornaments are no fun.
- Do not block the fridge door, snack runs still happen every hour.
For tip resistance, I use a heavy stand, then add backup:
- Furniture straps: One strap from the trunk to a stud. I hide it behind the tree.
- Command hooks: One near the top, with a clear line tied to a cabinet side.
- Thin line to a stud: Fishing line or picture wire works. Knot it tight and keep it invisible.
Kid and pet safe decorating makes a big difference:
- Shatterproof ornaments on the lower half. Soft ribbon loops instead of hooks.
- No glass near edges or counter corners.
- Skip tinsel, it is risky for pets.
- Hang any breakables higher, at least eye level for toddlers.
- Use soft ribbons and felt shapes low on the tree. My boys love felt gingerbread and stars.
I do a final shake test. If the tree wiggles, I tighten the base or add one more anchor point. It takes five minutes and saves tears later.
Power, Lights, and Timers Without Cord Clutter

Lights make the magic, but I want clean counters and no cord spaghetti. I pick power based on where the tree sits, then hide every wire I can.
Here is a quick comparison to help you choose:
| Option | Best For | Pros | Watch Outs |
|---|---|---|---|
| Battery micro lights | Tabletop or wall trees | No outlet needed, ultra thin wire | Replace batteries after long use |
| Rechargeable battery pack | Floor trees away from outlets | USB charging, fewer swaps | Remember to charge |
| Plug-in LED strings | Near outlets or islands with power | Bright, reliable, long lasting | Manage cords and placement |
To hide cords, I follow the kitchen lines:
- Run wires along cabinet edges, backsplash seams, or under the counter lip.
- Use clear clips, cord covers, or adhesive raceways in the same color as the cabinet.
- Keep cords off wet areas. Cross pathways behind stools or along the baseboard.
For easy on and off, I love automation:
- Smart plugs: Set schedules or voice control during dinner.
- Outlet timers: Simple on at dusk, off at bedtime.
- Warm white LEDs for a cozy glow. Cool white fits a modern, bright kitchen only if that is your style.
Tip: If you need an extension cord, choose one with GFCI protection, especially near the sink. I tape down the cord path or clip it so it never sits loose.
Budget and Supplies Checklist

A plan keeps costs in check and the fun high. Pick a budget level, then gather what you need before the kids start “helping.”
Budget paths I use:
- Minimalist: Ribbon and a few ornaments you already have. Quick, cute, very tidy.
- Medium: Theme set, lights, ribbon, plus a few handmade kid pieces.
- Full: Tree, lights, ribbon, ornaments, topper, skirt or basket, and extra accents.
Basic supplies that make setup smooth:
- Measuring tape
- Sturdy stand or weighted basket
- Extension cord with GFCI if needed
- Command hooks and clear clips
- Zip ties or twist ties
- Ribbon for tying ornaments and a soft garland
- Storage bin with dividers
- Small step stool for safe decorating
If I had to pick only three, I would grab shatterproof ornaments, a smart plug, and clear clips. That combo keeps the kitchen cheerful, safe, and super simple to manage.
Find the Best Spot in Your Kitchen: Corners, Counters, and Clever Alternatives

I want the glow to meet us where we live, snack, and stir. The right spot keeps the magic in sight and the mess out of the way. I start with easy, safe placements that fit our routines, so the tree looks sweet and never slows dinner. My favorite trick is to treat the Kitchen Christmas Tree like any other hardworking tool, it needs a smart home and a simple setup.
Small Kitchen Wins: Windowsill and Countertop Trees

When space is tight, I go small and tall. A 2 to 3 ft tree on a cake stand adds height and protects the counter from stray needles and water. A wood cutting board works too, and it looks warm and homey.
I keep tiny trees out of splash zones, so not beside the sink or right by the stove. If the faucet sprays, the tree shifts to the dry side of the counter. I also watch the coffee maker and toaster spots, heat and steam are not friends.
A windowsill tree feels like a little bakery window, cheerful and bright. I thread mini lights and tuck in dried citrus slices for color and a gentle scent. A small star or bow on top finishes it fast.
Here is how I style and protect in one go:
- Lift the base: Cake stand, cutting board, or a shallow tray.
- Contain the mess: A small basket or planter liner catches needles.
- Keep it dry: Place at least a hand’s width from the faucet.
- Mind the heat: Stay clear of burners and hot appliances.
When I want flexible space, I turn a rolling cart into a little tree station. The top holds the tree, the shelf stores mugs and cocoa mix, and I can roll it near the table for hot chocolate night. It moves back to the corner before bedtime, which keeps traffic lanes open for breakfast chaos.
Slim Floor Trees for Corners and Breakfast Nooks

A pencil tree fits where nothing else will. I slide it beside the pantry door, near the banquette, or by our message center where the boys grab homework lists. It stays out of the cooking zone and still cheers up the room.
I angle the tree so the ornaments face the room. That tiny turn makes the tree look fuller without taking more space. It also keeps delicate pieces away from busy hands.
For extra presence, I raise the tree without stealing floor space. A basket or low crate turns the base into a pretty pedestal. I fill gaps with a folded blanket or a tree collar so the stand hides and the tree feels taller.
Quick setup that works:
- Place the base on felt pads, it slides for cleaning and protects floors.
- Angle the tree toward the table or island for the best view.
- Use shatterproof ornaments on the lower half, always.
- Add a simple ribbon garland so it reads festive from across the room.
If the nook has an outlet, I add a smart plug and set a timer. Lights pop on at snack time, which makes the after school rush feel special.
Wall Mounted or Ladder Trees When Floor Space Is Tight

Flat trees save the day in tiny kitchens and rentals. I make a triangle tree on the wall with garland and small hooks. Start wide at the bottom, then step in as you go up, like drawing a simple tree. Add short strings of lights and a bow at the top. It is light, secure, and out of the way.
Another favorite is a leaning ladder tree. I wrap the rungs with lights and ribbon, then clip on felt ornaments. It looks charming, and it holds up to little hands since the pieces sit flat. If you have toddlers, anchor the ladder with a clear hook at the top so it does not slip.
Keep these in mind for kitchens the size of dorms and first apartments:
- Use removable hooks and thin garland, keep weight low.
- Stay clear of sinks and stovetops, no splashes or steam.
- Choose battery micro lights for fewer cords.
- Keep decor flat and soft to avoid snags near drawers.
I love how fast these go up. Ten minutes, a string of lights, and the wall looks merry without losing a single inch of workspace.
Above Cabinet Magic for a Tree Look Without the Tree

When counters need to stay clear, I go above the cabinets. I line the top with faux greenery or even cut sections from an old tree. I stagger the pieces so they form a gentle triangle, wide on one side and narrow at the top. Then I weave in lights, a few bows, and a tiny topper where the point lands. It reads like a tree silhouette, and no one bumps it while reaching for snacks.
I attach everything with clips, never nails. Clear clips tuck behind crown molding or along cabinet edges. I tuck the battery pack or plug-in wire at the back, then run cords along the wall with small adhesive clips in the cabinet color.
Simple steps that make it pop:
- Fluff the greenery, then layer pieces for a full shape.
- Use warm white LEDs for a soft glow that hides gaps.
- Add small bows, dried oranges, or gingerbread ornaments for kitchen charm.
- Finish with a mini topper at the narrow end to sell the tree shape.
This trick is perfect for renters and busy weeknights. The counters stay open, the floor stays clear, and the kitchen still sparkles for cocoa, cookies, and late night popcorn. My boys love spotting the tiny topper up high, like a secret only our kitchen knows.
Theme Ideas Kids Love and Guests Notice

I want themes that make the kids light up and still look pulled together for guests. A Kitchen Christmas Tree should feel playful, tidy, and easy to maintain during dinner rush. These four ideas hit that sweet spot and use items we already have in the kitchen!
Baking Day Tree with Cookie Cutters and Mini Rolling Pins
This one feels like a cookie party waiting to happen. I stick to red, white, kraft, and wood so it looks warm, not busy. I hang metal cookie cutters by ribbon, tuck in recipe cards as tags, and add tiny oven mitt ornaments. Gingham bows tie it all together. I top it with a whisk or a tiny chef hat, which makes my boys giggle every time.
For placement, I keep it near the mixer if the cord route is safe and dry. Soft ribbon loops replace hooks, so little hands can help without pokes.
- Key pieces: Cookie cutters, mini rolling pins, recipe cards.
- Textiles: Gingham bows, tiny mitts, kraft tags.
- Topper: Whisk or chef hat for instant charm.
Candy Shop Tree with Peppermints and Candy Canes
Bright red and white with a little sparkle feels cheerful and clean. I use faux peppermint ornaments, cellophane wrapped felt candies, and a striped ribbon garland. A clear jar of real candy canes on the counter creates a cute vignette that guests notice first thing.
To keep it neat, I repeat the same two candy styles from top to bottom. Simple pattern, zero clutter.
- Color focus: Red and white, plus a hint of glitter.
- Ornaments: Peppermints, felt candies, striped ribbon.
- Side accent: Candy cane jar near the tree.
Cozy Farmhouse Tree with Wood Beads and Burlap

This theme is calm and cozy, perfect for busy kitchens. I layer burlap ribbon, wood bead garlands, and matte ornaments in cream and soft green. Mini chalkboard tags labeled cocoa, sugar, and flour add a sweet pantry touch. I finish with a star or a wood slice topper.
It reads warm without stealing attention from the rest of the room, which I love on school nights.
- Palette: Cream, soft green, wood tones.
- Texture: Burlap, wood beads, matte finishes.
- Labels: Mini chalkboards for kitchen charm.
Citrus and Spice Tree with Dried Oranges and Cinnamon
This one smells like Christmas morning. I hang dried orange slices, cranberries, and little bundles of cinnamon tied with twine bows. I tuck in bay leaf or rosemary sprigs for a fresh kitchen feel. It looks classic, and the scent makes everyone linger.
I keep any fresh greens away from heat and steam, and I swap sprigs weekly so it stays bright.
- Natural details: Oranges, cranberries, cinnamon.
- Greens: Bay or rosemary, small and neat.
- Finish: Twine bows for a simple, timeless look.
Easy DIY Ornaments and Garlands to Make With Kids
Handmade touches make the tree feel personal, sweet, and so kid friendly. I keep these projects simple, fast, and tidy, so they fit into busy weeknights and Saturday mornings. The best part, the boys get to see their creations on our Kitchen Christmas Tree, and they beam every time!
Cinnamon Salt Dough Ornaments That Smell Amazing
These little stars and hearts look rustic and smell like cookies. I set out bowls and let the boys mix and roll. It turns into a mini bake day, without the sugar rush.
- Supplies: Flour, salt, water, ground cinnamon, cookie cutters, straw, ribbon or twine.
- Simple recipe: Mix 1 cup flour, 1/2 cup salt, 1/2 cup water, and 2 tablespoons cinnamon until a dough forms. If sticky, add a pinch more flour.
- Roll and cut: Dust the counter with flour. Roll to about 1/4 inch thick. Cut shapes with cookie cutters.
- Make the hanger: Use a straw to poke a small hole near the top.
- Bake: Place on a parchment lined sheet. Bake low and slow at 200 F until dry, about 2 to 3 hours. Flip halfway for even drying.
- Finish: Cool fully. Let kids paint or keep them natural. Tie with twine and hang.
Tips that help:
- Keep shapes simple for small hands, stars, trees, gingerbread people.
- Add names with a toothpick before baking for sweet keepsakes.
- Store extras in a zip bag with a cinnamon stick to keep the scent cozy.
Dried Orange Slices and Cranberry Garland
This garland is bright, classic, and smells like winter. I prep the oranges in the morning, then we string them after dinner with a cocoa break.
- Dry the oranges: Slice oranges 1/4 inch thick. Blot with paper towels. Set on a rack over a baking sheet. Bake at 200 F until firm and lightly translucent, about 2 to 3 hours. Rotate pans for even drying.
- String the garland: Use a large needle and thick thread or fishing line. Help kids with the needle. Thread a pattern of cranberries and orange slices. I like 5 to 7 cranberries between slices.
- Secure the ends: Tie a firm knot on each end so pieces do not slide.
Make it last:
- Let slices cool and dry overnight on the counter before stringing.
- If your kitchen runs humid, add a tiny gap between slices for airflow.
- Hang away from steam and stovetops. It keeps color and shape longer.
Pretty patterns to try:
- Classic: Orange, 5 cranberries, orange.
- Festive: Orange, cranberry, bay leaf, cranberry.
- Bold: Two orange slices with a single cranberry spacer.
Ribbon Bows, Scrap Fabric Ties, and Cookie Cutter Hangers
Quick wins are my favorite on weeknights. These three ideas fill the tree fast and look polished.
- Ribbon bows: Use wire edged ribbon for full, fluffy bows. Cut 12 to 18 inch pieces, make a simple bow, then fluff loops. Tie to branches with floral wire or twine. I repeat one ribbon style from top to bottom for a clean look.
- Scrap fabric ties: Cut 1 inch strips from old tea towels, gingham, or muslin. Knot them onto branches for a soft, rustic garland. Mix patterns in the same color family, like red, cream, and wood tones.
- Cookie cutter hangers: Loop twine through metal cookie cutters for instant ornaments. Stars, trees, and gingerbread shapes look so sweet. Add a tiny bow to the top for extra charm.
Smart color tips:
- Pick two main colors and one accent. Red and white with a hint of kraft always works.
- Repeat textures, satin ribbon, cotton fabric, jute twine.
- Place larger bows near the middle and bottom, smaller ones up top.
Mini Utensils, Recipe Cards, and Photo Tags
This is where the kitchen theme shines. I love seeing tiny tools and family recipes on the tree. It feels personal and playful, which the boys think is hilarious and cool.
- Mini utensils: Clip on mini whisks, tiny wooden spoons, and little measuring spoons. Use mini clothespins or short ribbon ties. Place them near lights so the metal sparkles.
- Recipe card ornaments: Slide family recipe cards into clear protective sleeves. Punch a hole in the top corner and tie with ribbon. If the card is precious, copy or scan it first and hang the copy.
- Photo tags: Print small pictures of the kids baking, cutting cookies, or licking frosting. Mount on kraft tags or cardstock. Punch a hole and tie with twine.
Placement that looks balanced:
- Spread metal pieces evenly so they do not crowd one side.
- Cluster one recipe card with one utensil and one bow for a mini vignette.
- Keep heavier items toward the center of the tree for stability.
A few extra ideas:
- Add tiny spice bundles, three cinnamon sticks tied with twine.
- Use chalkboard tags to label cocoa, sugar, and flour for a pantry feel.
- Tie on a mini rolling pin as a topper for a small tree, so cute!
Kid help guide:
- Ages 3 to 5, handing you cranberries, placing bows on lower branches.
- Ages 6 to 8, stringing garlands with help, tying simple knots.
- Ages 9 and up, mixing salt dough, threading needles with supervision.
These easy projects turn an ordinary weeknight into a memory. The tree fills up with stories, little hands stay busy, and the kitchen smells like happiness. I call that a win for everyone!
Style, Maintain, and Enjoy Your Tree All Season

I want our kitchen to sparkle from breakfast to bedtime without slowing dinner, so I set up our Kitchen Christmas Tree to be cute, safe, and easy to manage. With three boys, I need a simple routine, quick cleanup, and a setup that survives hot cocoa spills and cookie crumbs. Here is exactly how I decorate fast, keep counters open, and make it all feel festive every single day.
My 10 Minute Decorating Formula for a Balanced Tree
When time is tight, I use a short, clear process. It keeps the tree balanced, bright, and pretty from every angle.
- Fluff and place lights
- Fluff each branch so the tree looks full.
- Wrap lights from the trunk out, then back in, in a gentle zigzag.
- Use warm white for a soft glow, then test from a few feet back.
- Add one wide ribbon and one skinny ribbon in 3 to 5 vertical swoops
- Cut ribbons into 2 to 3 foot pieces.
- Tuck the wide ribbon first, top to bottom, in loose S shapes.
- Layer the skinny ribbon next, offset from the wide ribbon for depth.
- Keep the swoops vertical so the tree reads tall and tidy.
- Place 5 to 7 anchor ornaments
- Choose larger pieces or bold shapes, like stars, gingerbread, or citrus bundles.
- Space them evenly around the tree, not clustered.
- Think of a clock face, one at 12, 2, 4, 6, 8, and 10.
- Fill with medium, then small ornaments, repeating colors in triangles
- Place mediums next, then finish with smaller fillers.
- Repeat each color in a triangle pattern for a balanced look.
- Step back after each color and fix any empty spots.
- Add topper and a simple base cover
- Top with a bow, star, or a mini rolling pin for kitchen charm.
- Cover the base with a basket, collar, or folded tea towel.
Quick tip: Use soft ties instead of hooks on the lower half. Little hands can help, and no one gets poked.
Keep Cooking Easy With Clear Counters and Safe Surfaces
I want holiday cheer without losing prep space. Here is how I keep it cute and functional.
- Use trays and boards so decor moves fast for meal prep. A cake stand or shallow tray turns a tree into a portable setup.
- Keep flammable items far from heat. No ribbon or paper near the stove, toaster, or oven.
- Do not block outlets you need for mixers and air fryers. Run cords along cabinet lines, not through a workspace.
- Place a microfiber cloth nearby for quick wipe downs. Glitter and cocoa splashes disappear in seconds.
- Keep a small bin or basket under the tree for swaps. Extra hooks, ribbon scraps, and ties live there so you can fix things midweek.
Kitchen sanity check:
- Lights on a smart plug, not on a crowded power strip.
- Tree set at least three feet from open flames and steam.
- Counter space around knives and hot pans stays clear.
Daily Tidy, Fresh Scents, and Kid Friendly Habits
A little routine keeps the tree neat and the kitchen happy. I use small habits that take less than a minute.
- Set lights on a timer. On at dusk, off at bedtime. No one forgets, which helps me.
- Swap batteries before parties. I keep extras in a labeled zip bag near the mugs.
- Keep a small lint roller for glitter. It grabs ribbon fuzz and stray sparkles so fast.
- Use simmer pots for scent. Orange peel, clove, and cinnamon stick in a small pot on low. Turn it off during meal rush for safety.
- Set kid rules, simple and kind. We use this one, no touching below the ribbon line. My boys love a job, so they place soft ornaments above that line as their task.
Small daily refresh:
- Straighten two ribbons.
- Nudge one anchor ornament back to center.
- Quick sweep under the tree if you have pine needles or craft bits.
If a piece falls, I pop it into our little repair cup near the sink. I fix everything during dish time, which keeps clutter from piling up.
Smart Storage After the Holidays
Packing well saves money and time next year. I want to open the bins and get right to the fun.
- Label bins by theme. Candy, citrus, farmhouse, baking. One bin, one look.
- Coil lights on cardboard. Wrap each string flat, then tuck the plug end in. No knots, no mystery strands.
- Store dried citrus in paper bags with silica packs. Keep them dry, and toss if they mold. If in doubt, remake next season.
- Keep fragile items in hard cases. I use divided bins or small photo boxes inside a larger tub.
- Make a quick note of what to add next year. I jot down needs like one more skinny ribbon, extra hooks, or more shatterproof reds.
My quick pack order:
- Remove the topper and anchor ornaments first.
- Pull ribbons in sections and roll them, do not crumple.
- Take off medium and small ornaments, one color at a time.
- Unplug lights, then coil.
- Wipe the base and stand, then store together so you can find them fast.
Two small upgrades that help me every year:
- Clear labels: I label the top and the side of each bin for easy stacking.
- Color code: Red tape for kitchen, green tape for living room. I find the right bin in seconds.
With a simple plan, our tree stays pretty, safe, and fun, even during pasta night and cookie chaos. It feels like magic that fits real life, which is exactly what I want for the heart of our home!

Conclusion
I want our holidays to feel warm, practical, and full of joy, so a Kitchen Christmas Tree is my favorite way to bring the season right into the heart of the house. We kept it safe, tidy, and easy to manage, which matters when dinner, homework, and cookie taste tests all happen in the same space.
Here is my quick recap. Measure first, then choose a smart spot that stays clear of heat and splashes. Keep lights on timers, use shatterproof ornaments, and let safety lead the way. Lean into a simple theme and repeat colors so everything looks calm, not cluttered. Add one or two handmade touches for heart, then keep the daily reset short and sweet.
Ready to try it this week? Pick one placement, one theme, and one DIY. That tiny plan turns a busy kitchen into a cozy glow zone your kids will remember.
The kitchen is where memories stick, from cocoa mustaches to late night popcorn. A small, safe tree can make the whole home feel festive, even on a Tuesday.
I would love to see what you create, share a quick photo with family or friends, then pour hot cocoa and enjoy the glow!
This post may contain affiliate links. Read the full disclosure here.