Rustic Fall Wedding Centerpieces for a Cozy Celebration
Every time fall rolls around, I get a little giddy (and maybe a bit emotional!) about all the cozy touches that make a wedding extra special. As a mom of three very busy boys, I know how wild family gatherings can be, but I also know how much heart we put into every detail. When my cousin asked for help with her wedding, I fell in love with the idea of rustic fall wedding centerpieces. There’s just something so welcoming about pumpkins, wildflowers, and a little burlap on the table.
I’ve found that these warm, welcoming arrangements are a huge hit with both family and friends. They don’t have to be fancy to feel charming and homemade. If you’re helping plan a wedding this season, I can’t wait to share a few simple ideas that bring that autumn glow right to the center of your tables. With a dash of creativity (and maybe a little help from the kids), you can turn even the smallest touch into a memory everyone will treasure!
What Makes a Centerpiece ‘Rustic’ for Fall Weddings?

When I think about rustic fall wedding centerpieces, a few things instantly pop into my mind: warmth, comfort, and a sense of being surrounded by nature. You know that soft crunch of leaves under your feet or the smell of homemade apple pie coming from the kitchen? That’s the cozy spirit I love to bring to any wedding table! Rustic doesn’t have to mean rough; it’s all about simple beauty with a little touch of nostalgia. If you want your tables to feel inviting and homey, like you’re sitting down with close family for Sunday supper, rustic style is the way to go.
Natural Materials Speak Volumes

Nothing says rustic like the use of natural, raw materials. Think of wood slices instead of shiny trays, burlap runners in place of stiff fabric, and wildflowers picked straight from the garden (or at least made to look that way). I’ve found that when I mix in these rough-around-the-edges touches, it instantly softens the mood.
- Wooden accents (think slices for bases, little crates, or even tiny tree branches)
- Burlap and lace (simple ribbons or table runners work wonders)
- Natural fibers (twine, jute, raffia tied around jars or vases)
Using these materials is kind of like making your kitchen table look special for Thanksgiving without pulling out the fancy dishes. It just feels homegrown and heartfelt!
Cozy and Earthy Color Palettes

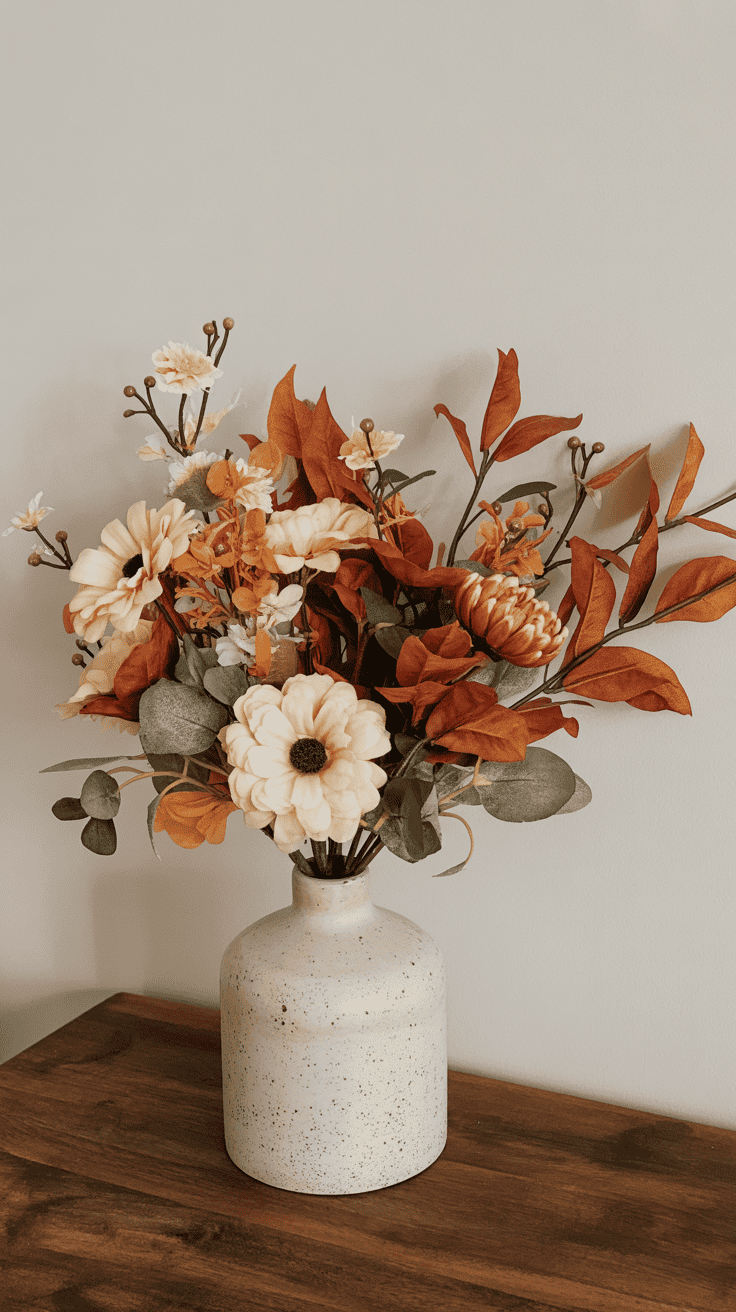
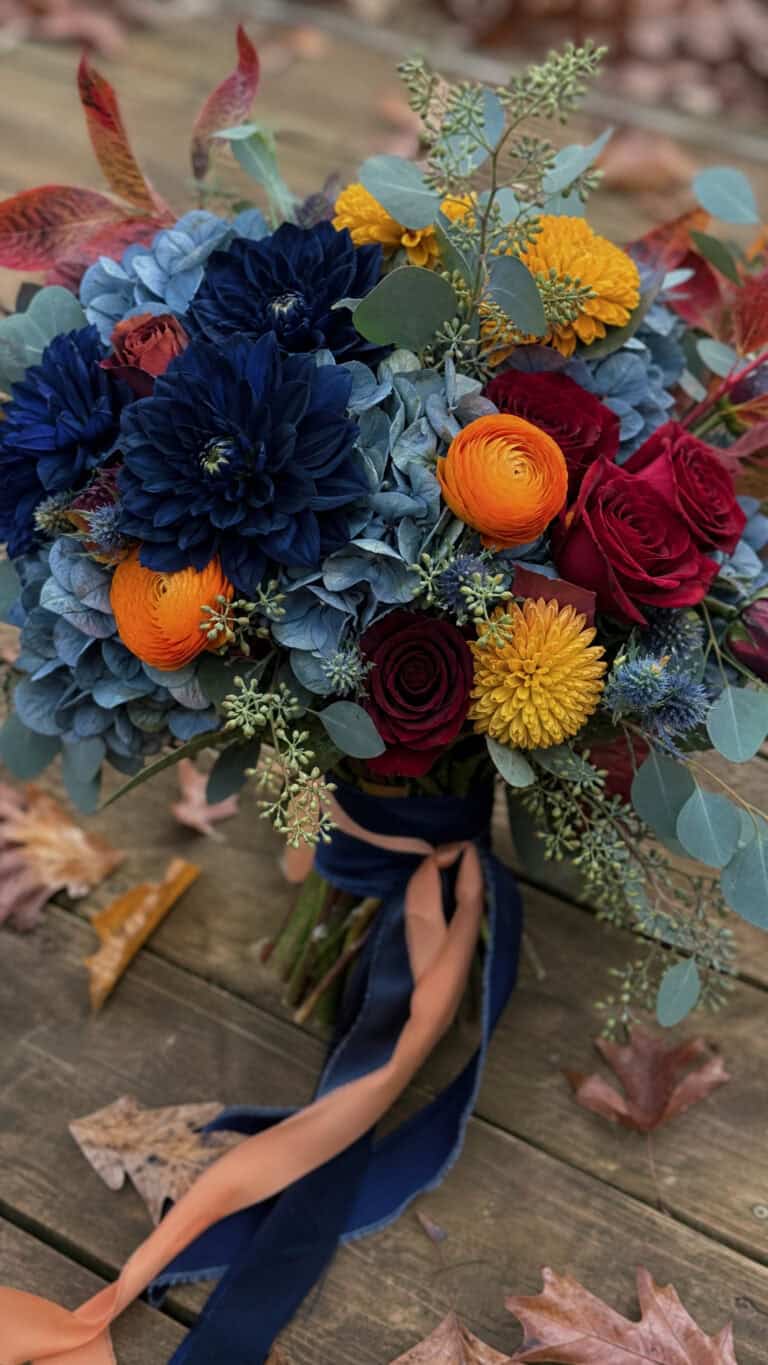
Rustic fall wedding centerpieces usually look best in colors inspired by autumn itself. I always start with the beautiful colors I see in my own backyard—deep oranges, golden yellows, creamy whites, and warm browns. If you stick to these rich, comforting shades, your tables will feel like a warm hug.
Here’s a quick go-to palette that never lets me down:
- Pumpkin orange
- Wheat yellow
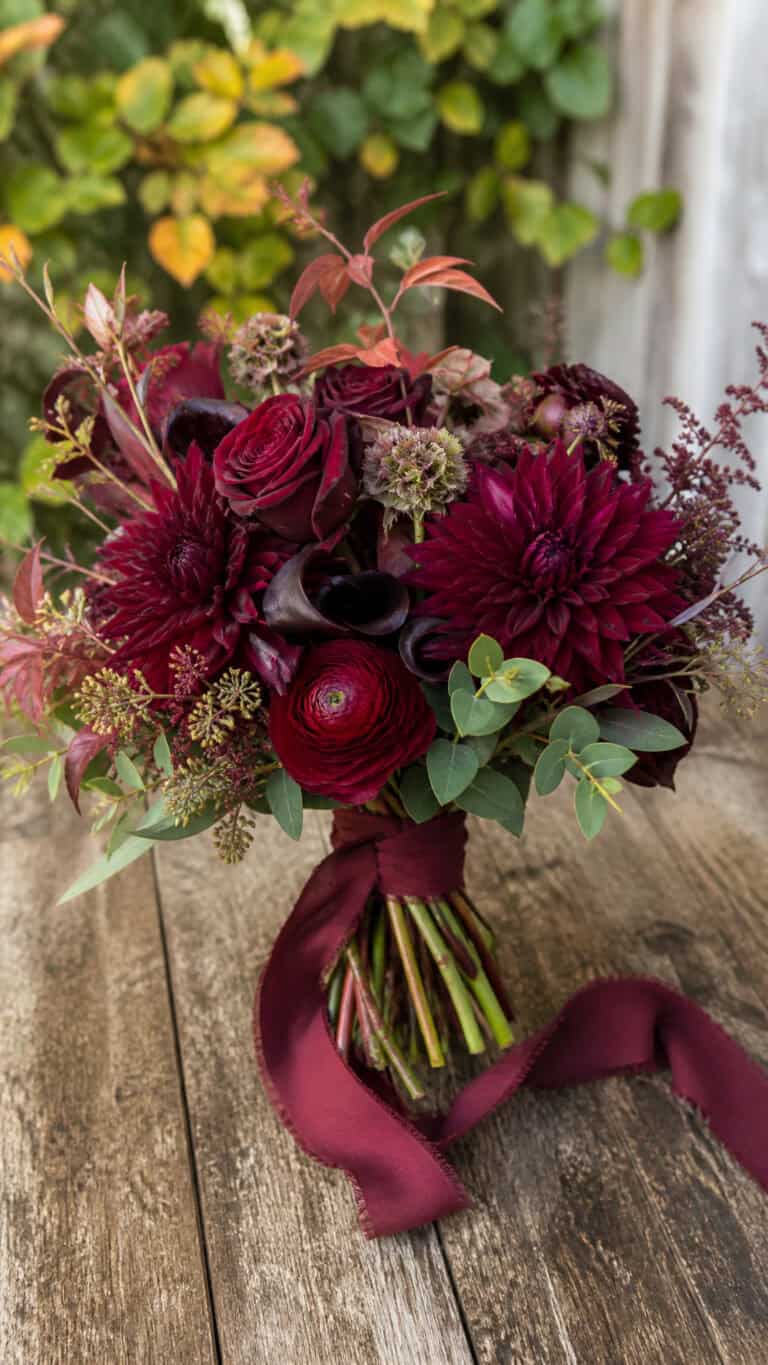
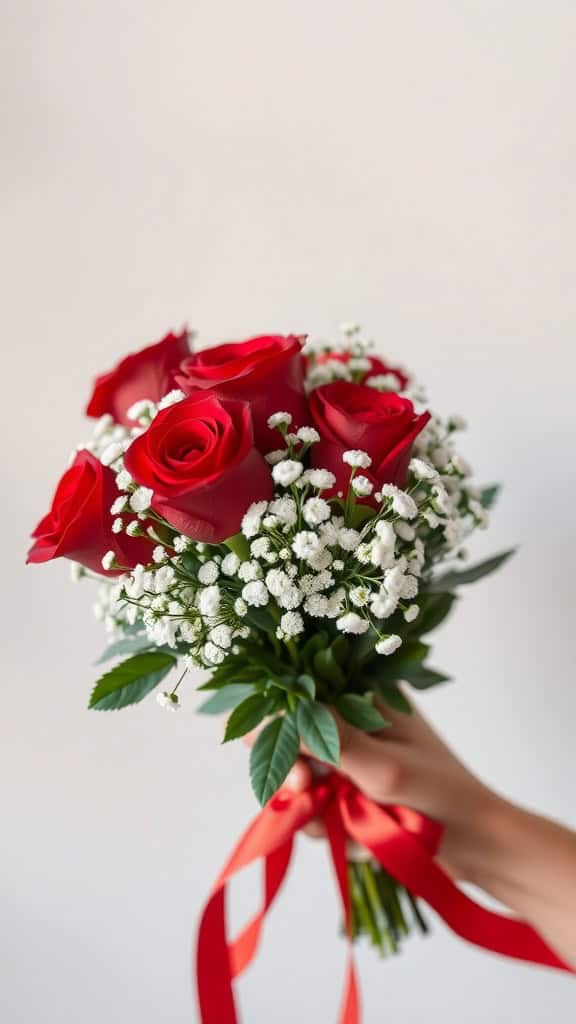
- Auburn red
- Olive green
- Cream and soft gray
Adding pops of color is fun, but the best rustic displays keep things grounded in these earthy tones.
Simple Forms with Whimsical Details

I love when nothing about a centerpiece feels too perfect or planned. Rustic style skips the stiff, symmetrical flower towers for arrangements that look almost accidental in a good way. Wildflowers spread in mason jars, twigs poking out here and there, loose leaves, or even a few adorable acorns can make something feel special.
Here’s a handy list of my favorite casual details:
- Wildflowers mixed with store-bought blooms
- Mason jars wrapped in burlap or lace ribbon
- Bundles of wheat or dried grasses
- Mini pumpkins and gourds tucked among candles
- Scattered pinecones, acorns, or even fall fruit
If you’re like me and decorating with kids at your side, this relaxed approach is a lifesaver! Let them scatter pinecones or tie ribbon bows. It all adds to that “just right” sense of hominess.
Imperfect, Handcrafted Vibes
The heart of rustic style sits in its little “imperfections.” Handmade or hand-picked elements shine here. Trust me, you don’t need fancy centerpieces straight from a catalog. A few paint-chipped lanterns, DIY wood signs, or vases filled with foraged greens can steal the show.
Some easy ideas for that cozy, handmade touch:
- Painted or carved pumpkins
- Chalkboard name tags
- Candles in old jam jars
- Home-sewn fabric squares
- Family heirlooms or personal knickknacks
It’s like your grandma’s living room, full of charm and stories. What matters most is the care and thought behind each touch.
Bringing the Outdoors In
Rustic tables always borrow from nature. I like to gather little treasures from outside—branches, leaves, seed pods—and nestle them around each centerpiece. If your kids love a nature walk, even better! Put them to work finding pinecones or pretty pebbles. Everything feels more festive when it’s got a little bit of the backyard in it.
You don’t have to get fancy. Just embrace whatever feels real and welcoming to you. That’s the heart of a rustic fall celebration!
DIY Rustic Fall Wedding Centerpieces: Easy Projects for Busy Moms
If you’re like me, you want rustic fall wedding centerpieces that are beautiful, stress-free, and actually doable with kids underfoot! Pulling together these warm, welcoming centerpieces shouldn’t make you crazy. With a few simple materials, some honest-to-goodness shortcuts, and a dash of personality, any busy mom can whip up centerpieces that look like they came straight from Pinterest. These little projects let you put your family’s stamp on the big day and even get the kids involved. I promise, you don’t need a fancy craft room or endless weekends. Let’s make something special that says fall, family, and love!
Mason Jar Magic: A Mom’s Go-To
Mason jars are my secret weapon for rustic style. You can fill them, wrap them, or stack them, and they always look charming. This project is fast, affordable, and so easy even my youngest can help out!
- Supplies: Mason jars in different sizes, burlap ribbon, hot glue, twine, and some faux or real wildflowers.
- How-To: Wrap burlap and twine around each jar. Add a few dabs of glue so everything stays put. Fill with wildflowers, eucalyptus, or even wheat stalks.
- Mom tip: Let the kids pick the flowers or tie the ribbon bows for that sweet, imperfect touch.
Set a few jars in the center of each table, or cluster them on a wood slice. You’ve got an instant centerpiece that looks like it took way more effort than it did!
Pumpkin Vase Centerpiece
Pumpkins are the official fall symbol, and letting them double as vases feels both fun and festive. Plus, it’s a little messy, so kids love to help.
- Supplies: Small pie pumpkins, floral foam, a sharp knife, and seasonal blooms.
- How-To: Cut off the top of each pumpkin and scoop out the seeds (save some for roasting later!). Tuck a soaked piece of floral foam inside and arrange your flowers—think mums, dahlias, and greenery.
- Mom tip: Let your kids poke in smaller blooms or add a tiny scarecrow pick.
Place a pumpkin vase on each table for a pop of autumn color that can’t be missed. It’s one of those “Why didn’t I think of this sooner?” projects.
Wood Slice Arrangements
Nothing feels more rustic to me than a thick wood slice topped with pretty details. One trip to the craft store or a friendly neighbor with trees, and you’re set!
- Supplies: Wood slices (you can buy these), mason jars or old bottles, mini pumpkins, pinecones, and tea lights.
- How-To: Arrange jars and pumpkins on the wood slice. Add pinecones and scatter a couple of tea lights for glow.
- Mom tip: My kids love running through the yard to find pinecones. Give them a basket and let them gather as many as they can!
This little centerpiece is perfect for round tables. It’s so easy to pull together and lets each table have its own bit of woodland charm.
Hay Bale Table Runners
Hay bales aren’t just for outdoor décor. Small craft hay bales can turn into fun, textural runners that stretch down the center of a long table.
- Supplies: Mini hay bales (found at the craft store), faux leaves, plaid napkins, and candles in jars.
- How-To: Line up the hay bales down the center of your table. Nestle candles and sprinkle faux leaves along the top. Tuck in napkins for extra color.
- Mom tip: Make it a family affair. Everyone can help unwrap the bales, lay down the leaves, or line up the candles.
This centerpiece gets noticed right away, and it makes your reception feel like a true country gathering.
Tiered Tray of Autumn Treats
Every celebration needs snacks! Why not make your centerpiece edible (and kid-approved) by using a tiered tray loaded with tiny autumn treats?
- Supplies: Tiered tray (metal or wood), mini pies, candied nuts, fresh apples, and some faux foliage.
- How-To: Stack treats on each level of the tray. Fill in gaps with little sprigs of leaves or twigs.
- Mom tip: Let the kids help place treats—they’ll love sneaking a bite or two.
A tiered tray centerpiece does double duty: it looks pretty and keeps kids (and grownups) happy between courses.
Quick Ideas for Last-Minute Centerpieces
If time is running short, don’t panic! Here are a few ideas that are quick to put together but still ooze rustic fall style:
- Fill clear vases with cinnamon sticks, dried oranges, and bright leaves.
- Arrange apples and pears in a wooden crate lined with a plaid tea towel.
- Stack old books, wrap them in twine, and add a candle on top for a cozy vintage look.
Materials and Where to Find Them
Sometimes the hardest part is just collecting the supplies, especially when life is busy. Here’s a quick table that shows where I usually find what I need.
| Item | Where to Shop |
|---|---|
| Mason Jars | Grocery store, dollar store, Amazon |
| Burlap Ribbon | Craft stores, Walmart, online shops |
| Wood Slices | Craft stores, Etsy, backyard trees |
| Mini Pumpkins | Local farms, grocery stores, farmers’ markets |
| Faux Leaves | Craft stores, dollar stores, Amazon |
| Pinecones | Your backyard, nature trails, craft stores |
| Floral Foam | Walmart, Michaels, Dollar Tree |
| Tiered Trays | HomeGoods, Target, Amazon |
Grab your list and make it a weekend outing with your kids! Sometimes the hunt makes the memories even sweeter.
These simple projects bring heart and warmth to your wedding, all without taking over your entire to-do list. Gather a few supplies, invite your family to join in, and let the season’s magic shine on each table.
Inspiring Rustic Fall Wedding Centerpiece Ideas to Spark Your Creativity

When I start dreaming up rustic fall wedding centerpieces, my mind races with possibilities. I always want tables to feel warm and welcoming. Using what nature offers is not only budget-friendly but also gives everything a personal touch that makes guests feel right at home. These ideas bring your family together and fill your wedding with charm everyone will remember.
Using Natural Elements: Leaves, Pinecones, and Acorns
If your yard is anything like mine in the fall, there are leaves and pinecones everywhere! What some call “yard mess” can become centerpiece magic. I like to make gathering these bits a family event. My boys and I grab baskets and head outside. We race to see who finds the prettiest red leaf or the biggest pinecone. Not only do we end up with piles of decorating supplies, these moments turn into sweet memories.
Practical ways to make it work:
- Go for a walk together: Kick through leaves at a park or in your backyard. Pick up colorful leaves, acorns, sweet gum balls, and pinecones. (Little hands love to help!)
- Sort and prep: When you get home, lay everything out on a big towel. Shake off dirt. If you’re using pinecones or acorns from outside, bake them at 200°F for about 30 minutes to dry out bugs and sap.
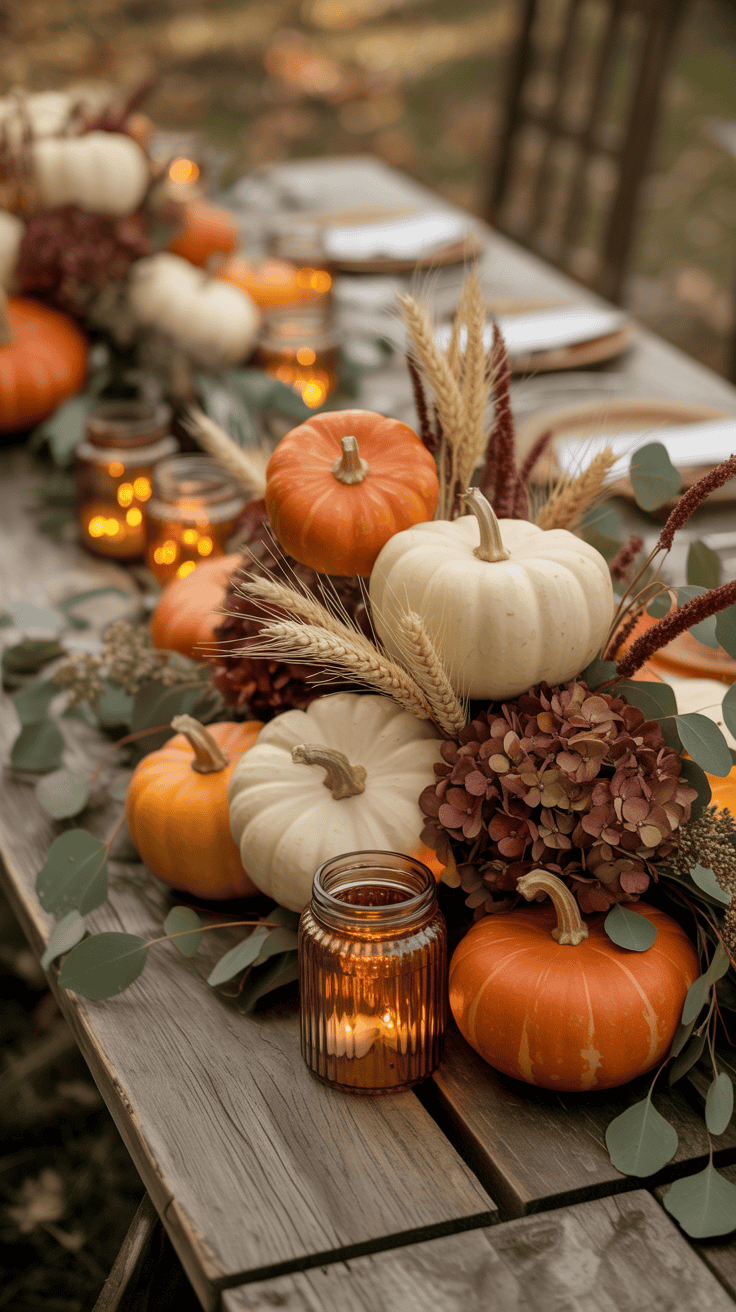
- Simple, pretty arrangements: Fill glass cylinders or mason jars with layered leaves, acorns, and pinecones. Tie some twine around the top or tuck a small sprig of greenery inside.
- Scattered accents: Arrange wood slices, leaves, and pinecones around flower arrangements or candles on your table. Mix in mini pumpkins for extra fall flair.
Here are a few ways I like to style these natural treasures:
- Layered Look: Lay big leaves flat under vases or jars for a splash of color.
- Pinecone clusters: Stack pinecones in small baskets or old tins for rustic texture.
- Mini wreaths: Use wire to loop leaves and acorns into tiny wreaths for each table. It doesn’t have to be perfect—wobbly shapes feel friendly and homemade!
Family tip: Invite kids to create “nature place cards.” Let them glue a leaf to some thick paper, then write each guest’s name. It’s simple and guests always smile!
Best part? Nature is free, and cleanup is quick. If you want a true family memory at the heart of your wedding, this approach makes rustic fall wedding centerpieces personal and fun.
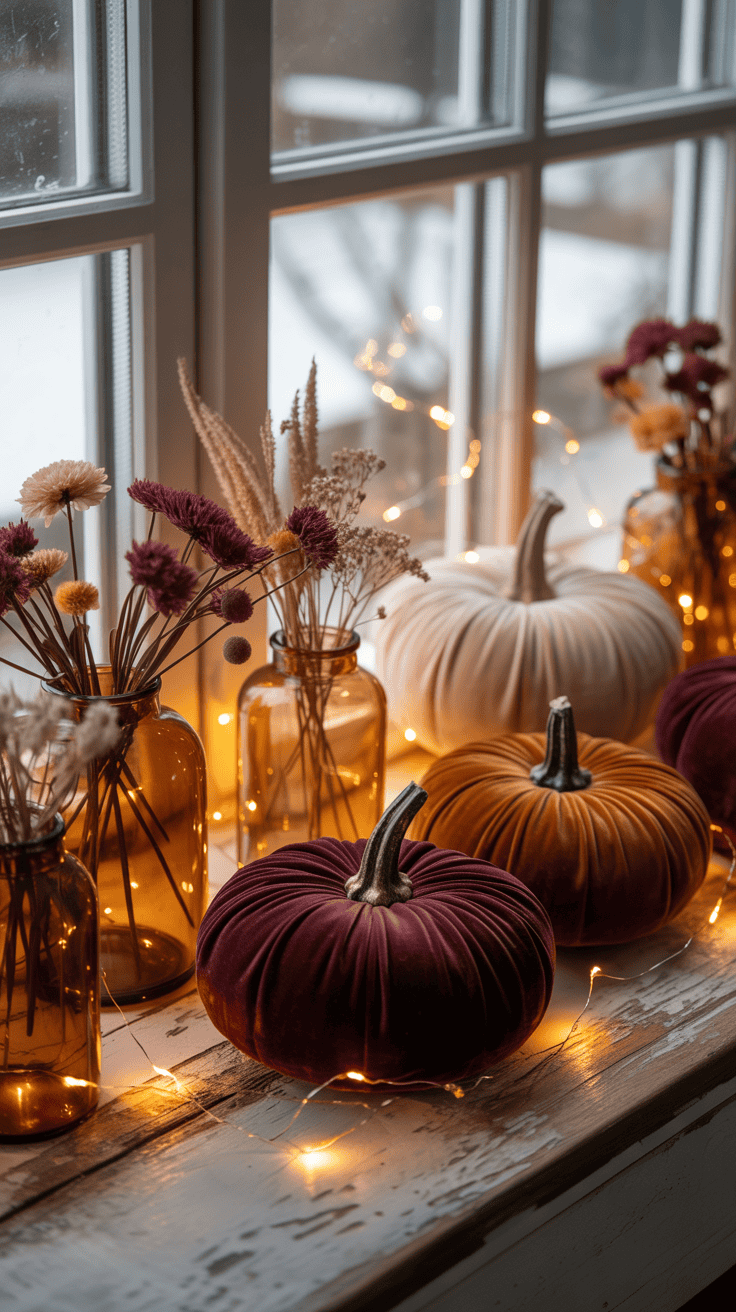
Adding Warm Glow: Candles and Fairy Lights

Nothing says cozy like the glow of candles and twinkling fairy lights! They bring a sense of calm, especially as the sun sets. If you’re like me and have three wild little ones running around, safety is always on your mind.
Here’s how I stick to kid-friendly options but still get all the warmth:
- Battery-powered candles: These look like the real thing (some even flicker!) without risk of burns or spilled wax.
- Mason jar lanterns: Tuck flameless candles into jars and wrap the outside with a little twine or lace.
- Glass cloche covers: If you do use real candles, set them inside tall vases or hurricane glass. This keeps little fingers safe and prevents mishaps if someone bumps the table.
Now, fairy lights are a mom’s best friend here! They’re easy to string, lightweight, and can be poked and draped just about anywhere. Here’s how I love to use them:
- Around centerpiece bases: Weave tiny fairy lights among pinecones and pumpkins on a wood slice or tray. They’re so sparkly!
- Inside jars and bottles: Fill a clear bottle or jar with a string of lights for a firefly-inspired effect.
- Wreaths and garlands: Wind mini lights through leaf garlands down the center of a long table for a magical (but not fussy) runner.
These simple touches create a table that makes you want to linger. Friends and family will feel the pull to sit a bit longer and share stories. My boys are always drawn to the twinkle, and seeing their eyes light up reminds me how special the small details can be.
Safety first! Always check batteries and switches before the big day. For outdoor weddings, make sure everything is waterproof, or add a few extra layers of tape and plastic to keep connections dry.
With these cozy ideas, your rustic fall wedding centerpieces will feel like a slice of autumn magic—warm, bright, and filled with family love.
How to Style Rustic Fall Wedding Centerpieces for Every Table
Planning out rustic fall wedding centerpieces is my favorite part of decorating for a cozy celebration! There’s nothing more fun than looking at each table and imagining how a touch of autumn warmth will make it feel special. I always keep in mind that every table has its own personality—just like our families. Whether you’re gathering around big round tables, long farm tables, or tucking a sweetheart table off to the side, you want every spot to feel inviting. With a few simple ideas, any table can feel like the best seat in the house for your rustic fall wedding centerpieces.
Choosing Centerpiece Heights and Sizes for Each Table
Not all tables are created equal, and I learned this fast after one too many wobbly vases and crowded soups. The trick is picking the right height and size for your centerpieces. If the centerpiece is too tall or bulky, folks can’t chat across the table. If it’s too tiny, it might get lost.
I like to think about these things:
- Round tables love a central focus. A medium-sized arrangement, like a mason jar of wildflowers on a wood slice, is perfect.
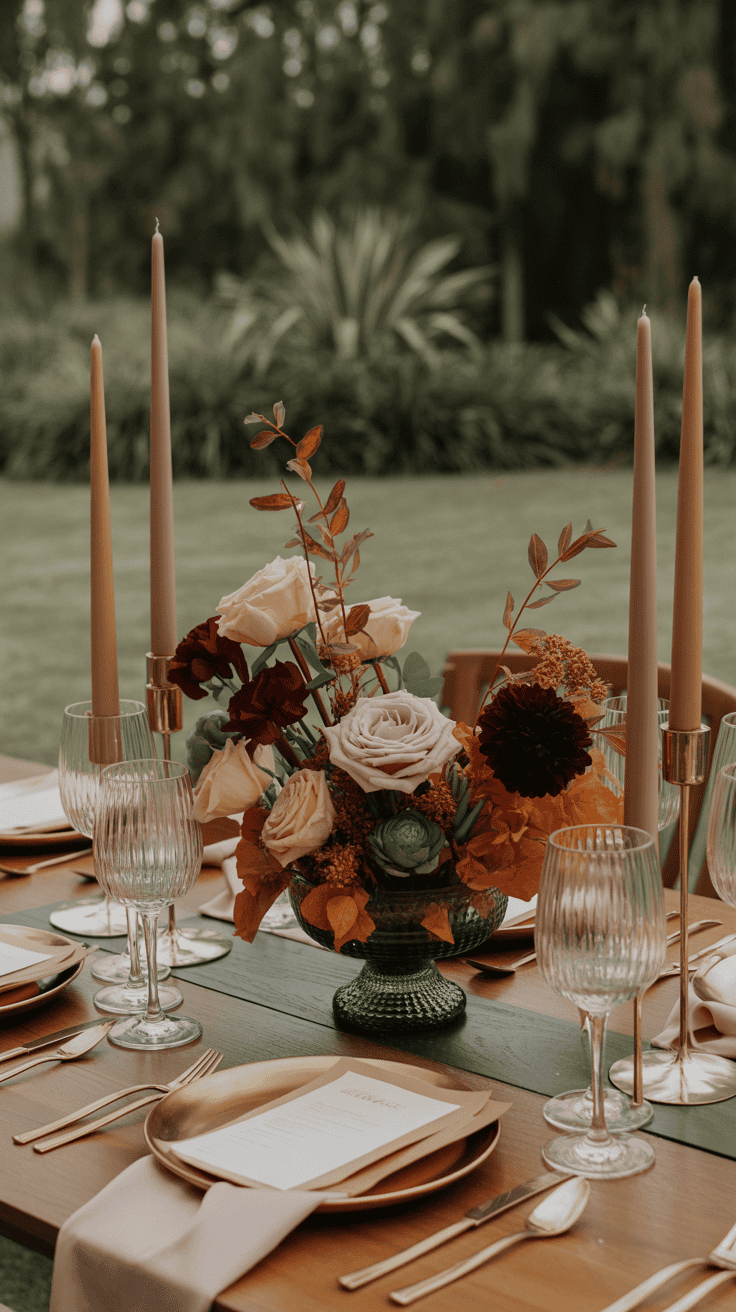
- Rectangle or farm tables look beautiful with a long, low runner of candles, pumpkins, and loose greenery. Think of it as setting a leafy trail down the middle.
- Sweetheart or buffet tables can handle something a bit taller or more unique since you want to mark them out as special spots.
Keep a tape measure handy on setup day! Aim for under 12 inches high for group tables so everyone can see each other. Save taller arrangements for areas where people aren’t chatting across the centerpiece.
Mixing and Matching for a Relaxed, Homey Look
It’s easy to get caught up thinking every table has to match perfectly. I promise, mismatched centerpieces are a big win for rustic fall weddings! I love mixing types and containers. Sometimes I use a cluster of small jars on one table and a pumpkin vase on another. It doesn’t have to look straight out of a catalog—this way, every table feels special and genuine.
Some ways I make it work:
- Repeat a color or material (like burlap or twine) on each arrangement even if the details change.
- Rotate between using candles, mini pumpkins, or jars, but stick to the same autumn color palette.
- Mix flowers and greenery with fruit or nuts for a varied, playful feel.
This approach is especially helpful when you’re relying on family collections, hand-me-downs, or whatever the kids find in the backyard!
Styling Tables for Kids, Family, and Special Guests
As a mom, I try to plan for tables that need extra love. If you’re making tables for kids or grandparents, think about safety, comfort, and fun details.
For kids’ tables, I like to:
- Use shorter centerpieces that can’t tip easily, such as a tray filled with gourds or a jar of battery-run fairy lights.
- Skip glass and use plastic or wood when possible.
- Add a playful detail, like jars filled with crayons or tiny scarecrow picks.
For family or VIP tables, add a personal touch:
- A photo of the couple as kids or a framed recipe card from Grandma.
- An heirloom vase or a table runner with family history.
- Special flower varieties that mean something, like sunflowers for a family farm.
These small touches make people feel seen and loved—and they look beautiful in pictures!
Layering Textures for That Warm and Cozy Feel
Rustic fall wedding centerpieces shine when you layer different textures. It’s like building a good stew—the more layers, the richer the effect! I always start with a base, whether that’s a slice of wood, a simple runner, or some woven placemats.
Pick two or three of these to combine:
- Wood and burlap: Never fails to look warm.
- Glass and metal: Add clear jars but sneak in a sprig of copper wire or a tin pitcher.
- Leaves and branches: Scatter real or faux leaves around your main arrangement, or tuck in curly willow branches for height.
Don’t be afraid to let things spill over the edges or look a little undone. That’s what makes the look so comforting and natural.
Adding Interactive and Edible Elements
I’m all for making decor do double duty, especially if kids are at your wedding! Edible centerpieces are a huge hit at our family gatherings. Who says you can’t tuck in a few snacks or treats among the flowers?
Some tried-and-true ideas:
- Bowls of apples or small bags of caramel popcorn tucked alongside flowers.
- A basket of biscuits wrapped in gingham, paired with honey jars.
- A tiered tray holding tiny pies, nuts, or chocolates.
Guests love a nibble, and it makes the whole table feel more like sitting down at Grandma’s house.
Personalizing Centerpieces to Match Your Story
Nothing beats adding a little family flair to your rustic fall wedding centerpieces. Over the years, I’ve seen the sweetest tables dressed with personal details and family stories.
Here are some fun ways to personalize each table:
- Slip a handwritten note or a “why we’re grateful” card under each plate.
- Set out little framed photos from both sides of the family.
- Use name cards made by the kids for everyone at the table.
- Mix in favorite childhood treats or candies in tiny mason jars.
It doesn’t take much—just a thoughtful touch or two—to make everyone feel right at home. That’s the spirit of a cozy rustic fall wedding centerpiece for every table, if you ask me!
These ideas make styling rustic fall wedding centerpieces simple and joyful, even for a busy mom juggling a full house. The right mix of warmth, charm, and fun makes each table its own little celebration spot!
Tips for Stress-Free Planning: Budget, Sourcing, and Time Management
Planning rustic fall wedding centerpieces might sound simple, but as a mom with three busy boys who never stop moving, I know how quickly things can get overwhelming. Big celebrations are full of moving parts! Family, friends, vendors, and that never-ending checklist mean something always tries to slip through the cracks. I want to make sure your planning feels fun, not frantic. Here’s how I keep my centerpieces—and my sanity—on track with some clear tips for budget, sourcing, and time management. Trust me, if I can pull it off in a house full of noise and homework papers, you can too!
Finding a Realistic Budget That Still Feels Special
I always start with the budget, even if it’s just a scribble on a scratch pad. No one wants to fall in love with centerpiece ideas only to stumble when it’s time to check out at the craft store. Rustic fall wedding centerpieces are perfect here, because they use natural, affordable materials and lots of DIY.
Some things to consider when setting the budget:
- Total centerpiece cost per table: Keep it simple! I stick to around $15–$25 per table. With the right pieces, this stretches surprisingly far.
- Factor in reusable items: Mason jars, wood slices, and vases can often be borrowed or reused for other family parties.
- Mix real and faux: Don’t be afraid to combine real flowers with faux stems or greenery. It stretches your dollar and looks adorable!
- DIY where possible: Getting crafty with your kids isn’t just sweet, it’s budget-friendly.
To make things even clearer, here’s how I usually break it down:
| Item | Estimated Cost | Times Used | Cost-Effective Tips |
|---|---|---|---|
| Mason jars | $1–$2 each | Reusable | Buy in bulk packs or ask friends |
| Wood slices | $2–$4 each | Reusable | Slice your own (with help!) |
| Seasonal flowers | $5–$10/table | Single use | Look for local, in-season bundles |
| Mini pumpkins | $1–$2 each | Compostable | Farmer’s markets in late fall |
| Faux leaves | $3/pack | Reusable | Great from craft stores |
| Candles/lights | $5–$10 table | Reusable | Get battery-operated in multipacks |
Write out your supplies and estimated prices before your first shopping run. That way, you’re less tempted by things you don’t need, and you know at a glance if something’s a bargain or not.
Where to Find the Best (and Most Affordable) Supplies
Sourcing can trip up the best plans, especially when money and time are tight. Over the years, I’ve learned that thinking outside the box (and outside the big box store!) saves so much stress—and usually brings more joy into the process.
Here’s where I look first:
- Dollar stores and thrift shops: Perfect for jars, baskets, and random little treasures. You’ll often spot exactly what you didn’t know you needed.
- Nature walks: Some of your prettiest centerpiece pieces are in your own backyard. Pinecones, acorns, and colorful leaves cost nothing. Plus, it’s an adventure for the kids.
- Farmers’ markets: Local growers will have seasonal pumpkins, squashes, or even just bunches of dried wheat.
- Online swaps and Facebook groups: Ask friends, family, or local groups if they have spare mason jars, burlap, or candle holders.
- Craft and big-box stores: Save these for the must-have items, but always check for sales and coupons first.
Before you buy, always check what you already have. I once found a whole box of fairy lights from Christmas hiding in the garage, which wound up being the perfect twinkle for our tables.
Time Management: Simple Steps to Stay Ahead
Nothing raises my stress more than the night-before panic. You know the one—kids finally asleep, and suddenly the kitchen is covered in half-finished centerpieces and you’re running out of glue sticks. Let’s skip that nightmare!
Here’s how I keep my wedding planning on track without losing my mind:
- Start early, even if just a little: I begin gathering supplies 4–6 weeks before the event. I keep all my finds in a big plastic tub.
- Make a timeline with weekly goals: One weekend could be for jars and flowers, another for collecting pinecones or gluing burlap bows.
- Batch your projects: Set aside a family craft night. We try to do all the assembling in one big push—just put on music and make it a party.
- Enlist help: Let your kids, partner, or even neighbors pitch in! Many hands make light work (and keep everyone entertained).
- Label and organize: I use sticky notes to mark which centerpiece goes to which table or area; that way, setup day is a breeze.
A sample timeline always helps me see if I’m on track:
| Task | When to Start | Notes |
|---|---|---|
| Gather supplies | 4–6 weeks ahead | Dollar store runs, nature walks |
| Prep/clean natural items | 3 weeks ahead | Bake pinecones, clean jars |
| Assemble bases/ribbons | 2 weeks ahead | Pre-wrap jars, cut burlap |
| Arrange flowers/pumpkins | 1–2 days ahead | Do with kids or a helper |
| Final assembly/setup | Event morning/evening | Bring everything to venue |
Don’t forget: If you’re making edible or fresh flower centerpieces, save the final touches for as close to the wedding as possible so they look their best!
If chaos starts creeping in, just remember: these centerpieces are about sharing warm family moments, not perfection. A little planning ahead, a pinch of creativity, and a willingness to let go of the tiny stuff turns “stressful planning” into sweet, simple fun. The best part? By involving your family, even the prep turns into a happy memory—one full of laughter, flour-dusted hands, and a whole lot of love!

Conclusion
Creating rustic fall wedding centerpieces is honestly one of my favorite ways to bring family together and fill your celebration with real warmth. With a handful of simple materials and your own personal touch, each table becomes a memory you can share with the people you love most. You don’t need a fancy budget, just a spark of creativity and the joy of letting your kids pitch in.
Don’t stress about making everything perfect! The beauty comes from those little handmade quirks and the laughter along the way. Go ahead, have fun with it, and soak in the season. If you’ve tried your own rustic fall wedding centerpieces or have ideas that worked for your family, I’d truly love to hear what made your day special. Drop a comment below, share a photo, or tell your story—I’m cheering for you every step of the way. Thanks for spending this time with me, mom to mom, and let’s keep supporting each other through every big (and sometimes messy!) celebration!
This post may contain affiliate links. Read the full disclosure here.