DIY Thanksgiving Centerpiece Ideas to Make This Week
With three busy boys running around, I know how tricky it can be to pull together a festive Thanksgiving table that actually feels special. That’s why I love simple, fun DIY Thanksgiving centerpiece ideas that don’t take forever to make but still add that charming, cozy touch!
Once you’ve made your centerpiece, take a peek at these simple Thanksgiving table decorating ideas to pull the whole look together.
These projects are super easy to fit into a hectic week and perfect for creating some holiday magic with the kids. Trust me, a little effort goes a long way in making the table look inviting without adding to the chaos!

How to Get Started with DIY Thanksgiving Centerpieces
Getting started with DIY Thanksgiving centerpiece ideas can feel overwhelming at first, but it doesn’t have to be that way. I’ve found that the magic really begins when you pick a theme that matches your family’s personality, gather smart and affordable materials, and carve out some time that works for everyone—even the kids. It sets the tone for a centerpiece that feels personal and festive without adding stress to your busy week. Here’s how I approach it.
Choosing a Theme That Fits Your Family Style

The best centerpieces start with a theme that speaks to your family. It could be something cozy, rustic, playful, or classic. To find a theme that clicks, I think about what makes my family tick during the holidays. Is it the warm, earthy colors that remind us of our backyard? Or maybe the whimsical little details the kids love to spot each year?
Try these ideas to narrow down your theme:
- Look at your existing décor. Match the centerpiece to colors or patterns you already use.
- Think about your family’s favorite Thanksgiving moments. Do you lean towards traditional turkey and pumpkins? Or maybe you have a soft spot for natural elements like leaves and pinecones.
- Add a personal touch. This could be something like incorporating handmade tags with family member’s names or a simple quote that sums up your holiday mood.
When your centerpiece feels like it belongs at your table, it becomes part of the holiday story instead of just decoration.
Budget-Friendly Materials and Where to Find Them

You don’t need to spend a fortune to make a centerpiece that looks charming and thoughtful. I always start by checking what’s already around the house and then look for affordable extras. Some of the best materials come straight from nature or the dollar store.
Here’s a list of budget-friendly materials I often use:
- Natural finds: Leaves, acorns, pinecones, branches, and berries from your yard or local park.
- Dollar store treasures: Candles, mini pumpkins, artificial flowers, ribbon, or simple bowls and vases.
- Household items: Mason jars, old wooden trays, glass bottles, and leftover fabric scraps.
Places to keep an eye out for these materials:
- Local park or your own backyard for natural bits.
- Dollar stores and craft stores for inexpensive decor pieces.
- Your own kitchen or storage for reusable containers or seasonal cloth napkins.
By mixing natural elements with simple finds, you get a centerpiece that looks like you spent a lot of time on it, but didn’t break the bank.
Setting Aside Time with Kids In Mind

If you have kids like I do (three rowdy boys who love to help but sometimes get distracted), setting aside time to make the centerpiece can be a bit tricky. The key is to make it fun and manageable without the feeling that it’s a big, stressful project.
Here’s what works for me:
- Break it down into short sessions. Instead of planning a big chunk of time, I spread the work over a few days, so everyone stays fresh and interested.
- Give kids simple, hands-on tasks. Collecting leaves, arranging pinecones, or placing small decorations around the centerpiece. These small roles keep them busy and proud of their work.
- Prepare a clean and safe workspace. Set up a spot where kids can create without worrying about mess or breaking anything special.
- Create a festive playlist or snack time to keep the mood lively. Making this a cozy family event is half the fun.
Including kids makes the centerpiece feel more special and memorable. Plus, they love showing off their handiwork on Thanksgiving day!
Getting started with DIY Thanksgiving centerpieces is easier than you think when you have a clear theme, smart material choices, and a plan to keep the whole family involved. The best part is watching those simple touches turn your table into a warm and welcoming place for everyone.
Easy and Stunning DIY Thanksgiving Centerpiece Ideas
When it comes to sprucing up the Thanksgiving table, finding simple and eye-catching DIY Thanksgiving centerpiece ideas is a lifesaver—especially when you’re juggling kids, errands, and last-minute meal prep! I love centerpieces that look special but don’t take hours or fancy tools to pull off. These ideas are my go-to picks when I want something charming, quick, and family-friendly. Here are three easy projects you can make this week that bring warmth and fall vibes right to your table.
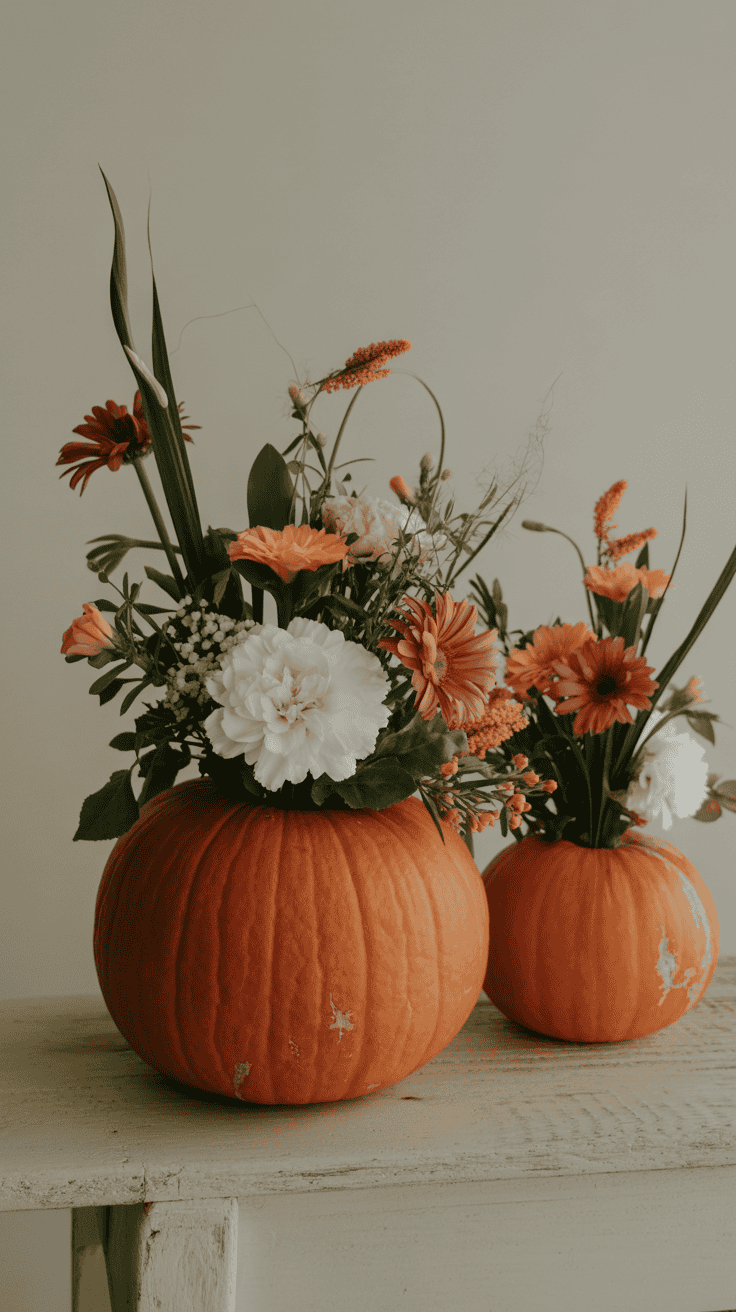
Rustic Pumpkin Vase Centerpiece

One of my favorite ways to add a cozy, rustic touch is by turning a pumpkin into a lovely flower vase. It feels festive and natural, and the kids enjoy helping with the scooping part (talk about a fun sensory activity!). Here’s how you can do it, step by step:
- Pick the right pumpkin. Choose a medium-sized one with a flat bottom so it sits steady on the table.
- Cut off the top. Use a sharp knife to slice around the stem about 3 to 4 inches down, creating a lid. Keep the lid for decoration or set it aside.
- Scoop out the insides. Hollow out the pumpkin completely, removing seeds and pulp. This gives enough space for your bouquet.
- Add a container. Place a small jar or vase inside to hold water. This keeps the pumpkin from getting soggy while keeping flowers fresh.
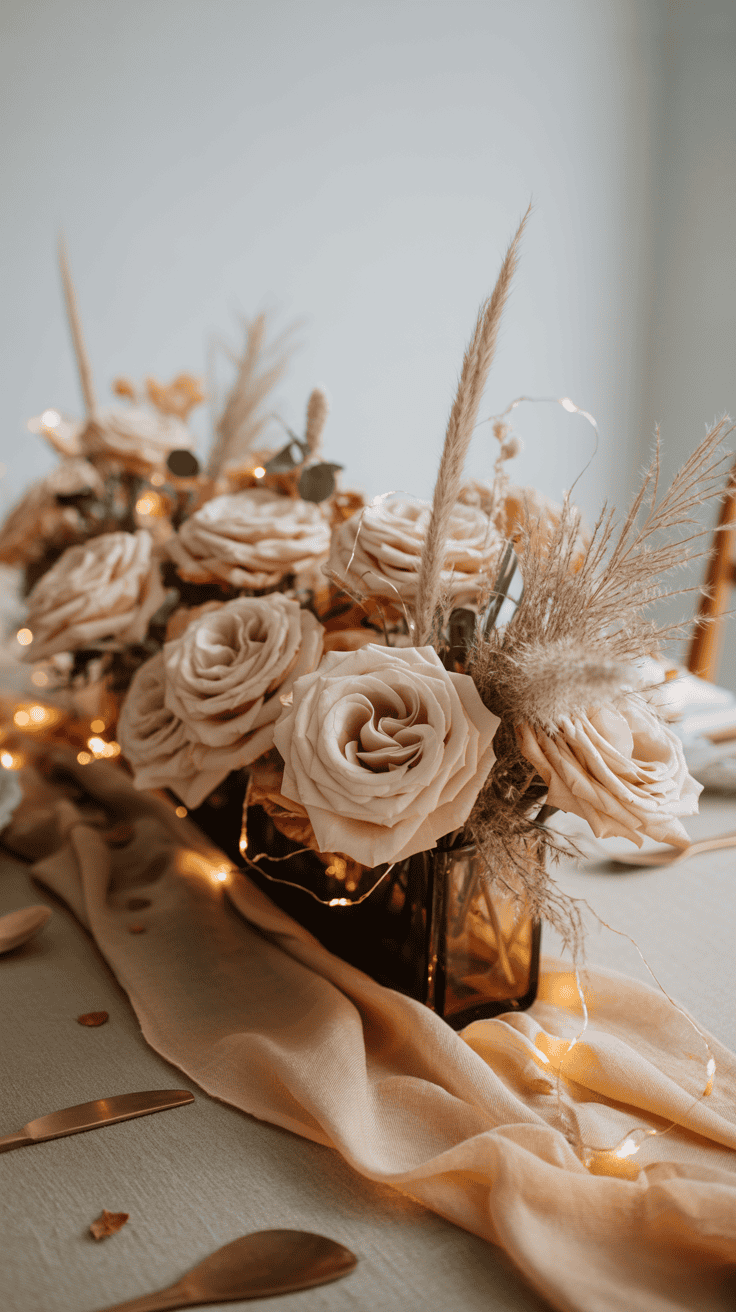
- Arrange your flowers. Use fall blooms like sunflowers, mums, or even eucalyptus branches for texture and color. Mix in some twigs or dried wheat for a rustic feel.
- Optional touch: Place the pumpkin lid slightly askew or prop it beside the vase for a casual, natural look.
This pumpkin vase centerpiece feels so cozy and warm. Plus, the fresh flowers add a bright pop of color that really brings the whole table to life.
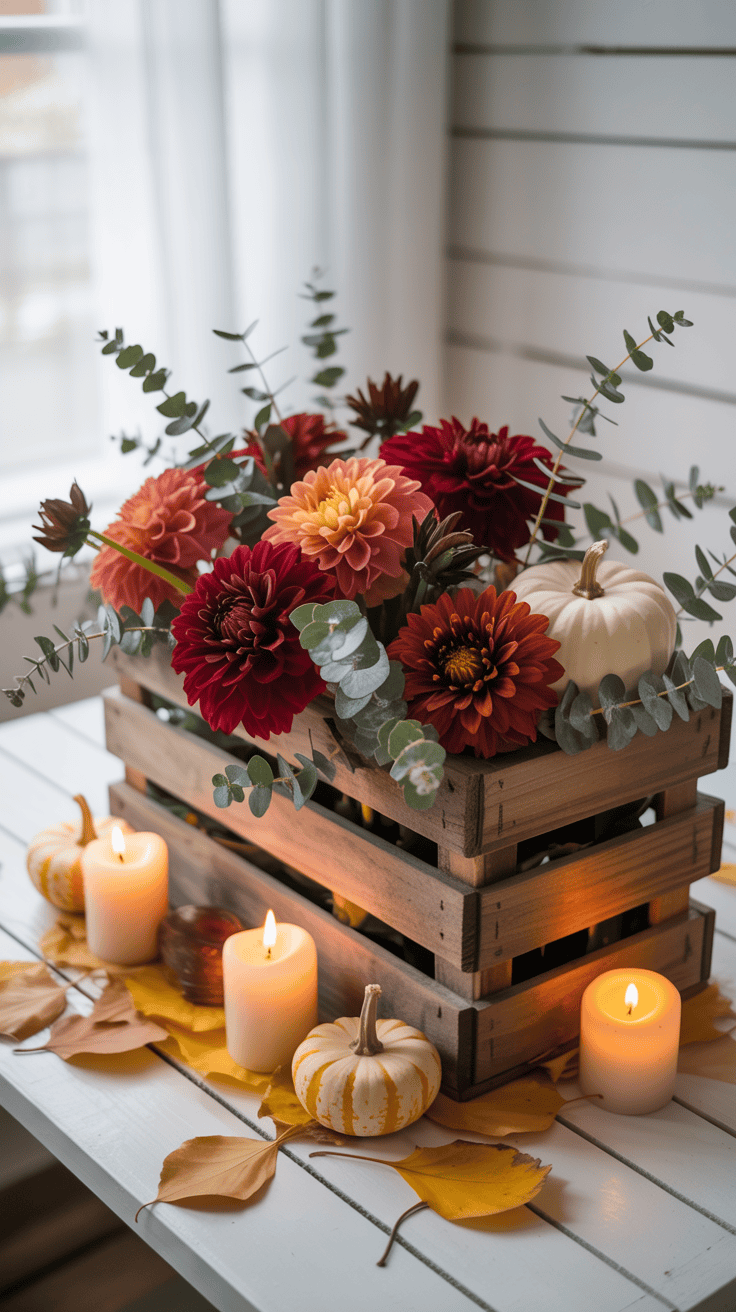
Candlelit Acorn and Pinecone Display

When the weather cools down, nothing says cozy like glowing candles mixed with natural touches. This acorn and pinecone display is so simple and makes the table feel inviting and warm by candlelight.
Here’s how I put one together in no time:
- Gather acorns and pinecones. If you don’t have your own stash, you can usually find these at craft stores.
- Choose your candles. I like small pillar candles or tea lights. Battery-operated candles work great if you want zero fuss.
- Pick a tray or wide bowl. Use something shallow and wide so you can spread the elements out.
- Arrange the pinecones and acorns. Scatter them across the base in a natural pattern.
- Nestle in the candles. Place them at different spots inside the arrangement. Grouping in odd numbers looks better and feels more organic.
- Add a sprig or two of greenery. A bit of eucalyptus or cedar adds color and freshness.
The flickering candlelight bouncing off pinecones feels perfect for Thanksgiving evening, making the whole family slow down and enjoy the moment. It’s so easy to do, and the warm glow is always a big hit.
Mini Cornucopia with Fresh Fruits
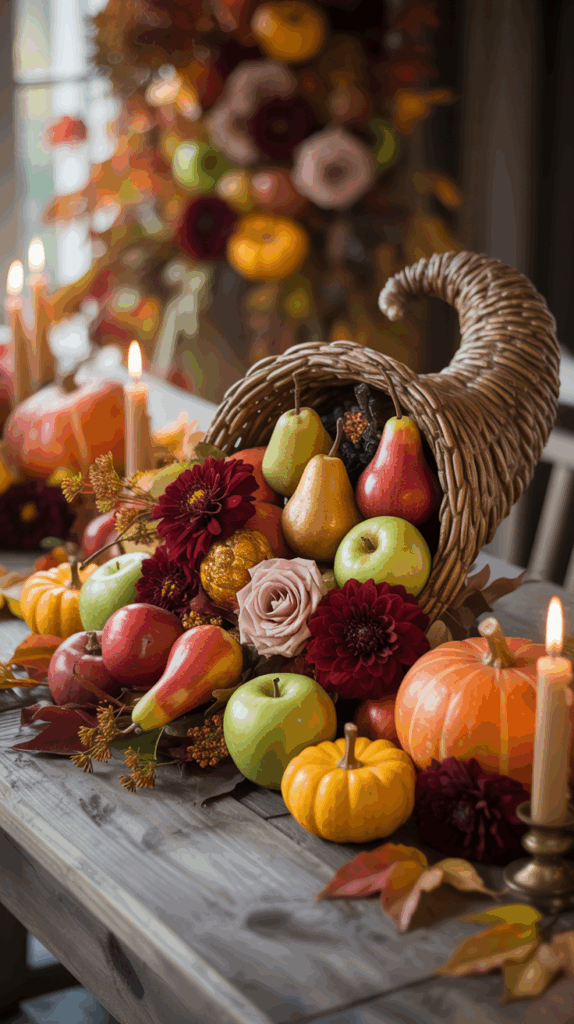
If you want a playful, colorful centerpiece, little cornucopias filled with fresh fruits bring that traditional harvest look in a cute, modern way. I love making these because they’re affordable and fun for kids to help with, especially when picking out fruits or arranging everything.
Here’s what you need and how to create them:
- Grab some craft cone shapes. You can find foam or wicker cornucopias at craft stores, or make your own by rolling brown paper into cones and securing them.
- Choose small or cut fruits. Apples, mini pears, grapes, figs, and cranberries work beautifully. You can mix in little faux berries if you want longer-lasting decor.
- Fill each cone carefully. Start by placing greenery or napkin scraps inside for support, then arrange fruits spilling out as if the harvest is overflowing.
- Add nuts or small gourds. They fill gaps and add texture.
- Tie a ribbon or twine around the top. It makes it look finished and adds a rustic touch.
Set a few mini cornucopias down the table or cluster them around your main centerpiece for a burst of seasonal color. They’re quick to make and add a whimsical, festive feel that kids love to show off.
These DIY Thanksgiving centerpiece ideas are all about easy, doable projects that bring the fall spirit right where the family gathers. No stress, just fun and warmth that brighten your holiday moments!
Kid-Friendly DIY Centerpieces to Make Together

When it comes to DIY Thanksgiving centerpiece ideas, involving the kids is a win-win. They get messy and creative, and you get a beautiful, meaningful centerpiece that tells a story. Plus, these projects keep little hands busy and big smiles coming. I love how these crafts turn into little family traditions, and best of all, they’re simple and fun to make even during a busy week. Here are two favorites that my boys and I have made more than once because they’re just that enjoyable and charming.
Handprint Turkey Centerpiece
This is a classic for a reason. The handprint turkey centerpiece is playful and so personal—it’s like having a little piece of your kids right there on the table. My boys get giggly every time we dip their hands in paint, and I love watching them see their “turkey feathers” come to life.
Here’s how to make it happen together:
- Gather materials: You’ll need colored construction paper (or cardstock), washable paints in fall colors like red, orange, yellow, and brown, glue, googly eyes (optional), and scissors.
- Paint the hands: Choose different colors and paint your kids’ palms and fingers. Press each hand firmly onto the paper to create several “feather” prints.
- Cut out turkey body: Use brown paper for the turkey’s body shape—something like an oval or circle.
- Assemble the turkey: Glue the handprint “feathers” fanned out behind the body. Add googly eyes and draw a beak and feet with markers.
- Add a base: Use a sturdy cardboard or wooden block painted in fall colors to attach the turkey so it stands up easily on your table.
It’s so rewarding to see those colorful handprints all around the turkey; it feels cheerful and personal. Plus, this centerpiece doubles as a keepsake you’ll want to save as the kids grow.
Painted Leaf Garland Centerpiece
Painted leaf garlands are a simple, charming way to bring nature’s beauty inside, sprinkled with your kids’ creativity. This project lets the kids express their artistic side while working with a natural harvest you can find on neighborhood walks.
Here’s how to create your own painted leaf garland centerpiece:
- Collect leaves: Start with a walk outside to gather different shapes and sizes of leaves. My boys loved seeing who could find the biggest leaf!
- Paint the leaves: Use non-toxic paints in Thanksgiving colors—rich reds, warm oranges, golds, and earthy browns. Let kids paint patterns, swirls, or solid colors on each leaf.
- Dry leaves: Spread them out on newspaper or paper towels to dry fully.
- String the garland: Use a sturdy thread or thin twine. Poke small holes in the dried leaves and thread them through, leaving some space between each.
- Create the centerpiece: Arrange the painted leaf garland around a candle, vase, or bowl for a soft, festive look. You can also coil it into a wreath shape and place it around your main table decoration.
This project is hands-down a favorite because it combines nature, art, and a bit of kid-powered magic. It draws the eye, feels natural, and makes the whole table cozy with that homemade touch.
Both of these projects are perfect if you’re hunting for diy thanksgiving centerpiece ideas that keep the kids engaged and add a splash of warmth and personality to your holiday table. They’re fast to make, affordable, and full of charm—just what we busy moms need during the whirlwind week before Thanksgiving!
Tips to Customize and Personalize Your Thanksgiving Centerpieces

When it comes to diy thanksgiving centerpiece ideas, adding your own personal touch makes all the difference. A centerpiece that reflects your family’s story or the season’s natural beauty creates a warm, inviting vibe that guests notice right away. I love finding ways to mix memories, colors, and textures to make something that feels truly special without needing lots of time or fancy supplies.
Incorporating Family Traditions and Memories
Adding sentimental items to your centerpiece is a wonderful way to bring family history right to the table. These small touches make the decoration mean more than just looks—they tell a story feeling fully connected to your loved ones and past Thanksgivings.
Here are some ideas I like to use:
- Display old family photos. Slip a few small pictures into cute vintage frames or DIY photo holders made from craft sticks or clip stands. It sparks conversation and creates instant nostalgia.
- Use heirloom dishes or linens. Adding a treasured cloth napkin, a hand-stitched doily, or your grandmother’s fruit bowl as part of the centerpiece instantly makes things feel cozy and personal.
- Incorporate handmade crafts. Kids’ drawings or handmade turkeys, dried leaf collages, or even small holiday notes with what family members are thankful for can be tucked right into the display.
- Add meaningful keepsakes. Maybe you have a little wooden turkey from a family trip or a carved pumpkin you made last year. These items bring a layer of warmth and tradition.
- Use seasonal family recipes as decor. Write out a favorite Thanksgiving recipe on decorative cards and place them with your centerpiece as a nod to the meal and memories.
By weaving in these sentimental pieces, your centerpiece won’t just look beautiful—it will feel like your family is right there with you, year after year.
Using Seasonal Colors and Textures
Colors and textures are the silent stars of a centerpiece. When you choose the right mix, your table looks pulled together without much effort. I usually stick to a palette that feels warm and natural because it’s easy on the eyes and matches the Thanksgiving spirit perfectly.
Here’s how I pick and combine colors and textures:
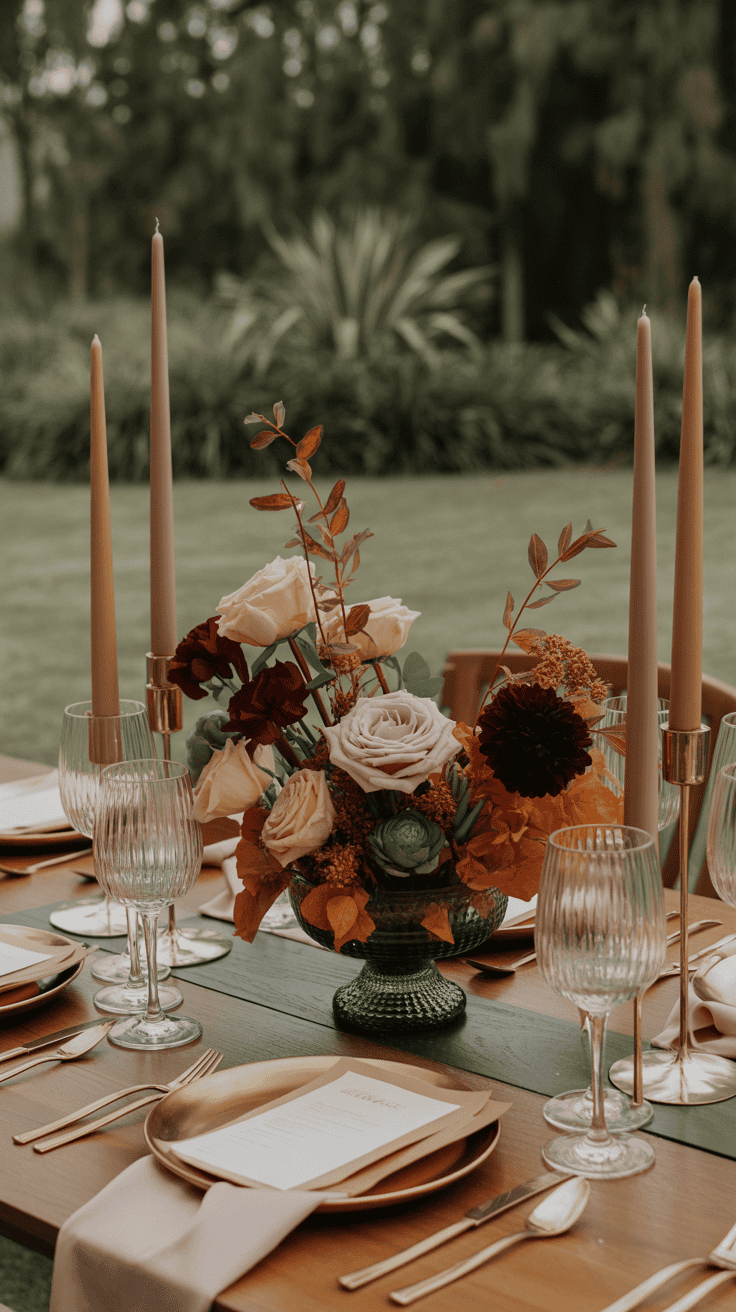
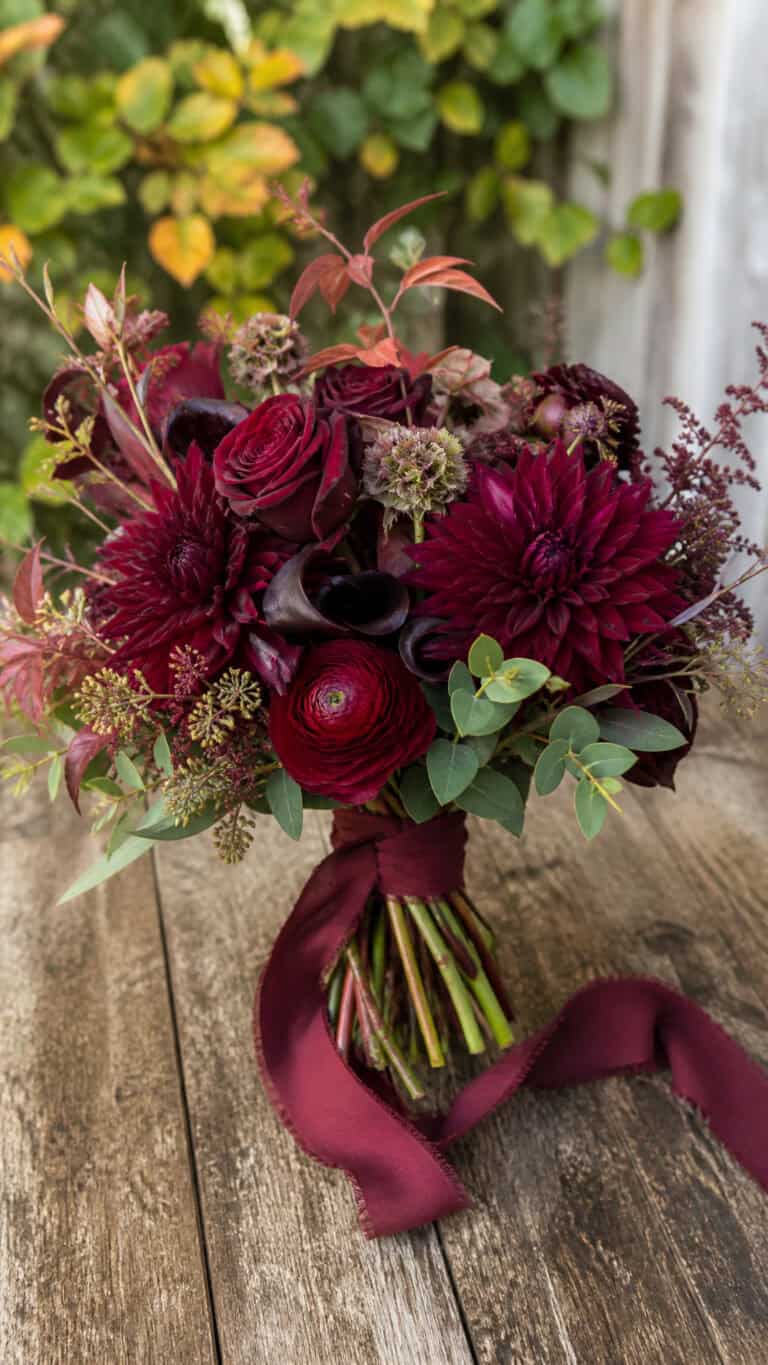
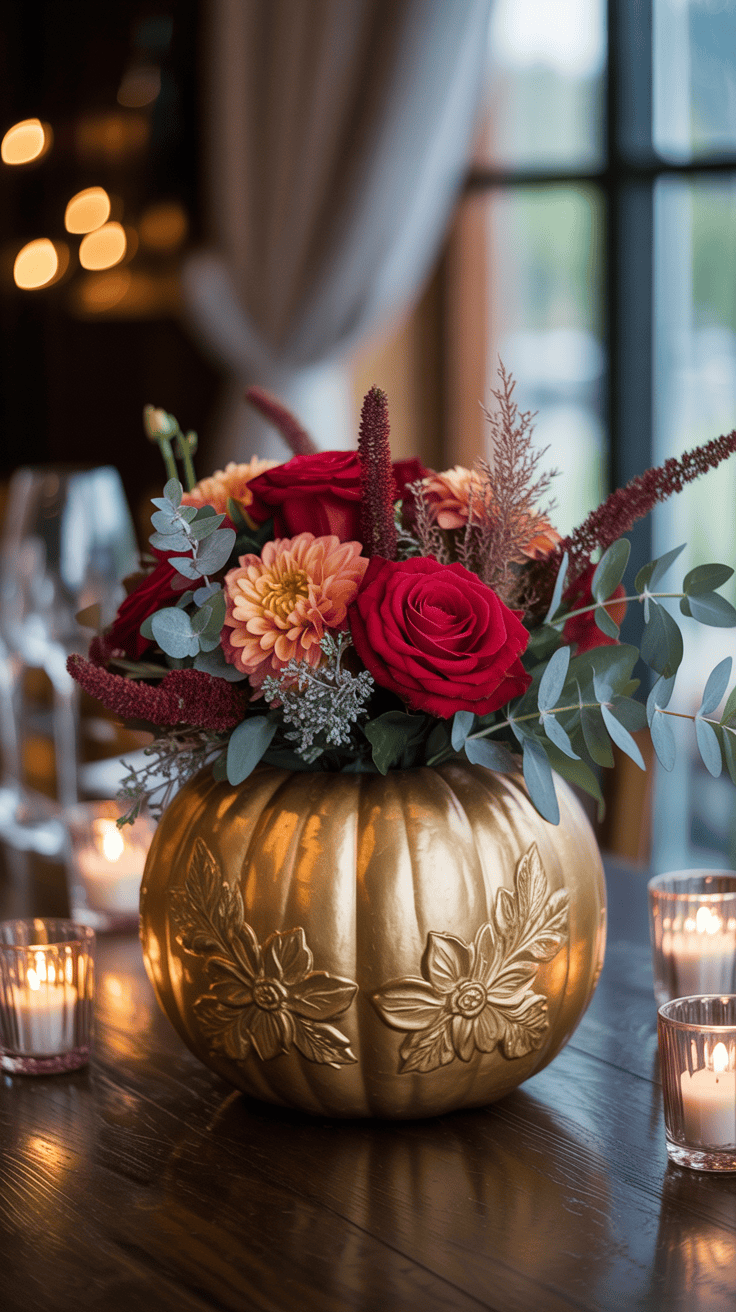
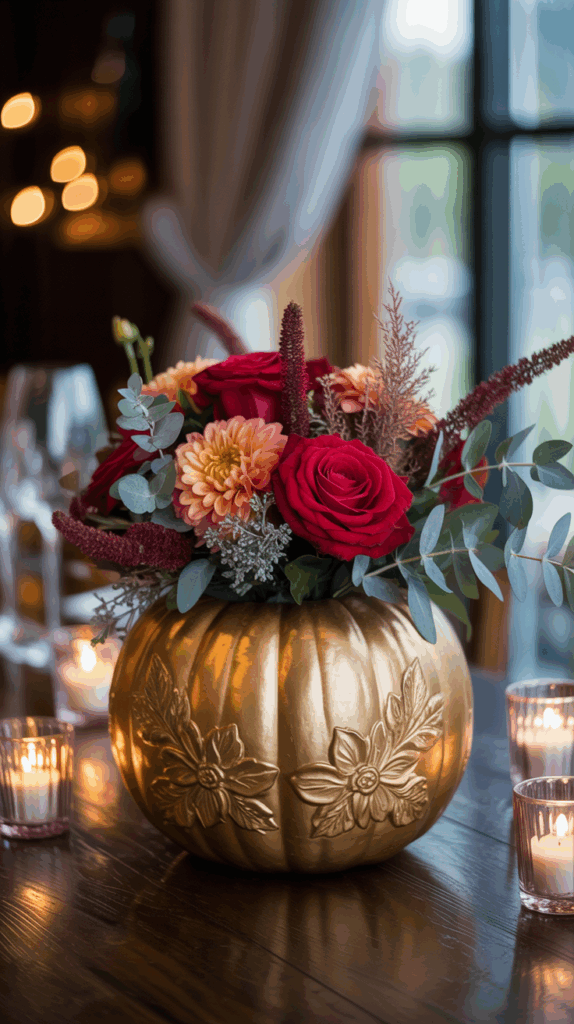
- Stick to classic fall hues. Rich oranges, deep reds, golden yellows, warm browns, and creamy neutrals create that instant autumn feel. You can use pumpkins, leaves, and flowers to bring those colors in naturally.
- Layer textures for interest. Think smooth pumpkins, rough pinecones, fluffy mums, shiny gourds, and soft ribbons. Playing with different surfaces keeps things visually appealing and cozy.
- Add touches of greenery. Fresh or faux eucalyptus, cedar sprigs, or even dried wheat can add color contrast and bring a bit of life to the centerpiece.
- Mix natural with manmade. Combining natural elements like acorns and branches with slight sparkle from metallic candles or ribbons helps the centerpiece catch the eye without feeling overdone.
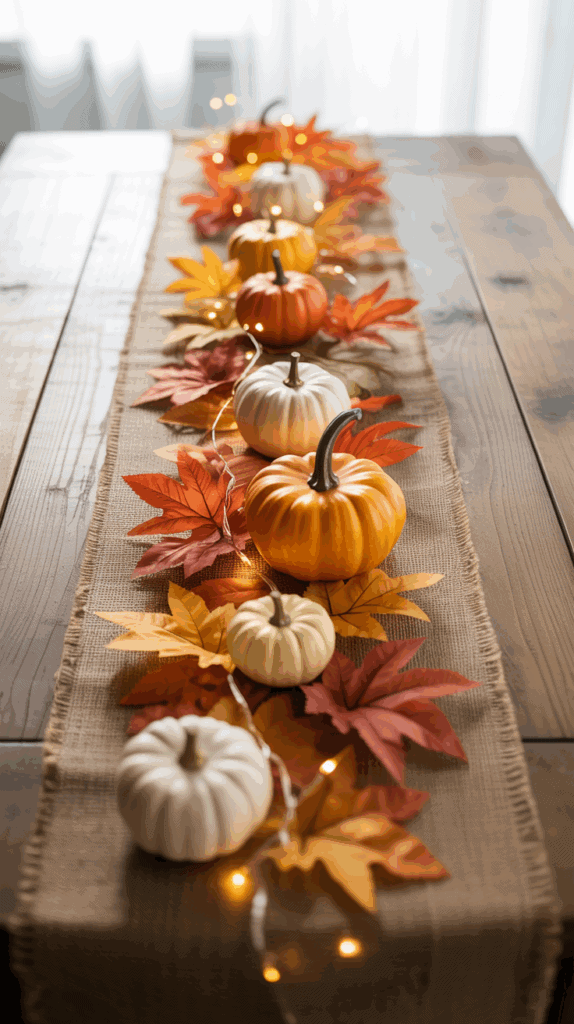
- Choose textures that invite touch. Burlap runners, linen napkins, or woven baskets add softness that’s pleasant to hold and look at.
One of my favorite combos is a burlap table runner topped with a cluster of pumpkins, eucalyptus sprigs, and a few candle votives. It’s simple but gives so much warmth and texture, making the whole space feel like a hug.
Using seasonal colors and textures this way makes creating your diy thanksgiving centerpiece ideas feel natural and relaxed, even during a busy week. It’s all about those small, thoughtful layers that make your table feel ready for gratitude and family fun.
Maintaining and Setting Up Your Centerpiece for Thanksgiving Day

When you’re juggling three kids and a million Thanksgiving tasks, the last thing you want is to worry about your centerpiece wilting or looking out of place on the big day. Taking a little time to maintain your DIY Thanksgiving centerpiece ideas and arranging everything right on the table makes your decor shine without stress. I’ve learned a few handy tricks that keep flowers fresh, natural elements looking their best, and the whole table pulling together with style.
Storage and Freshness Tips
Fresh flowers and natural pieces are charming, but they need a bit of care to stay lovely through the day. Here’s what I do to keep everything looking fresh:
- Trim stems before placing: I cut a half-inch off flower stems at an angle right before arranging. It helps them soak up water better.
- Use clean containers: Dirty vases or jars can cause flowers to wilt faster. I give them a quick rinse with soap and water, especially if I’m reusing.
- Change water often: If you use a pumpkin or bowl with water, changing the water every other day keeps blooms lively longer.
- Keep cool as much as possible: When the kids nap or you’re not prepping the table, I store flowers in the fridge or a cool room. Cooler temps slow down wilting.
- Moisten leaves and pinecones: For leaves and pinecones, lightly misting with water (just a tiny spritz) keeps them from drying out and crumbling, especially if you picked them a few days in advance.
- Use floral foam for tricky arrangements: If your centerpiece has flowers, a bit of wet floral foam inside the vase or pumpkin keeps stems steady and hydrated.
- Skip direct sunlight: While you want your centerpiece visible, direct sun can dry things out faster. I place it where it gets softer light or shade during the afternoon.
These simple steps make a big difference. You get that wow factor on Thanksgiving without worrying about droopy flowers or dull greenery.
Table Arrangement and Complementary Decor
Your centerpiece is the star, but it shines best surrounded by thoughtful little touches on the table. I always try to create a balanced, cozy feel where everything works together—kind of like how the right seasoning lifts a meal.
Here’s my go-to approach for putting it all together:
- Center the centerpiece: Start by placing your DIY creation in the middle so it’s the natural focal point for everyone at the table.
- Add height variations: I use taller candles, small vases, or stacked pumpkins to add layers. This keeps the eye moving and adds interest.
- Scatter small accents: Surround your centerpiece with mini pumpkins, acorns, or little gourds. These tie it all together without clutter.
- Use textiles to frame: A simple burlap runner, a festive tablecloth, or colorful napkins in warm tones highlight the centerpiece and bring warmth.
- Keep seating in mind: Make sure your centerpiece isn’t too tall or wide. You want guests to see each other and pass dishes easily—that’s key for a happy, chatty meal.
- Mirror the color scheme: If your centerpiece has orange and gold, add matching napkin rings or placemats that pick up those shades. It makes the whole table feel thoughtfully designed.
- Keep candles safe and cozy: If you add candlelight, group candles on sturdy trays or holders to avoid accidents and keep things tidy. Battery candles are a great alternative if you have little kids around.
- Mix natural and handmade: I love placing small hand-painted leaf garlands or kid’s crafts next to natural elements. It adds personality and a sense of family to the setting.
With these tips, your Thanksgiving table will feel pulled together and warm, like each detail was meant to be there. It’s amazing how little touches around the centerpiece create a welcoming space that invites everyone to relax and enjoy the meal.
Taking the time to maintain your centerpiece and set it up thoughtfully makes your DIY Thanksgiving centerpiece ideas look polished and ready for guests. Plus, it frees you up to focus on what really counts—celebrating with family and making memories!

Conclusion
DIY Thanksgiving centerpiece ideas don’t have to be complicated or time-consuming to make your table feel warm and inviting. With simple materials, a little creativity, and some family involvement, you can create charming decorations that bring the spirit of the season right to your home.
Taking the time to build these centerpieces with your kids turns decorating into a fun part of your holiday routine, not another task on your list. Enjoy the process, and know that these moments of togetherness add more meaning than any fancy decor ever could.
I’d love to hear about your own favorite centerpiece ideas or how your family gets involved. After all, it’s those shared memories around the table that truly make Thanksgiving special!
This post may contain affiliate links. Read the full disclosure here.