DIY Flower Arrangement Ideas You Can Create in One Afternoon
Fall always feels like the perfect time to bring a little cozy charm into our homes, and one way I love to do that is with flowers. Even as a busy mom of three little boys, I find that these diy flower arrangement ideas for fall are simple enough to whip up in just one afternoon. It’s amazing how a few seasonal blooms and a touch of creativity can brighten up any room, and trust me, it’s a fun break from the usual chaos!
I’m excited to share easy and playful ways to gather, arrange, and display fall flowers that won’t take over your whole day. Whether you’re decorating the kitchen table or adding a delightful touch to the front porch, these ideas fit into a busy schedule without stress. You don’t have to be an expert; it’s all about enjoying the season with a little hands-on joy.

Must-Have Flowers and Foliage for Fall Arrangements
When I think about fall arrangements, I imagine warm colors, cozy textures, and a hint of nature’s magic. Choosing the right flowers and foliage not only makes your DIY flower arrangement ideas for fall stand out but also makes the process fun and simple. You don’t need a fancy garden or a green thumb to put together something gorgeous. Just a little know-how and a few staple blooms, and you’re good to go!
Let’s talk about the must-have flowers and foliage that will turn your fall centerpiece into a charming display everyone will adore.
Key Flowers for Fall Arrangements

Fall flowers bring a burst of color and personality to any arrangement. They’re like the season’s cheerleaders — vibrant, warm, and inviting. Here are my favorites:
- Chrysanthemums: Known as mums, these are a classic choice. They come in rich reds, oranges, yellows, and even deep purples. Their full, rounded blooms help fill space and add a lush feel.
- Sunflowers: Nothing screams fall quite like a sunflower! Bright and cheerful, they instantly lift any arrangement and make it feel sunny even on a chilly day.
- Dahlias: With their intricate petals and variety of shades, dahlias add a touch of elegance and texture. They blend beautifully with other fall blooms.
- Marigolds: These cheerful, fiery blooms are perfect for adding a pop of orange and yellow. Plus, they’re budget-friendly and grow easily.
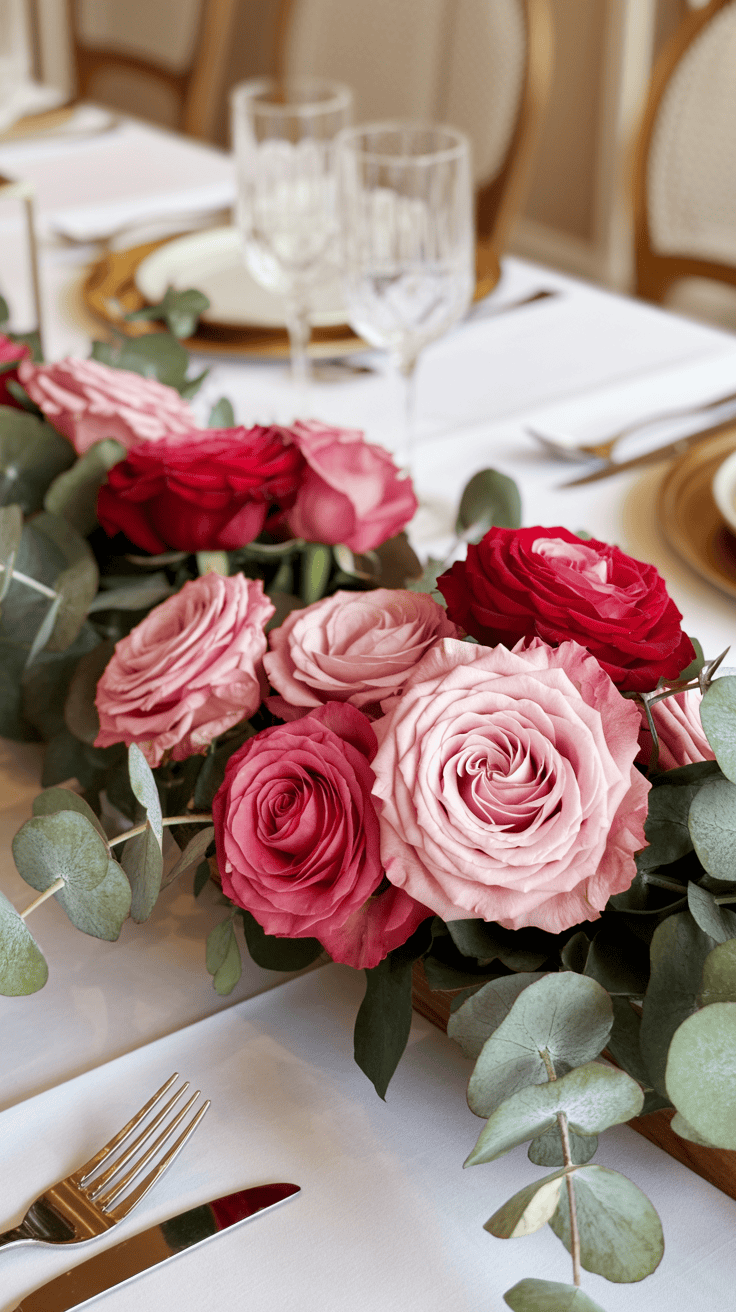
- Bronze and Burgundy Roses: Deep, rich colors like burgundy or bronze give your arrangement a touch of romance and sophistication.
Adding these flowers to your arrangement creates a vibrant, layered look. Plus, they’re easy to find at farm stands, grocery stores, or your local flower shop.
Foliage That Complete the Fall Look
Flowers are just the start. Foliage adds depth and a cozy, natural feeling. For fall arrangements, I always reach for these:
- Ginkgo Leaves: Their fan-shaped, yellow-green leaves add a soft, whimsical vibe. They’re a signature look for fall.
- Maple Leaves: If you can pick up some real maple leaves, they’re perfect for adding warm reds and oranges. Plus, they’re free if you gather them on a walk!
- Eucalyptus: Fraser or seeded eucalyptus brings a long-lasting, fresh green touch. It has a slight silvery hue that complements fall colors perfectly.
- Bear Grass: Its wispy, elegant look is great for filling in gaps and adding movement.
- Oak and Chestnut Burrs: These add a rustic, textured touch that makes your arrangement look genuinely seasonal.
Foliage doesn’t have to be bright; sometimes, a touch of muted green or brown is enough to make everything else pop. It’s like the finishing touch on a cozy sweater.
How to Combine Them
Using these flowers and foliage together is simple. Think about layering—start with your greenery as a base, then add your bold flowers on top. Don’t be afraid to mix textures and colors. For a natural, garden-like feel, let the foliage be a little wild and not perfectly symmetrical. That’s what makes it charming.
Pro tip: Pick flowers and foliage in different stages of bloom. Some tight and fresh, others a little worn. This variety adds real charm and depth.
Having a handful of go-to flowers and green accents makes creating fall arrangements quick and fun. You can make your own beautiful centerpiece in just an afternoon that screams autumn charm. Trust me, when you see how it all comes together, you’ll wonder why you didn’t do this every weekend!
Essential Supplies and Prep Tips for Quick, Stunning Arrangements

Let’s be honest, when you’ve got kids running circles around you, time is gold! My favorite diy flower arrangement ideas for fall always start with good prep and the right supplies. Over the years, I’ve learned that gathering everything you need ahead of time can turn a messy scramble into a smooth, fun afternoon. Trust me, when you’re organized, you spend less time searching for scissors and more time making something beautiful. Here’s how to make that magic happen fast, without sacrificing the wow factor.
My Go-To Florist Toolbox
I like to have all my tools in one little basket that I can grab in a hurry. If you keep these on hand, last-minute inspiration becomes so much easier! Here’s what I use for nearly every quick fall arrangement:
- Sharp scissors or garden clippers: A good cut helps flowers last longer and keeps your hands safe (and happy).
- Vases, jars, pitchers, or bowls: Anything watertight works. I let the boys pick out quirky mugs or bottles sometimes, which keeps things playful!
- Floral tape or clear tape: Create a simple grid on top of your vase to hold stems in place.
- Floral wire: Great for those floppy stems that need extra support.
- Floral frog, foam, or marbles: Perfect for short, sturdy designs. Foam is excellent for shaping, but I often grab marbles or even small pebbles for a more eco-friendly feel.
- Buckets or tubs for water: I soak my flowers as soon as I get home, especially those that tend to wilt fast.
- Paper towels and a dish towel: Wipe up water drips, or dampen them to keep stems moist during the process.
- Gloves: Optional, but thorns and sticky sap are no fun!
With these basics, you can set up anywhere in the house! Sometimes I even spread out a folding table in the kitchen so my boys can “help.”
Quick Prep for Last-Minute Arrangements
When you’re short on time and the kids are ready for snack #6 of the day, having a quick prep routine is key. Here’s my step-by-step for getting flowers ready fast and keeping them looking their best:
- Unwrap and Clean
Take everything out of plastic sleeves right away. Strip off any leaves that will sit below the water line. This keeps the water clean and helps flowers last longer. - Cut Stems at an Angle
I love this step! It helps the flowers drink up water more easily. Use sharp scissors or garden clippers, and cut at a gentle angle — just like you’re giving them a fresh haircut. - Soak Greens and Blooms
Fill a bucket or your kitchen sink with cool water. Let all your flowers and greens soak for 30 minutes to perk up. Sometimes I even use this time to make a snack for the kids! - Sort by Type and Length
Spread everything out and group similar flowers and foliage. Put the tallest stems together and the shorter ones off to the side. This makes arranging a breeze, even if you’re interrupted a hundred times. - Prep Your Vases
Rinse your containers and add cool, clean water. If they’re clear, scrubbing off fingerprints helps make everything sparkle. If you want, add a floral preservative or a splash of lemon-lime soda (just a little) to extend the life of your blooms.
Tips for Stress-Free Design
Arranging flowers shouldn’t feel like a chore. Here are a few ways I keep things light and family-friendly, no matter how crazy the day gets:
- Let it be imperfect! Kids love helping, and their “creative touches” make memories you’ll always cherish.
- Keep cleanup simple. Lay down an old towel or newspaper to catch petals and water droplets.
- Choose sturdy vases. Heavy, tip-proof containers survive curious little hands much better.
- Work in batches. Sometimes I do a few mini-arrangements instead of one big one so everyone gets a chance to join in.
- Play music or bring snacks. Seriously, snacks fix everything.
Budget-Friendly Supplies from Around the House
You don’t need a fancy florist’s kit. Some of my favorite arrangements started with items I already had lying around. Here are things I reach for when inspiration strikes and I don’t want to run to the store:
- Old jars, teacups, or even soup cans: Clean and cute after a little scrubbing.
- Twine, ribbon, or washi tape: Tie around your vase for easy color and charm.
- Wooden skewers or chopsticks: Works in a pinch to support tall stems.
- Pebbles, coffee beans, or marbles: Drop into the vase for stability and style.
Sometimes my boys bring in pinecones or acorns from the yard, which gives the final arrangement a personal, seasonal touch. Those little details always make it feel special.
Smart Shortcuts for Busy Moms
Time is short, so here are my top ways to save time and still make your diy flower arrangement ideas for fall shine:
- Start with store-bought bouquets and just add a few fresh branches or leaves from the yard.
- Snip greens straight from your own garden or use trimmings from a neighbor — just ask first!
- Use a lazy Susan or spinning tray when arranging, so you can see every angle and work faster.
- Set up a mini “workshop” at the kitchen table if you’re tight on counter space.
Getting organized helps you enjoy every minute with your family while making something beautiful! With just a little prep and the right supplies, you’ll surprise yourself with how easy it is to fill your home with fall’s cozy charm.
Creative DIY Flower Arrangement Ideas for Fall (All Doable in One Afternoon!)

Fall is honestly my favorite season to decorate with flowers. The colors are warm and inviting, and the best part is that these diy flower arrangement ideas for fall are super doable — I can usually finish all of them in just one afternoon! Whether I’m trying to spruce up the dining table or add a little charm to the front porch, I love how simple arrangements can lift the whole mood. And trust me, with a few tips, even busy moms like us can do something lovely in no time. Here are some of my favorite ideas that you can put together quickly — perfect for a cozy fall vibe!
Pumpkin Vase Centerpiece
Nothing screams fall more than a pumpkin filled with fresh flowers sitting right in the middle of your table. This pumpkin vase centerpiece is so fun to make, especially because it feels a little unexpected. First, choose a pumpkin that feels sturdy but not too big; you want it to be easy to hollow out. Using a sharp knife or an ice cream scoop, carefully cut a circle around the stem, then scoop out all the seeds and insides. Be gentle but thorough so you don’t break the pumpkin wall.
Once your pumpkin is hollowed out, fill it with clean water. To make your arrangement stay fresh longer and avoid making a big mess on your table, I recommend lining the inside with a plastic bag or inserting a plastic container inside the pumpkin. Now, gather your favorite fall flowers — think mums, sunflowers, small dahlias, and even some leafy greens like eucalyptus or ginkgo. Arrange them in the water, letting some stems spill out for a wild, natural look.
The best part? This project is a perfect way to enjoy the kids helping out. They love scooping out the pumpkin, and they get so proud seeing their creation on display. For cleanup, just dump the water outside or in the sink, rinse the pumpkin (or save it for a snack if it’s also carving perfect), and wipe down your table. Easy!
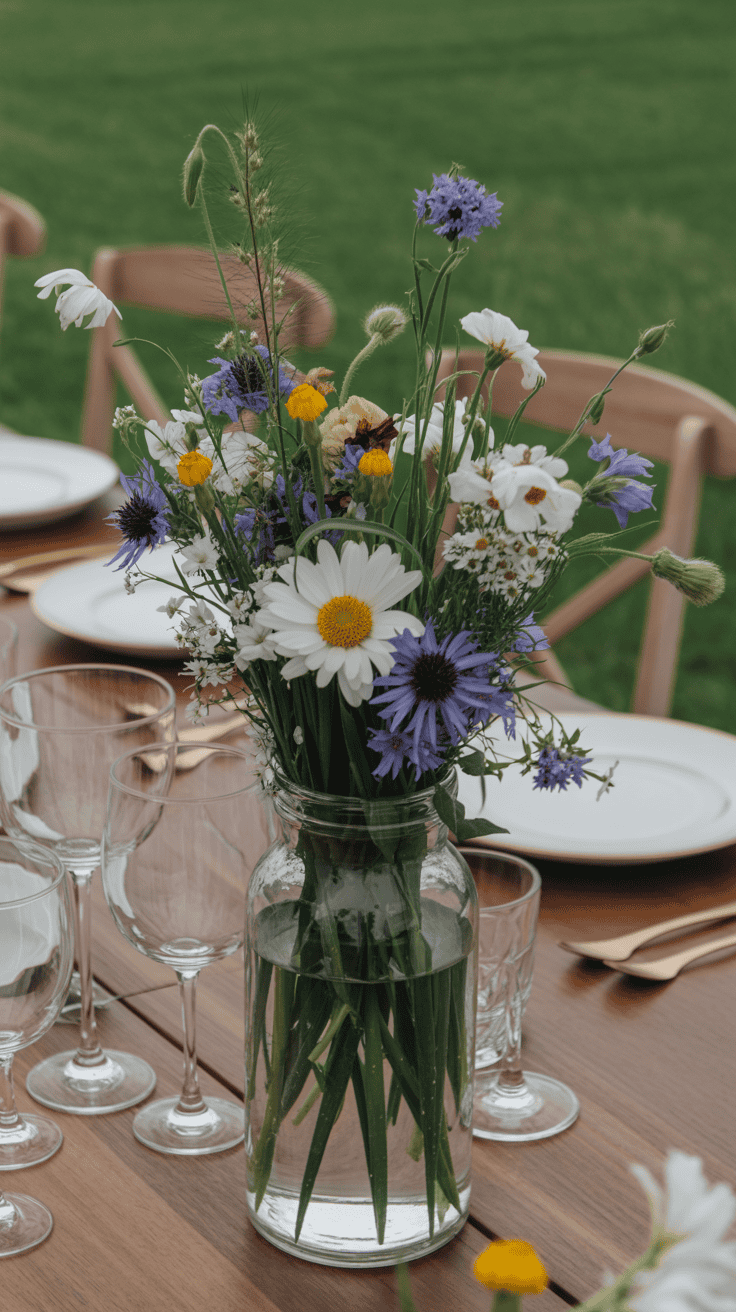
Mason Jar Mantle Display
There’s something about mason jars that makes every arrangement feel cozy and homemade. I like to make a series of small fall floral displays in mason jars to line the mantle or windowsill. Start by picking a handful of jars — any size works, but I love the classic pint-sized ones. You can even decorate the jars with ribbon, twine, or burlap to add a rustic touch.
Layering fall flowers in these jars is simple. Fill each jar with water, then start by adding greenery like eucalyptus, oak, or chestnut burrs. Next, add your flowers — a mix of tiny mums, marigolds, and small sunflowers work beautifully. For visual interest, hop between bright yellows, oranges, and deep reds. Stick some twigs or branches in a few jars to add height and texture.
arrange your jars in a row, varying their heights a little, and tie a piece of twine or ribbon around each for extra charm. The best part? They’re so versatile, you can move them around easily or group them in different spots. Plus, these jars can last for days with fresh water, and kids love seeing their favorite fall colors all neatly lined up.
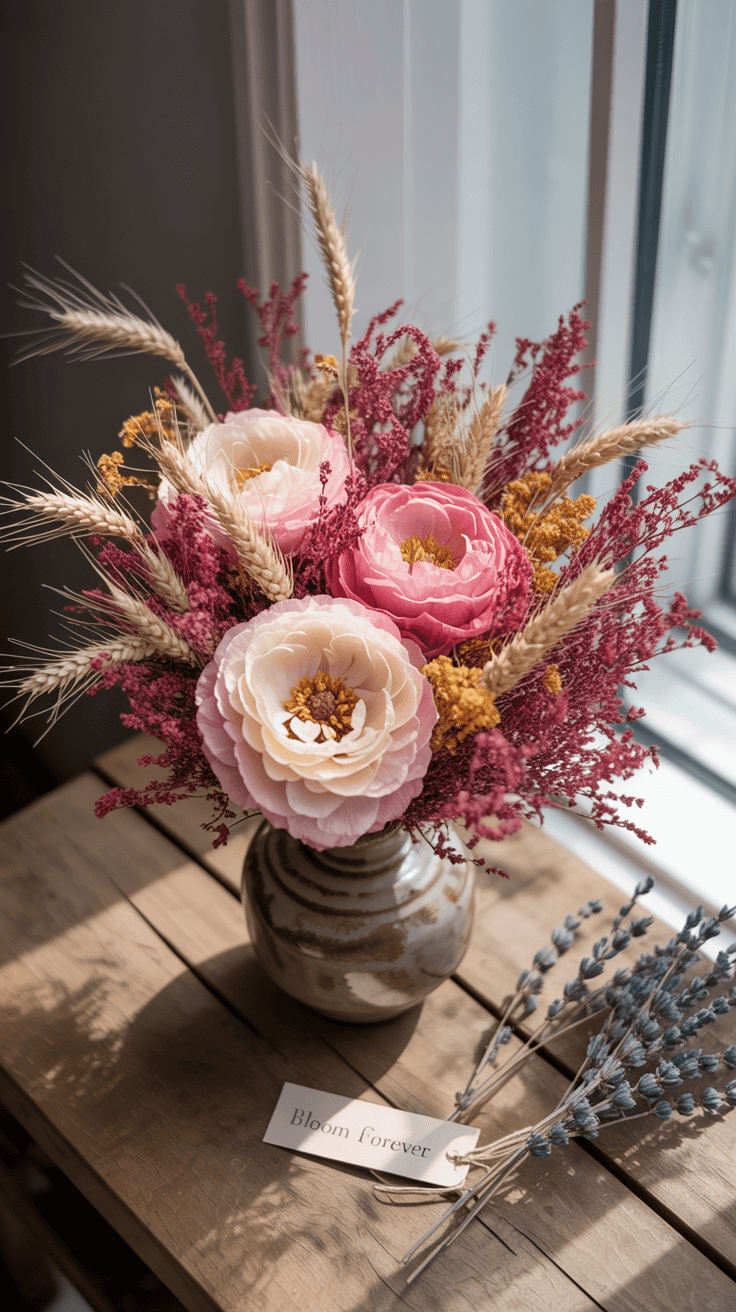
Rustic Basket Bouquet
If you want something that looks charming and handmade, a rustic basket filled with flowers and forest finds is perfect. Pick a shallow basket and line it with floral foam or even a damp sponge to keep things tidy. Start inserting your flowers — think of dahlias, chrysanthemums, and some wild-looking greenery like bear grass or eucalyptus. Let the stems fan out to fill the space nicely.
Now, this is where it gets fun. Incorporate foraged treasures like pinecones, acorns, small gourds, or colorful leaves. These natural touches give your arrangement that fall feel — like you collected everything on a walk. If you have kids, this is a great project for them. They love hunting for leaves, pinecones, and even small sticks. It’s a lovely way to spend a quiet afternoon outside, then bring all those treasures inside for a homespun style.
To finish, lean some bigger leaves or branches on the sides of the basket to make it look full and inviting. Kids always get excited about helping with the final touches, and the best part is that this arrangement can sit on your kitchen table or front porch all season long. Cleanup is just removing the flowers and tossing the foam or sponge in the compost.
Front-Door Mini Wreath
Nothing makes your home feel welcoming like a cute wreath on the front door. Making a mini floral wreath is surprisingly easy and a great way to get the kids involved. Grab some wire wreath frames, floral wire, and a selection of fall flowers like tiny mums, marigolds, mums, and maybe some dried leaves or berries.
Start by arranging your flowers into small bunches, then tie each bunch onto the wire frame with floral wire. Mix and match colors — maybe some bright orange, deep rust, and golden yellow — or let the kids pick their favorites. I find that letting little ones choose the flower colors adds their personality and makes the project even more special.
Tuck in some extra greens like eucalyptus to fill gaps and support the flowers. When you’re happy with the look, secure everything tightly and add a little bow or a festive ribbon for hanging. One of my favorite moments is watching my kids’ faces light up when they see their work hanging on the door. Plus, this wreath isn’t heavy, so it’s easy to hang and move around.
With just a few simple supplies and a little patience, you can create a charming, seasonal wreath in less than an hour. Plus, it’s such a thoughtful decor piece that will greet your family and visitors all fall long.
These diy flower arrangement ideas for fall are simple, fast, and packed with personality. They let you enjoy the beauty of the season without spending hours or breaking the bank. Plus, they’re perfect activities to do with the kids — making memories while adding some cozy charm to your home!
Tips to Make Your Arrangements Last Longer (Even with Kids Around!)

As a mom of three little boys, I know how tricky it can be to keep flowers fresh when your house is a whirlwind of activity. Kids are adorable, but they don’t always have the gentle touch needed for fragile flower arrangements. Luckily, I’ve picked up a few tricks over the years that help my DIY fall arrangements stay beautiful longer. These simple tips are game changers, especially when you want your decor to last through entertaining or just brightening your home.
Here’s how I keep my arrangements fresh and lively, even with kids zooming around.
Use Clean, Sharp Tools for Cutting
It might sound basic, but using sharp scissors or garden clippers really makes a difference. When you cut the stems at a clean angle, you’re helping flowers absorb water more easily. Dull blades can crush stems and cause quicker wilting. I keep a dedicated pair of scissors just for flowers in my kitchen drawer.
Prepare Flowers Before Arranging
Once you get your flowers home, give each stem a fresh cut right away. Remove any leaves that will sit below the water line. Foliage submerged in water can cause rot and speed up decay. When in a rush, I simply take a few extra seconds to clean stems—trust me, it makes your flowers last longer!
Soak Flowers and Greenery First
Before arranging, soak your flowers in cool water for about 30 minutes. This little trick perks them up and helps them stay hydrated. I do this during snack time — winning extra quiet minutes for myself! After soaking, I sort them by height and type, making the actual arrangement faster and easier.
Choose the Right Vase and Fill It Properly
Picking a sturdy vase helps prevent messes from tipping over—especially important with little ones around. Fill your vase with room temperature water, and consider adding a floral preservative. You can buy this at the store, or make your own with a teaspoon of sugar, a splash of bleach, and a drop of lemon juice. It keeps flowers fresher longer by inhibiting bacteria growth.
Proper Stem Placement Keeps Arrangements Lasting Longer
Put your greenery in first as a base, then insert your colorful blooms. Don’t overcrowd the stems; give each flower space to breathe and access water. I find that cutting stems at a slight angle helps them take up more water, which keeps arrangements looking lively.
Water Regularly and Refill as Needed
Check your flowers daily. When water looks cloudy, change it out. I keep a small pitcher handy and change water about every two days. Fresh water means flowers stay hydrated and happy longer.
Keep Arrangement Out of Direct Sun and Drafts
This is a big one. I’ve learned the hard way that placing arrangements near heaters, vents, or direct sunlight makes them fade quick. I try to keep them in cooler spots, like a shady corner or away from busy windows.
Incorporate Natural Elements for Extra Staying Power
Adding a few extra touches can really help. I like to slip in some extra leaves or small branches from the yard. They act like nature’s own preservative by helping hold stems in place and adding a natural charm.
Final Tips for Busy Moms
- Choose hardy flowers like chrysanthemums, marigolds, or sunflowers that naturally last longer.
- Keep arrangements small and simple so they’re easier to take care of.
- Don’t be afraid to deadhead — pinch off wilted flowers and leaves to keep things looking fresh.
- Create mini arrangements if one big display gets too much attention from little hands. Smaller bouquets are easier to maintain and fun to rearrange.
- Enlist the kids! Let them help water, change water, or pick out flowers. They love feeling part of the decorating process.
Taking care of your fall flower arrangements doesn’t have to be a chore. With a few quick steps, your arrangements will look great longer — and you’ll enjoy their cozy charm even as things get busy around here. Just remember, a little extra care goes a long way, especially with energetic little helpers underfoot!
Conclusion
Trying these diy flower arrangement ideas for fall reminds me that a little creativity goes a long way, even when life feels busy. It is such a fun break to play with fall colors and textures, and my boys always surprise me with their ideas. The best part is how these projects turn a regular afternoon into something warm and special for the whole family.
If you make any of these fall arrangements or have your own creative spin, I would love to see and hear about it. Share your photos or tips in the comments below! Thanks for following along and making these memory-filled moments happen with me. Happy arranging!
This post may contain affiliate links. Read the full disclosure here.